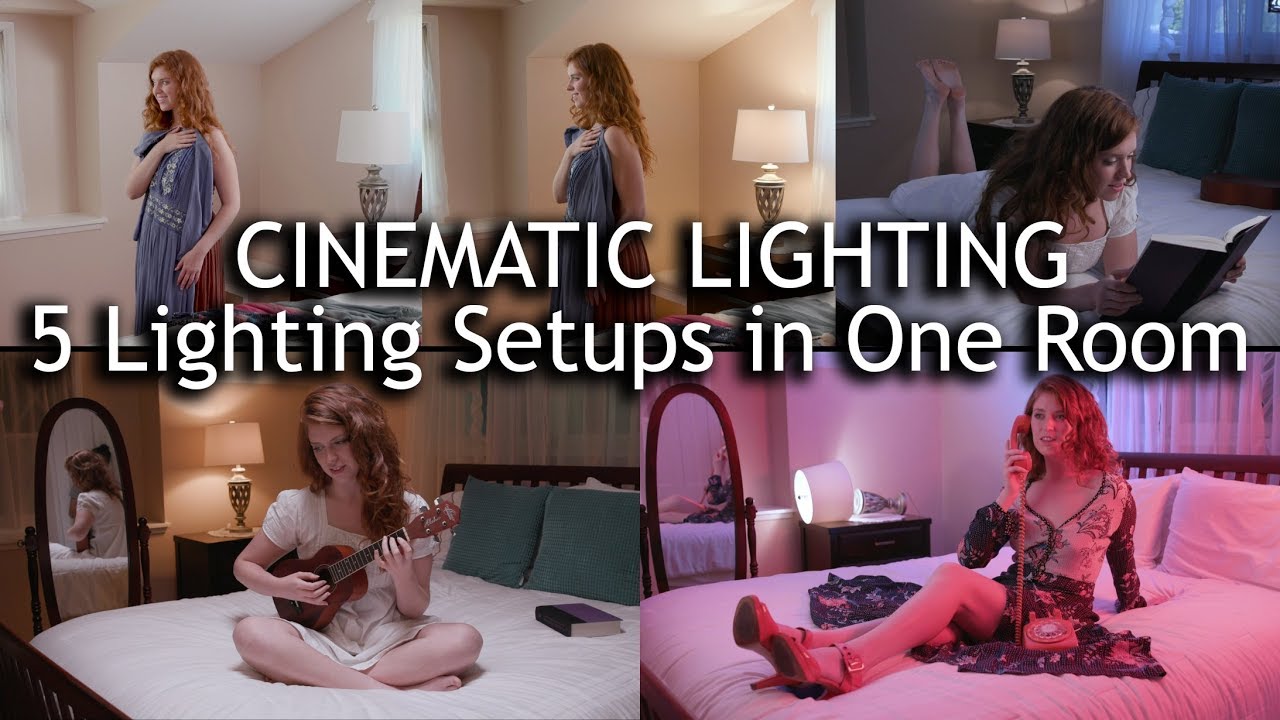
Small rooms have beaten me more times than I’d like to admit. You show up to a location, the ceiling is low, the walls are close, and the one window faces the wrong direction. For years I treated that as a problem to solve by hauling in more gear. What I’ve learned, slowly, is that constraints force better decisions. A tight room doesn’t need more light. It needs smarter light placement and a clear idea of what mood you’re actually after before you touch a single stand.
In this The Slanted Lens tutorial, JP Morgan walks through five completely different cinematic lighting moods built inside the same small room using Intellytech LiteCloth LED panels. The whole exercise is a masterclass in understanding how the position, color temperature, and intensity of a source changes the entire feeling of a frame, not just the exposure. I’ve since sketched all five setups in my lighting journal and adapted several of them for commercial work. The breakdown below pulls out the core technique from each setup so you can follow along without having to pause and rewind.
Step 1: Build a Convincing Window Light With LED Panels
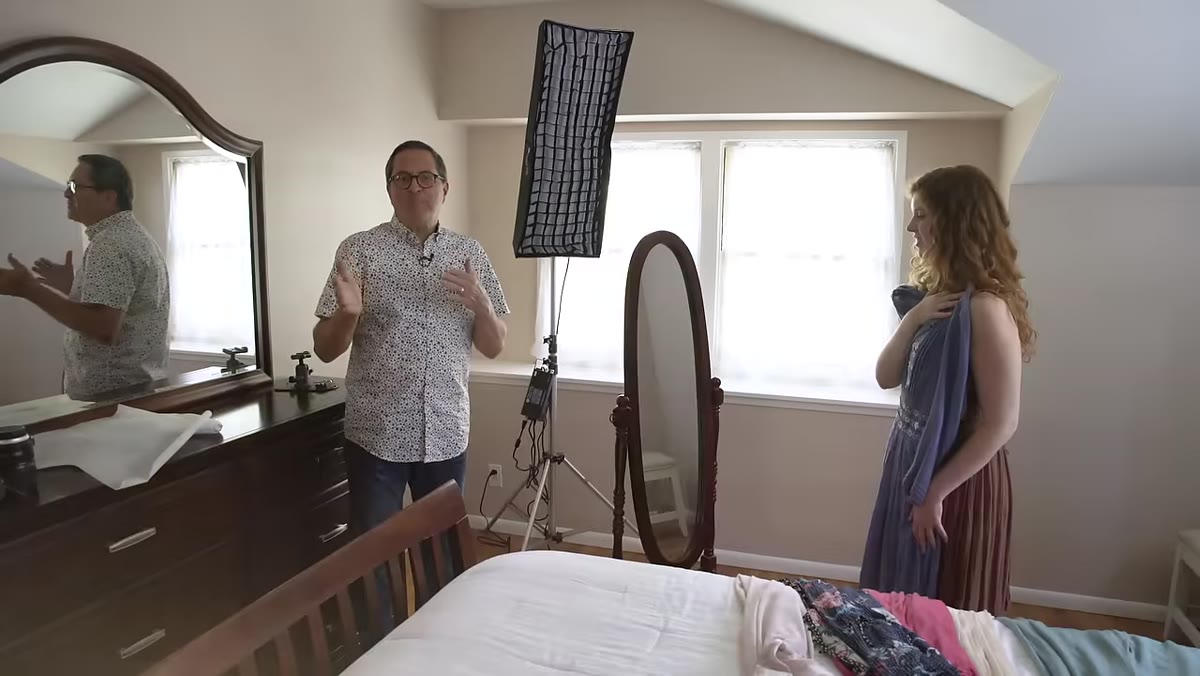
 First window light setup being arranged with LED panels
The first setup tackles a common problem: a room with a window that either blows out completely at a usable exposure or contributes nothing. JP’s solution is to ignore the actual window as a light source and build a simulated version inside the room using two Intellytech LiteCloth 2x2 panels (the LC-160). One panel becomes the primary source, positioned to mimic directional window light falling across the subject. The second panel is pulled down in intensity and placed to act as a broad, soft fill that lifts shadows without erasing them.
First window light setup being arranged with LED panels
The first setup tackles a common problem: a room with a window that either blows out completely at a usable exposure or contributes nothing. JP’s solution is to ignore the actual window as a light source and build a simulated version inside the room using two Intellytech LiteCloth 2x2 panels (the LC-160). One panel becomes the primary source, positioned to mimic directional window light falling across the subject. The second panel is pulled down in intensity and placed to act as a broad, soft fill that lifts shadows without erasing them.
What makes this work is that both panels share the same apparent origin point in the frame, so the light reads as motivated from a single source. JP also adds an LC-120, which is a 1x3 panel configuration, positioned slightly behind the subject to create a rim light. That rim separates the subject from the background and adds the kind of subtle depth you see in well-lit film frames. Keep the rim modest. If it reads as a rim, it’s probably too hot.
Step 2: Shift to a Moody Practical-Based Daylight Scene
 Practical lamp with diffusion wrap in background of frame
The second setup keeps the daylight color temperature but drops the energy level and introduces warmth through a practical lamp. JP swaps a standard bulb for a 200-watt unfrosted bulb, then wraps the fixture with diffusion material to soften the hard edge that a bare unfrosted bulb throws. That detail matters. An unfrosted high-wattage bulb without diffusion creates a hot spot that reads as artificial immediately.
Practical lamp with diffusion wrap in background of frame
The second setup keeps the daylight color temperature but drops the energy level and introduces warmth through a practical lamp. JP swaps a standard bulb for a 200-watt unfrosted bulb, then wraps the fixture with diffusion material to soften the hard edge that a bare unfrosted bulb throws. That detail matters. An unfrosted high-wattage bulb without diffusion creates a hot spot that reads as artificial immediately.
The 1x3 LiteCloth panel returns here as a background rim, giving the scene some separation, while one of the 2x2 panels handles light on the face. The practical lamp isn’t doing heavy lifting on the subject at all. It’s providing depth, color, and a reason for the light to exist in the scene. Practicals are scene furniture. They tell the viewer where the light is supposed to be coming from, and your audience believes it even when the actual illumination is coming from something entirely different.
Step 3: Execute a Day-for-Night Conversion
 Camera settings showing ND filter and 3200K tungsten balance
Day-for-night is one of those techniques that sounds straightforward and then humbles you the first time you try it. JP sets the camera to a tungsten white balance of 3200K and adds four stops of ND filtration. The ND crushes the ambient daylight coming through the window to the point where it reads as a dark exterior rather than bright daylight. The tungsten white balance shifts the remaining ambient light into a heavy blue tone, which our brains read as night.
Camera settings showing ND filter and 3200K tungsten balance
Day-for-night is one of those techniques that sounds straightforward and then humbles you the first time you try it. JP sets the camera to a tungsten white balance of 3200K and adds four stops of ND filtration. The ND crushes the ambient daylight coming through the window to the point where it reads as a dark exterior rather than bright daylight. The tungsten white balance shifts the remaining ambient light into a heavy blue tone, which our brains read as night.
The key discipline here is committing to the crush. Most people don’t add enough ND and end up with windows that look murky rather than dark. Four stops is the starting point, not the ceiling. Dial your exposure so the window registers as near-black and let your controlled LED sources carry all the visible light in the frame.
Step 4: Design a Hard-Light Noir Scene
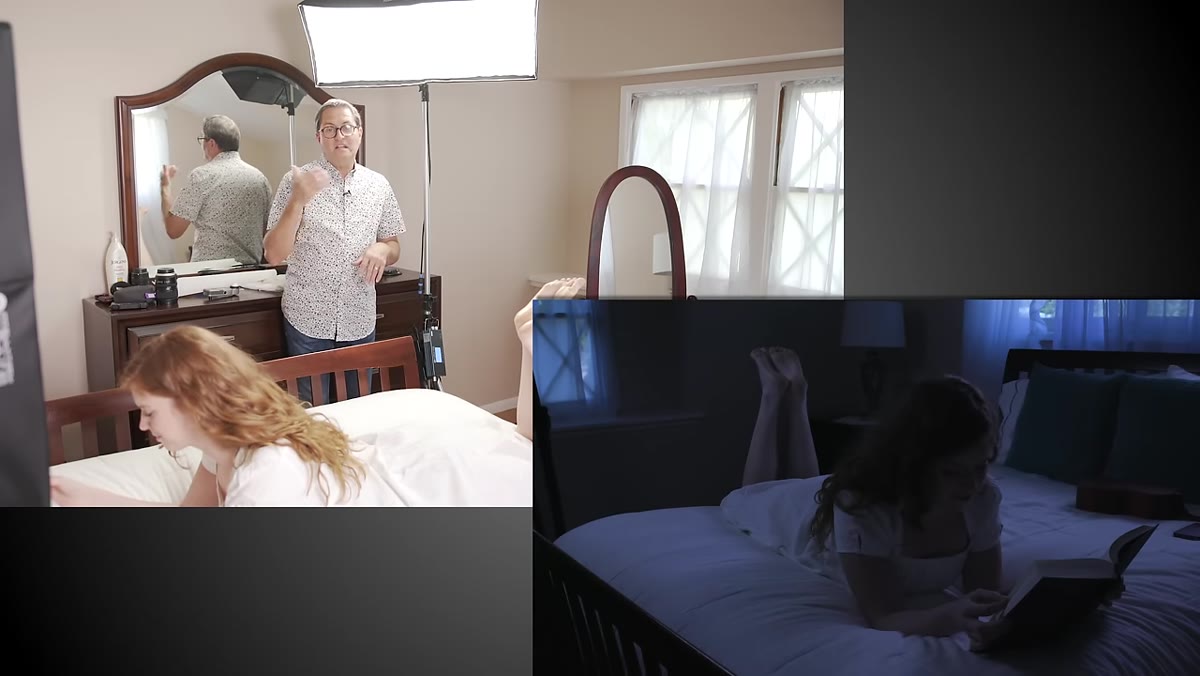 Single hard light source creating strong directional shadows on subject
This setup drops the softboxes and grids and leans into hard, directional light for a noir-influenced look. JP uses a single, relatively bare source placed to cast strong shadows across the subject’s face and the environment. The contrast ratio goes up sharply here. Shadows don’t fill. They stay dark.
Single hard light source creating strong directional shadows on subject
This setup drops the softboxes and grids and leans into hard, directional light for a noir-influenced look. JP uses a single, relatively bare source placed to cast strong shadows across the subject’s face and the environment. The contrast ratio goes up sharply here. Shadows don’t fill. They stay dark.
The temptation when working with hard light is to soften it slightly because you’re worried about it being “unflattering.” Resist that. Hard light is supposed to feel uncomfortable. That discomfort is the mood. The discipline is controlling where the shadow falls rather than eliminating it. A shadow that cuts cleanly across a face at the right angle is more interesting than a perfectly lit face with no dimension.
Step 5: Create a Dark, Low-Key Dramatic Look
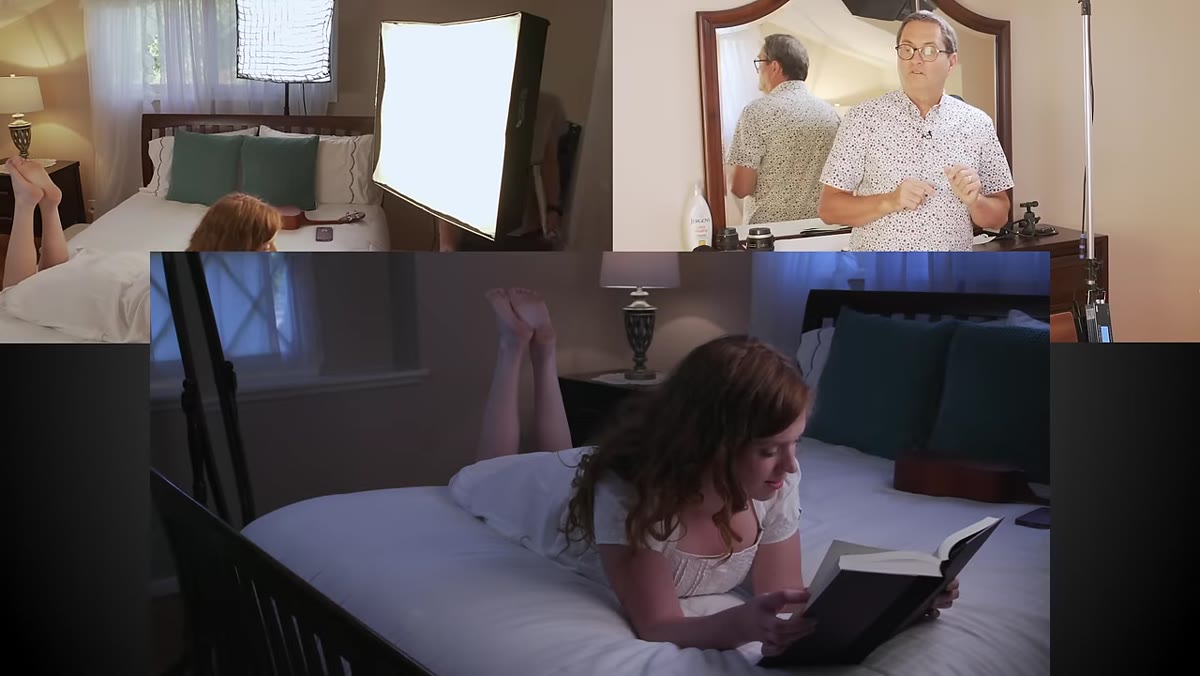 Extremely dark low-key setup with minimal subject illumination
The final setup is the most stripped back. Exposure is pulled down, light sources are reduced, and what remains is a very small, controlled pool of light on the subject with almost everything else in shadow. JP treats the background as negative space rather than something to illuminate. The subject exists inside the darkness rather than being separated from it.
Extremely dark low-key setup with minimal subject illumination
The final setup is the most stripped back. Exposure is pulled down, light sources are reduced, and what remains is a very small, controlled pool of light on the subject with almost everything else in shadow. JP treats the background as negative space rather than something to illuminate. The subject exists inside the darkness rather than being separated from it.
In practice this means being precise about what you’re actually lighting. A small modification placed at the right angle can do more work than three poorly positioned large sources. I find that this kind of low-key setup reveals every sloppy placement decision immediately. There’s no fill light to hide behind.
What I’d Add: Pre-Label Your Intensity Splits Before the Shoot
JP controls each panel independently throughout the whole session, and that flexibility is the entire architecture of this approach. But on a commercial shoot with a client in the room, fiddling with ratios in real time under pressure creates hesitation that reads as uncertainty.
My habit now is to test each setup the evening before, note the exact power percentages for each unit on a piece of masking tape stuck to the stand, and arrive on set with a starting point already dialed in. Clients don’t need to watch you figure it out. They need to watch you confirm something you already know. That single change in workflow, going from guessing to confirming, shifts the entire energy of a session.
The core lesson across all five setups is that the mood of a scene is a technical decision, not a feeling you hope arrives. Color temperature, the number of active sources, contrast ratio, and whether your practicals are doing visual work are all controllable variables. Decide what the scene should feel like, then engineer backward to the settings that produce it.
Watch the full tutorial on YouTube and see JP Morgan demonstrate each transition in real time. Watching the room change with each swap is genuinely instructive in a way that still images can’t fully replicate.
Comments (2)
Love how you break down complex stuff into manageable steps.
My workflow just got 10x faster. Not even kidding.
Leave a Comment