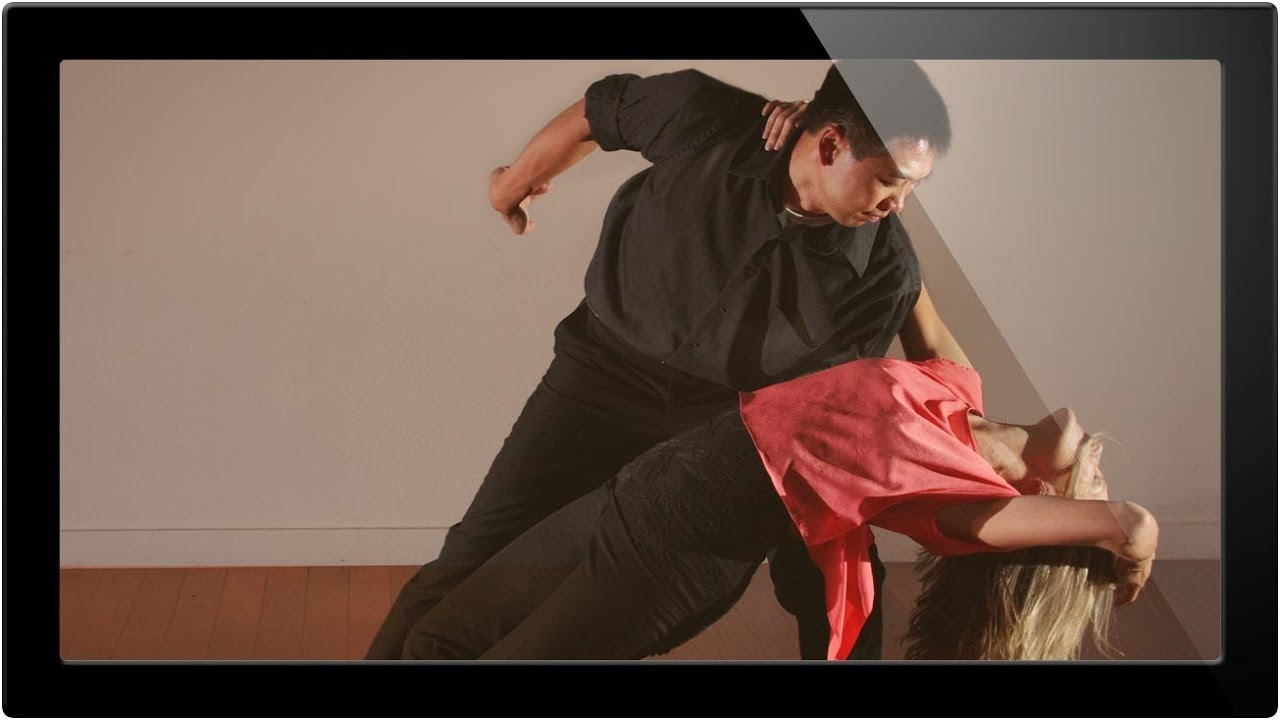
Every working studio photographer has a folder somewhere they’d rather forget. Mine has a fashion editorial from my third year shooting commercially where I mixed daylight-balanced strobes with tungsten practicals and didn’t catch it until I was culling at home. The images were technically salvageable, but they cost me hours in post and a fair amount of pride. That experience is exactly why I now pay close attention to any tutorial that promises to fix lighting problems after the fact. Not as a crutch, but as a genuine part of the professional workflow.
In this Aaron Nace (PHLEARN) tutorial, Watch the full tutorial on YouTube, Aaron works through a real viewer-submitted image with genuine problems: a hard light source with no fill, distracting background elements, a color cast from what looks like lens flare or a visible light source catching the frame edge, and shadows that are simply too dark to read well. These are not fabricated problems. They are exactly what happens when someone shoots with a single hard modifier and skips the fill light entirely. I see it constantly in the studio, and I’ve been guilty of it myself early on.
What makes this tutorial worth writing about is that Aaron doesn’t just patch problems. He identifies them first, names them clearly, and prioritizes them by visual weight. That diagnostic step is the one most people skip, and skipping it is why retouching sessions drag on for three hours when they should take forty minutes.
Step 1: Diagnose Before You Touch a Single Tool
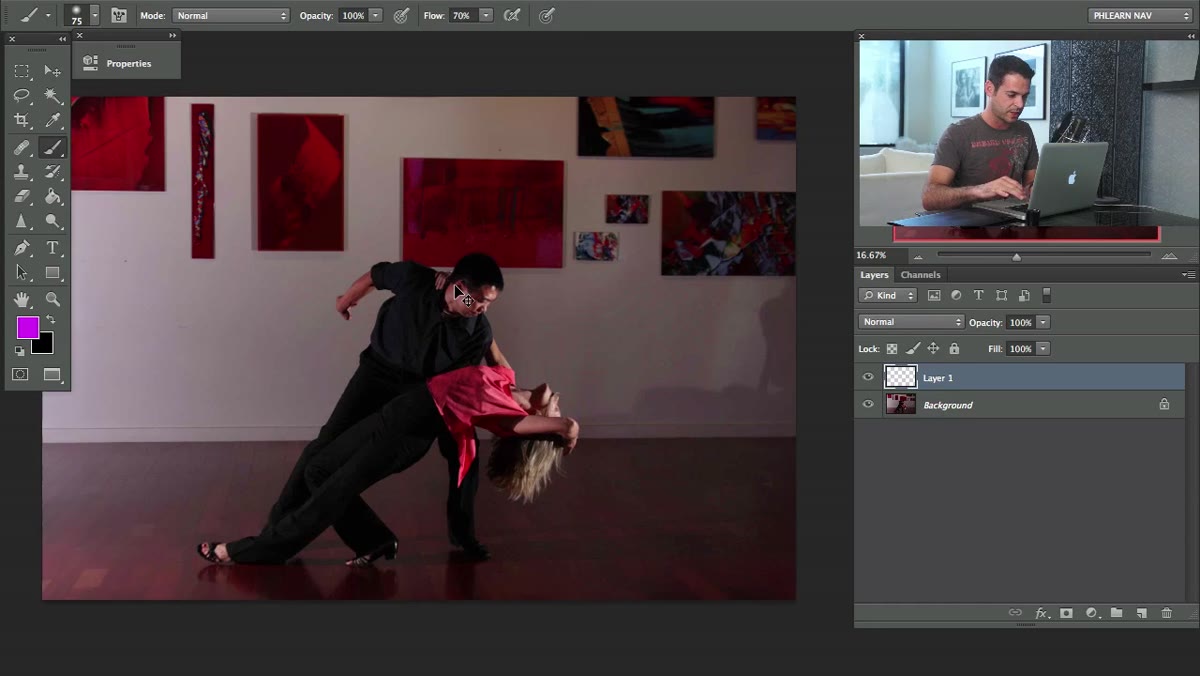 Instructor identifying shadow, background clutter, and color cast on screen
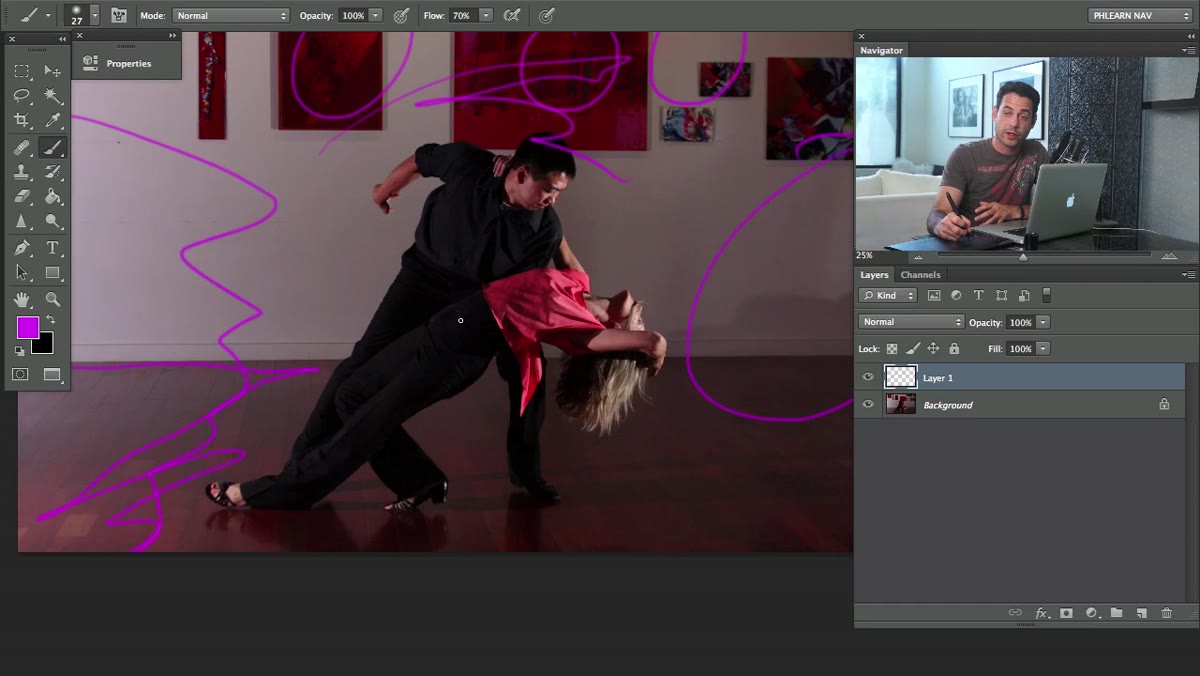
Before opening a single panel in Photoshop, spend two minutes looking at the image critically. In this case Aaron identifies four distinct problems: a distracting shadow on the right side of the frame (likely cast by the subjects themselves), clutter on the background wall, a color discoloration near the light source side of the frame, and an overall shadow density that’s too heavy because no fill light was used on set. Write these down if you have to. I keep a small notepad next to my retouching station specifically for this. When you know the list going in, you don’t wander.
Instructor identifying shadow, background clutter, and color cast on screen
Before opening a single panel in Photoshop, spend two minutes looking at the image critically. In this case Aaron identifies four distinct problems: a distracting shadow on the right side of the frame (likely cast by the subjects themselves), clutter on the background wall, a color discoloration near the light source side of the frame, and an overall shadow density that’s too heavy because no fill light was used on set. Write these down if you have to. I keep a small notepad next to my retouching station specifically for this. When you know the list going in, you don’t wander.
The key diagnostic question for lighting problems is: where did this happen, at the capture stage or the processing stage? Shadows that are too dense and harsh are a capture problem. You cannot add fill light that was never there. You can only simulate it. Knowing that distinction changes how aggressively you approach the correction.
Step 2: Crop First to Eliminate What You Can’t Fix
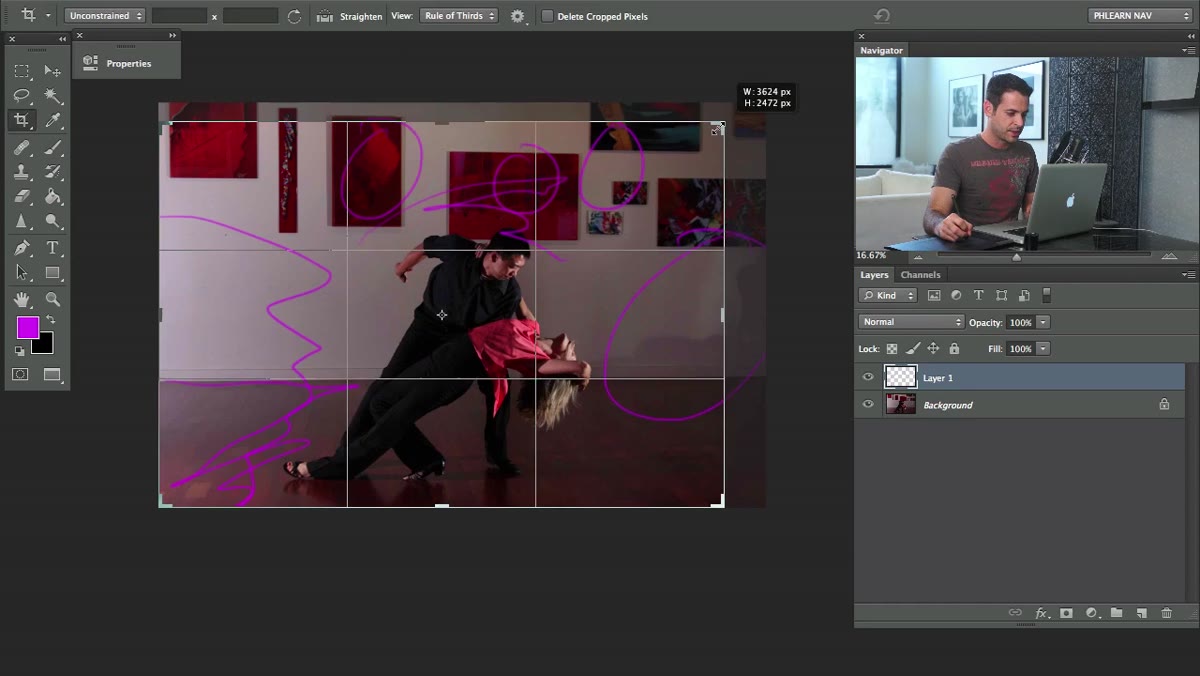 Crop tool active, frame being tightened around subjects
Aaron’s first actual tool is the crop, and this is the move I respect most in the whole tutorial. The shadow on the right side of the frame is distracting and would take real work to paint out convincingly. Instead of touching it, he crops it out entirely. The resulting frame uses a diagonal composition across the floor, with a rule-of-thirds intersection landing near the subjects. The crop is purposeful, not just remedial.
Crop tool active, frame being tightened around subjects
Aaron’s first actual tool is the crop, and this is the move I respect most in the whole tutorial. The shadow on the right side of the frame is distracting and would take real work to paint out convincingly. Instead of touching it, he crops it out entirely. The resulting frame uses a diagonal composition across the floor, with a rule-of-thirds intersection landing near the subjects. The crop is purposeful, not just remedial.
The practical instruction here: grab the Crop tool, tighten the frame so the offending shadow falls outside the boundary, and use that constraint to actually improve the composition rather than just remove the problem. A crop that solves a problem and improves the image is doing double work. That’s efficient retouching.
Step 3: Sample and Paint to Clean the Background Wall
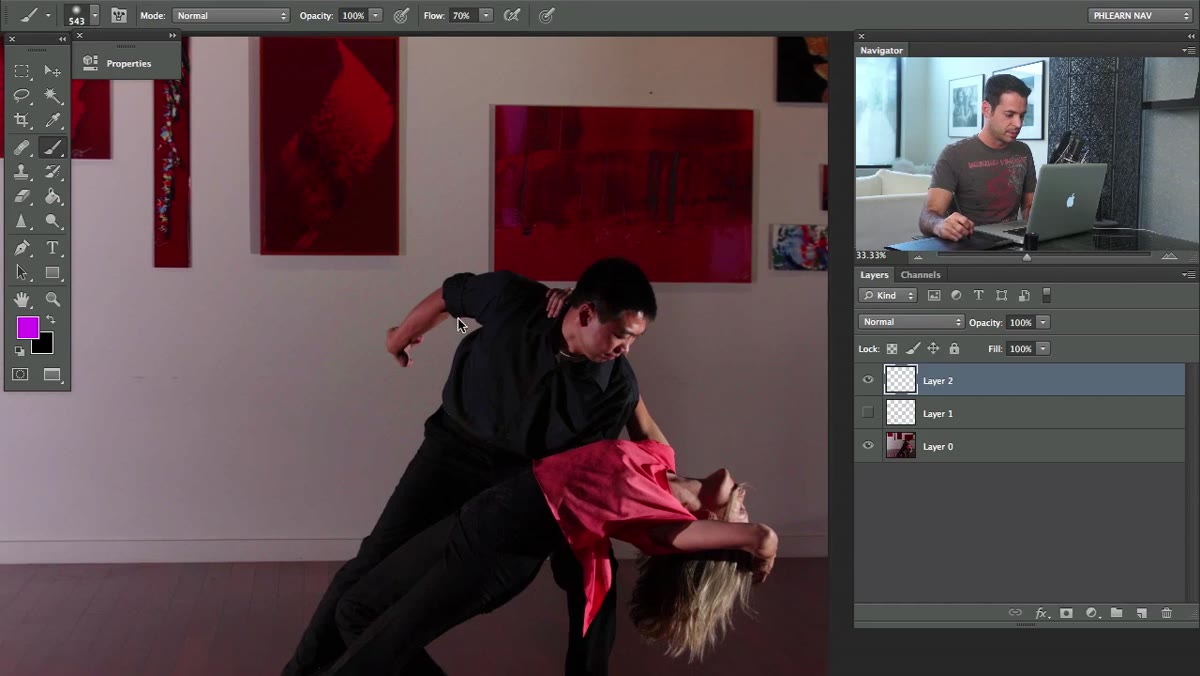 Brush tool active, alt-sampling wall color to paint over clutter
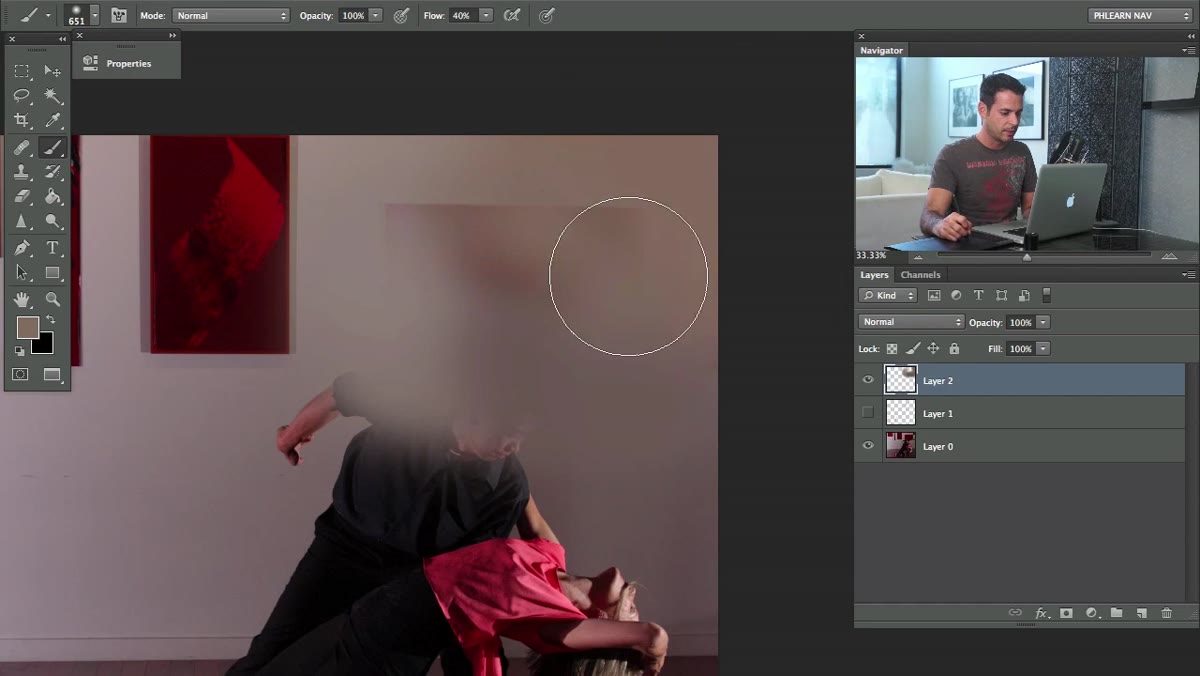
With the crop applied, Aaron moves to the background wall. There are markings and objects on the wall behind the subjects that pull the eye away from the faces. His solution is direct: use a regular brush, hold Alt (Option on Mac) to sample a color from a clean section of the wall nearby, then paint over the distracting elements. He samples frequently, picking up slightly different tones as the wall has natural variation in it.
Brush tool active, alt-sampling wall color to paint over clutter
With the crop applied, Aaron moves to the background wall. There are markings and objects on the wall behind the subjects that pull the eye away from the faces. His solution is direct: use a regular brush, hold Alt (Option on Mac) to sample a color from a clean section of the wall nearby, then paint over the distracting elements. He samples frequently, picking up slightly different tones as the wall has natural variation in it.
The technique works because it respects the existing tone and texture of the wall rather than flooding it with a flat color. Sample from a point close in proximity to where you’re painting, use a brush with moderate hardness (not a razor-sharp edge, not a completely soft feather), and build it up in passes rather than trying to cover everything in one stroke. This is the same logic as dodging and burning: small, controlled, repeatable moves.
Step 4: Correct the Color Cast on the Floor and Wall
 Color discoloration visible near light source side of the frame
The lighter, discolored area near the edge of the frame is likely either a lens flare or the actual light source catching the edge of the shot. Either way, it reads as a color problem more than a light problem by the time you’re in post. Aaron addresses it as part of the broader cleanup, bringing the floor and wall back to a consistent tone that doesn’t pull the viewer’s eye toward the edge of the frame.
Color discoloration visible near light source side of the frame
The lighter, discolored area near the edge of the frame is likely either a lens flare or the actual light source catching the edge of the shot. Either way, it reads as a color problem more than a light problem by the time you’re in post. Aaron addresses it as part of the broader cleanup, bringing the floor and wall back to a consistent tone that doesn’t pull the viewer’s eye toward the edge of the frame.
In practice, you handle this with a combination of sampling and painting on its own layer, or with a targeted Hue/Saturation or Color Balance adjustment layer masked to just the affected region. The goal is not perfect uniformity but visual neutrality. The eye should move through the image without snagging on that corner.
Step 5: Simulate Fill Light to Lift the Shadow Areas
 Dark shadow area on subjects identified, discussion of fill light
This is the most substantive lighting correction in the tutorial. Because the original shot used a hard light source with no fill, the shadow side of the subjects is very dense. There’s significant detail loss in those areas. Aaron’s approach is to brighten those shadow regions in Photoshop to approximate what a fill light or reflector would have done on set.
Dark shadow area on subjects identified, discussion of fill light
This is the most substantive lighting correction in the tutorial. Because the original shot used a hard light source with no fill, the shadow side of the subjects is very dense. There’s significant detail loss in those areas. Aaron’s approach is to brighten those shadow regions in Photoshop to approximate what a fill light or reflector would have done on set.
The principle is to paint or apply a brightening adjustment selectively to only the shadow regions, keeping the highlight areas intact. You can do this with a Curves adjustment layer masked to the shadow zones, or by painting with a low-opacity white brush on a layer set to Screen blending mode. Keep the effect subtle. The goal is to close the gap between highlight and shadow, not eliminate it entirely. A completely flat image looks worse than a slightly harsh one.
What I’d Do Differently in My Own Studio Work
This tutorial is excellent for rescue work on existing images, but the cleaner solution is always on set. If you’re shooting with a hard modifier, a single-grid beauty dish, a bare strobe, anything without diffusion, add a fill source. It doesn’t have to match the key light’s power. In my studio I typically run fill at one and a half to two stops below key, positioned opposite and slightly toward camera. That ratio keeps the shape and drama of the hard light while lifting the shadows enough that you’re not spending an hour in Photoshop trying to recover what a forty-dollar reflector would have prevented.
That said, not every photographer submitting work to a retoucher controlled the shoot. Client-supplied images, archival work, personal photographs handed to you for polish. These situations are real, and knowing how to correct lighting in post is a legitimate professional skill. Aaron’s workflow here is the right one: diagnose, crop, clean, correct color, then lift shadows. That order matters.
The single most important thing this tutorial reinforced for me is that cropping is always the first retouching move, not a last resort. Identify what can leave the frame before you decide what needs to be fixed within it. Most images benefit from tighter framing anyway, and every problem you crop out is one you don’t have to paint.
Watch the full tutorial on YouTube to see Aaron work through the full image from start to finish.
Comments
Leave a Comment