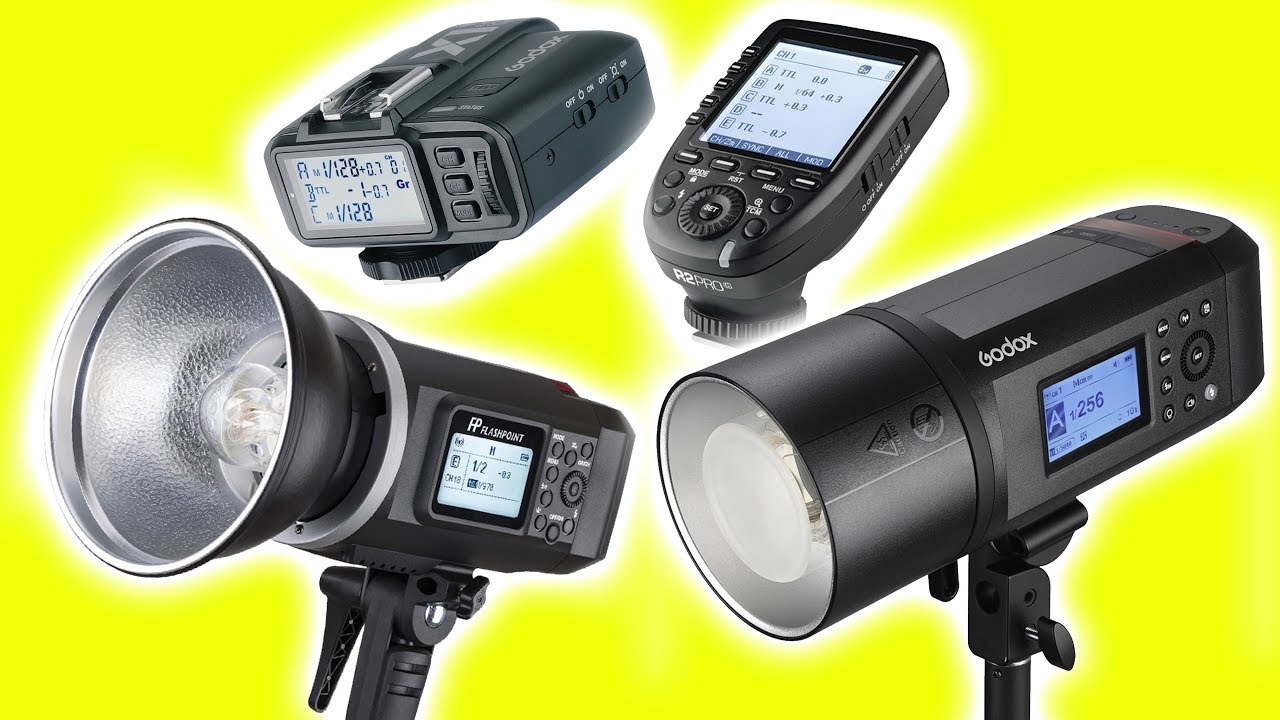
Every piece of gear I add to my kit gets tested the day it arrives. That is just how I work. So when I first unpacked the Godox AD600B, I did what I always do: I taped a label on it, plugged it in, and started poking around the menus. What I found was a system that rewards the photographer who takes twenty minutes to actually learn the controls rather than just pointing it at a subject and hoping the defaults hold up. The problem most people run into is not the power output. It is the group and channel logic, the firmware quirks, and the small menu decisions that either make a shoot run smoothly or quietly sabotage it.
In this Tony and Chelsea Northrup tutorial, Tony walks through the full AD600 ecosystem: the AD600B, the AD600BM, the AD600Pro, and both the X1T and XPro triggers, including firmware updates. Watch the full tutorial on YouTube before your next shoot and you will save yourself the kind of mid-session troubleshooting that makes clients nervous. Here is my expanded walkthrough of everything he covers, written for anyone who wants to understand the why behind each setting, not just the what.
Step 1: Power On and Understand the Panel Layout
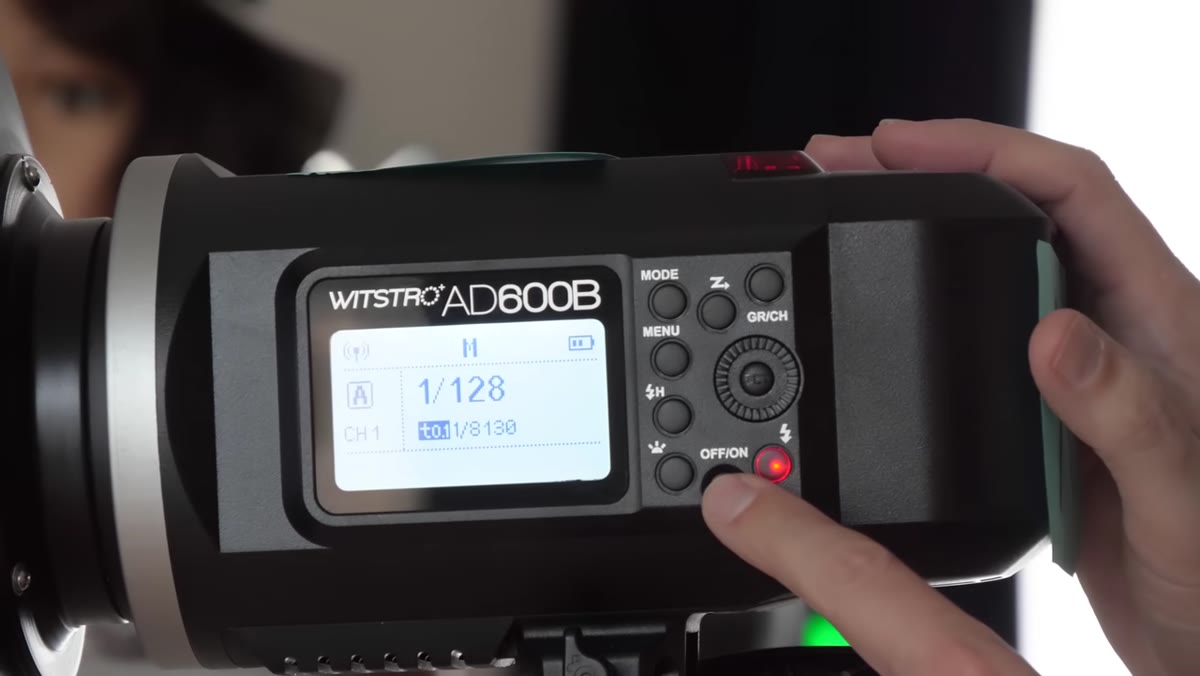 Hand holding down power button on AD600 strobe
Hold the power button down until the unit comes to life. Tony assumes at this point that your battery is charged and seated correctly, and honestly that is the right call. What matters now is understanding that while you will do most of your work from the remote trigger, the strobe itself handles a few critical settings that the remote cannot touch. Get familiar with the physical controls before you ever pick up the transmitter. On my AD600B, I keep a small strip of masking tape on the side noting which group letter it is assigned to for that job. Sounds fussy, but when you have three strobes lighting a backdrop and one key light, visual confirmation beats menu-diving every time.
Hand holding down power button on AD600 strobe
Hold the power button down until the unit comes to life. Tony assumes at this point that your battery is charged and seated correctly, and honestly that is the right call. What matters now is understanding that while you will do most of your work from the remote trigger, the strobe itself handles a few critical settings that the remote cannot touch. Get familiar with the physical controls before you ever pick up the transmitter. On my AD600B, I keep a small strip of masking tape on the side noting which group letter it is assigned to for that job. Sounds fussy, but when you have three strobes lighting a backdrop and one key light, visual confirmation beats menu-diving every time.
Step 2: Assign Groups (A Through E) for Independent Control
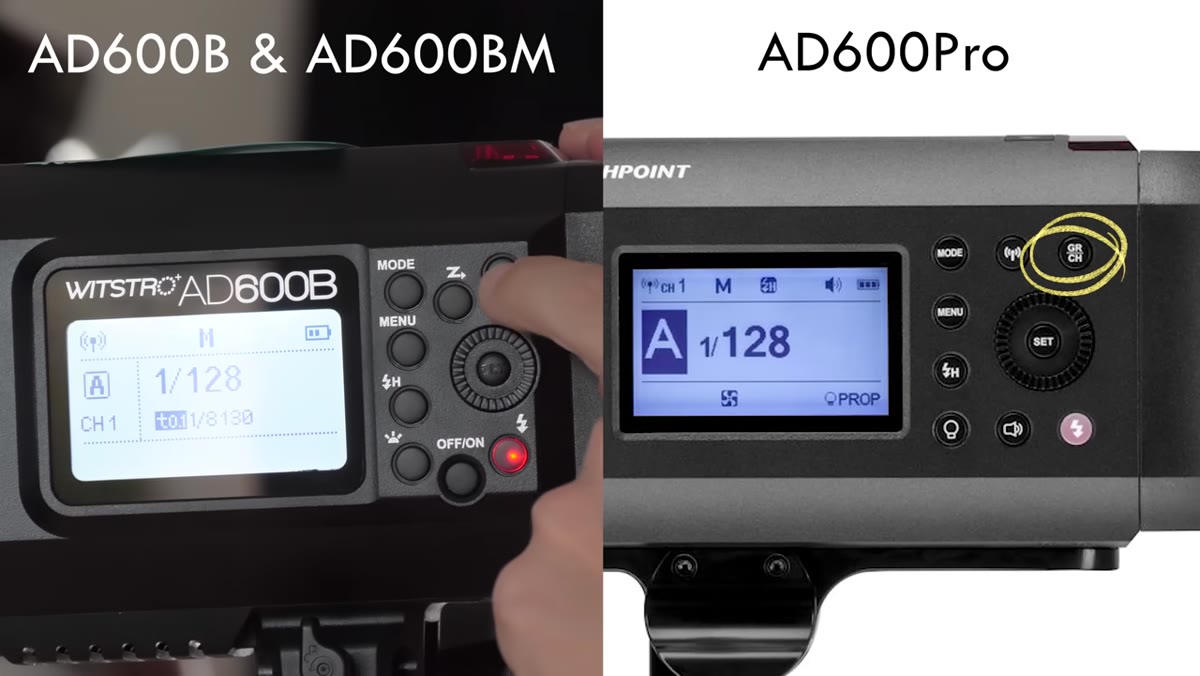 Group channel button being pressed, display cycling through A B C D E
Press the group/channel button in the upper right of the strobe to cycle through the five group letters: A, B, C, D, and E. This is the single most important organizational decision you make before a shoot. Each letter represents an independently controlled group, meaning you can adjust power on group A without touching B or C. Tony’s recommended approach is logical and matches what I use in my own work: key light on A, fill light on B, background light or lights on C. If you have multiple strobes doing the same job at the same power level, assign them all to the same letter and the trigger will treat them as one. I rarely stack strobes in a single group because I almost always want at least a half-stop of flexibility between units, but for flat backdrop work it simplifies the trigger interface considerably.
Group channel button being pressed, display cycling through A B C D E
Press the group/channel button in the upper right of the strobe to cycle through the five group letters: A, B, C, D, and E. This is the single most important organizational decision you make before a shoot. Each letter represents an independently controlled group, meaning you can adjust power on group A without touching B or C. Tony’s recommended approach is logical and matches what I use in my own work: key light on A, fill light on B, background light or lights on C. If you have multiple strobes doing the same job at the same power level, assign them all to the same letter and the trigger will treat them as one. I rarely stack strobes in a single group because I almost always want at least a half-stop of flexibility between units, but for flat backdrop work it simplifies the trigger interface considerably.
Step 3: Set the Channel and Avoid Triggering Other People’s Lights
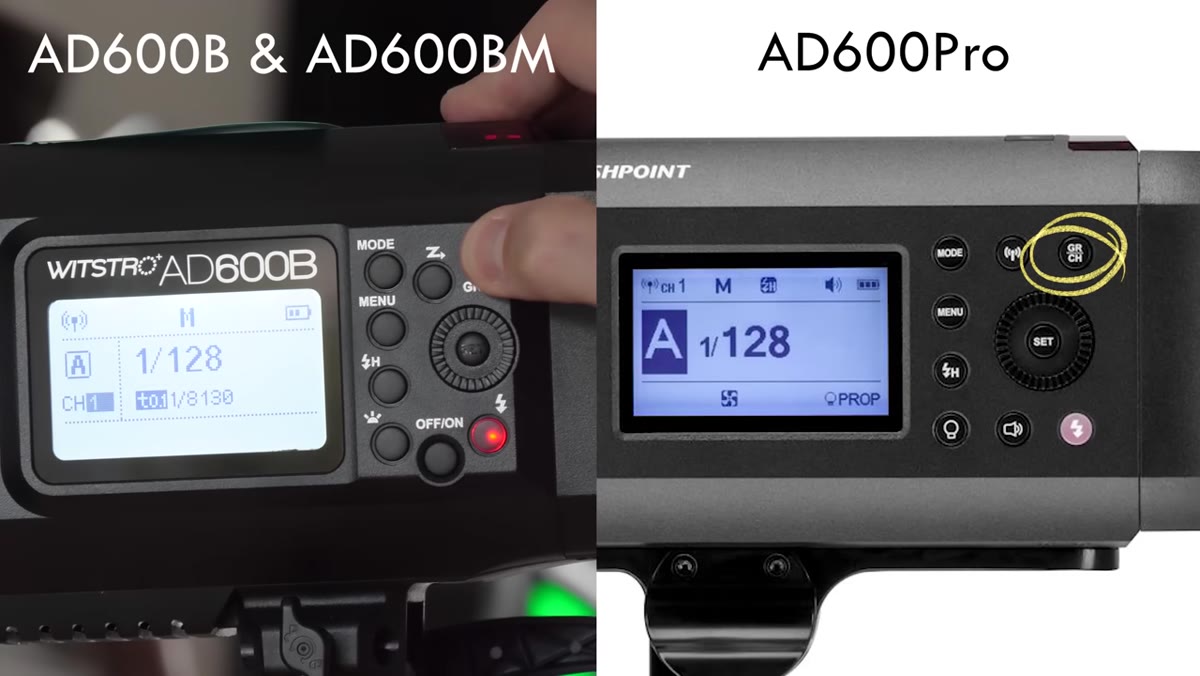 Dial being turned to change channel number on strobe display
To change the channel on the strobe, hold down the group/channel button and rotate the dial. The channel on the strobe and the channel on your trigger must match, or nothing fires. Channel 1 is the factory default, which means every Godox user who never changed it is on channel 1. If you shoot in shared studio spaces or at events with other photographers using Godox gear, you will eventually fire someone else’s lights or they will fire yours. Pick a non-default channel and stick with it. I set mine to channel 8 years ago and have never had a conflict. On the X1T transmitter, Tony notes you press the channel/OK button once and then use the dial to adjust. Same logic, slightly different button sequence.
Dial being turned to change channel number on strobe display
To change the channel on the strobe, hold down the group/channel button and rotate the dial. The channel on the strobe and the channel on your trigger must match, or nothing fires. Channel 1 is the factory default, which means every Godox user who never changed it is on channel 1. If you shoot in shared studio spaces or at events with other photographers using Godox gear, you will eventually fire someone else’s lights or they will fire yours. Pick a non-default channel and stick with it. I set mine to channel 8 years ago and have never had a conflict. On the X1T transmitter, Tony notes you press the channel/OK button once and then use the dial to adjust. Same logic, slightly different button sequence.
Step 4: Navigate the Menu for Beep, Slave Mode, and Fan Settings
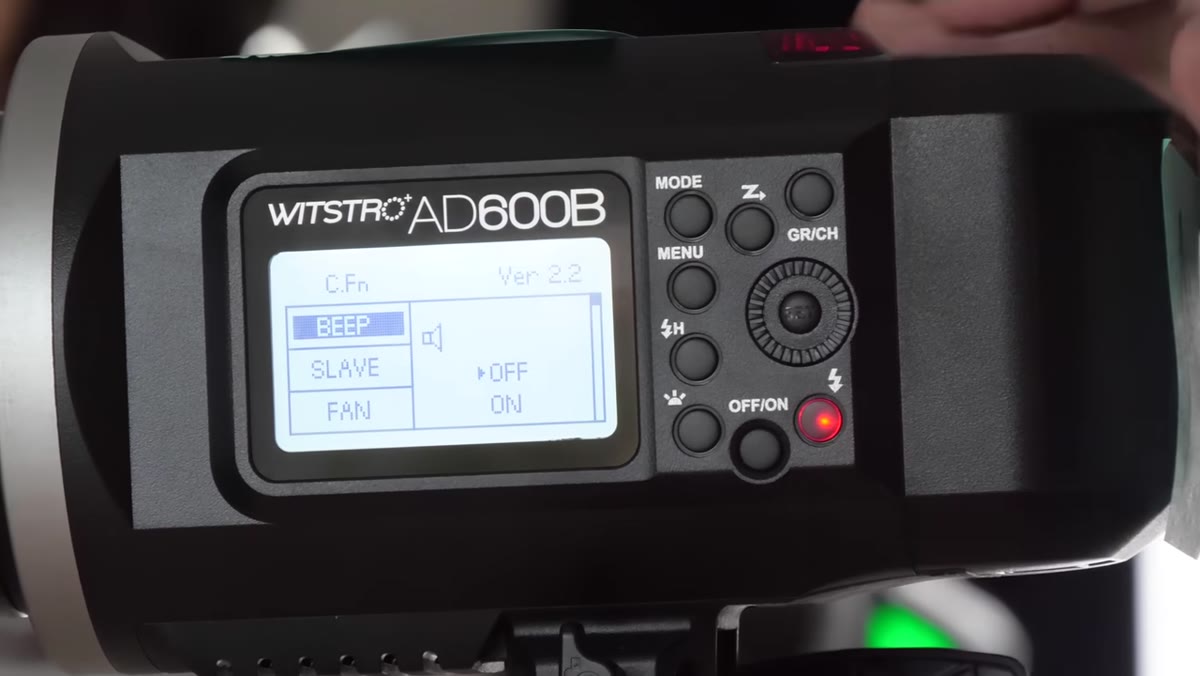 Menu screen on AD600 showing Beep option selected
Hit the menu button on the strobe and you will find four options worth understanding: beep, slave mode, fan, and sleep. The beep is an audible ready signal that fires when the strobe has recycled. At full power, that signal matters. At anything below half power with a fresh battery, these strobes recycle so fast the beep is just noise. I leave it off. Slave mode is a valuable backup: if your wireless trigger dies mid-shoot, you can set the strobe to S1 or S2 and it will fire optically whenever another flash goes off in the room. S1 triggers on the first flash pulse, S2 waits for the second pulse to avoid being tripped by TTL pre-fires. Try S1 first. If you are seeing the strobe fire too early or not at all, switch to S2. Optical slave is not a workflow I rely on, but knowing it is there has saved me in a pinch.
Menu screen on AD600 showing Beep option selected
Hit the menu button on the strobe and you will find four options worth understanding: beep, slave mode, fan, and sleep. The beep is an audible ready signal that fires when the strobe has recycled. At full power, that signal matters. At anything below half power with a fresh battery, these strobes recycle so fast the beep is just noise. I leave it off. Slave mode is a valuable backup: if your wireless trigger dies mid-shoot, you can set the strobe to S1 or S2 and it will fire optically whenever another flash goes off in the room. S1 triggers on the first flash pulse, S2 waits for the second pulse to avoid being tripped by TTL pre-fires. Try S1 first. If you are seeing the strobe fire too early or not at all, switch to S2. Optical slave is not a workflow I rely on, but knowing it is there has saved me in a pinch.
Step 5: Manage the Fan and Sleep Settings for Long Shoots
 Fan setting on menu display, options showing Auto and Off
The fan setting defaults to auto and that is where it should stay for almost every photo shoot. These strobes generate real heat under sustained use, and the fan is doing genuine thermal work. The one exception Tony flags is video work. If you are rolling audio during a video segment and the fan kicks on, it will bleed into your recording. In that case, switching the fan off for a short segment is fine. Just set a reminder to turn it back to auto when you are done or you risk thermal shutdown, which is exactly as disruptive as it sounds. The sleep setting is similarly practical: it lets the unit power down after a set idle period to protect battery life, but make sure the timeout is long enough that the strobe does not go dark between setups.
Fan setting on menu display, options showing Auto and Off
The fan setting defaults to auto and that is where it should stay for almost every photo shoot. These strobes generate real heat under sustained use, and the fan is doing genuine thermal work. The one exception Tony flags is video work. If you are rolling audio during a video segment and the fan kicks on, it will bleed into your recording. In that case, switching the fan off for a short segment is fine. Just set a reminder to turn it back to auto when you are done or you risk thermal shutdown, which is exactly as disruptive as it sounds. The sleep setting is similarly practical: it lets the unit power down after a set idle period to protect battery life, but make sure the timeout is long enough that the strobe does not go dark between setups.
What I Would Add From My Own Kit
Tony’s tutorial is thorough on the operational side, but one thing worth underlining for commercial work is color temperature consistency across groups. The AD600 strobes are well-matched from the factory, but when you are mixing an AD600B with an AD600Pro on the same shoot, verify they are reading the same Kelvin at the same power level before you commit to a setup. I learned this the hard way on an editorial job years ago, using units from two different generations and ending up with a cast on the fill side that cost me serious retouching time. Now I shoot a test frame of an X-Rite ColorChecker with all lights firing and confirm my raw files before the subject walks in. It takes four minutes and eliminates a category of problem entirely.
The single most valuable habit this tutorial reinforces is treating your group assignments like a repeatable system, not a session-by-session improvisation. A, B, C with consistent roles across every shoot means your trigger layout becomes muscle memory and you stop losing time to menu confusion when a client is waiting. Decide your system, label your lights, and do not deviate from it.
Watch the full tutorial on YouTube for Tony’s complete walkthrough, including firmware update steps for both the X1T and XPro triggers that are worth doing before you ever take a strobe on a paid job.
Comments
Leave a Comment