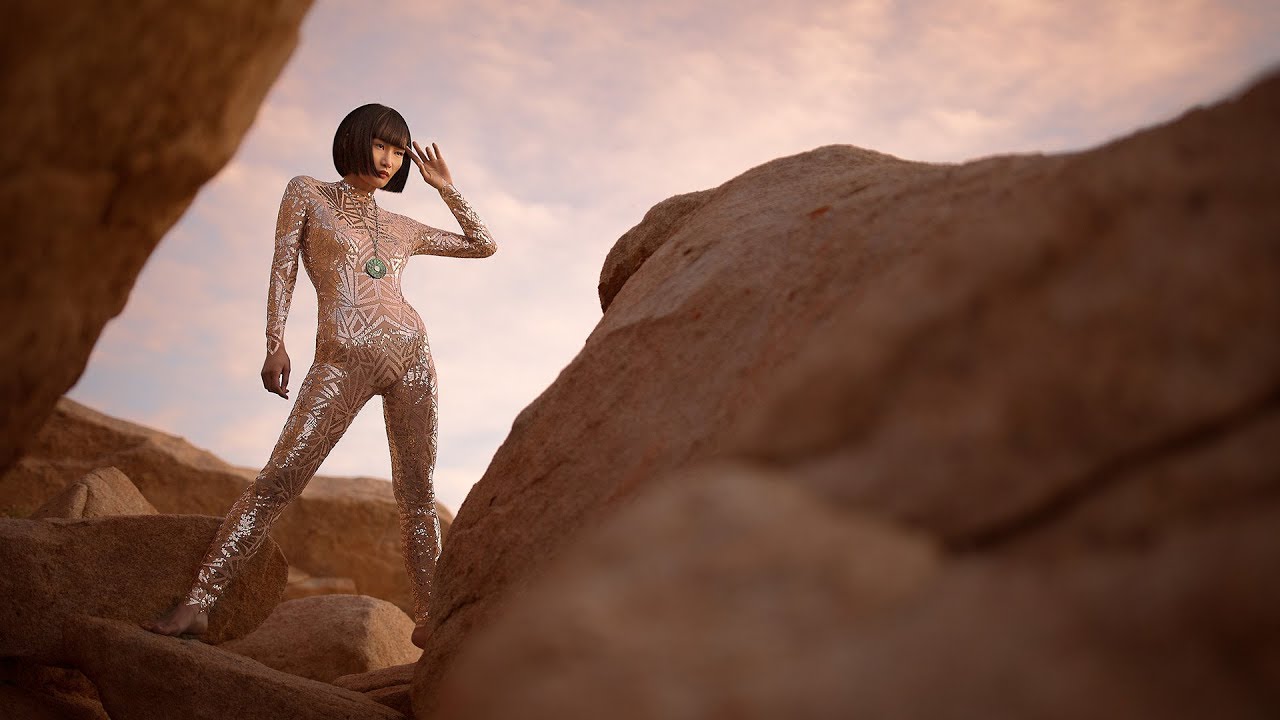
There is a specific kind of frustration that comes from nailing your strobe exposure and completely blowing out your background, or the opposite: beautiful ambient light behind your subject while they look like a cardboard cutout in the foreground. Getting strobes and natural light to coexist in a single frame is one of those skills that sounds simple and behaves otherwise. I spent years treating them as separate problems to solve one at a time. They’re not. They’re a ratio, and once you start thinking in ratios, everything clicks.
In this Aaron Nace (PHLEARN) tutorial, he walks through a location shoot where the goal is to make a subject read clearly against a rocky, textured background using a single rim-positioned strobe. The setup is elegant and the logic is transferable to almost any location scenario. Watch the full tutorial on YouTube before or after reading through these steps. Either way works, but the breakdown below is written so you can follow it without the video if you’re mid-shoot and need a quick reference.
What makes this particular walkthrough useful is that it approaches the problem from the ambient side first, then brings the strobe in as a controlled addition. That sequencing matters. Most lighting problems I’ve seen on set, and committed myself early in my career, come from building the exposure around the strobe and then scrambling to fix the background. Nace reverses that order, and he’s right to do so.
Step 1: Scout for Separation Opportunities
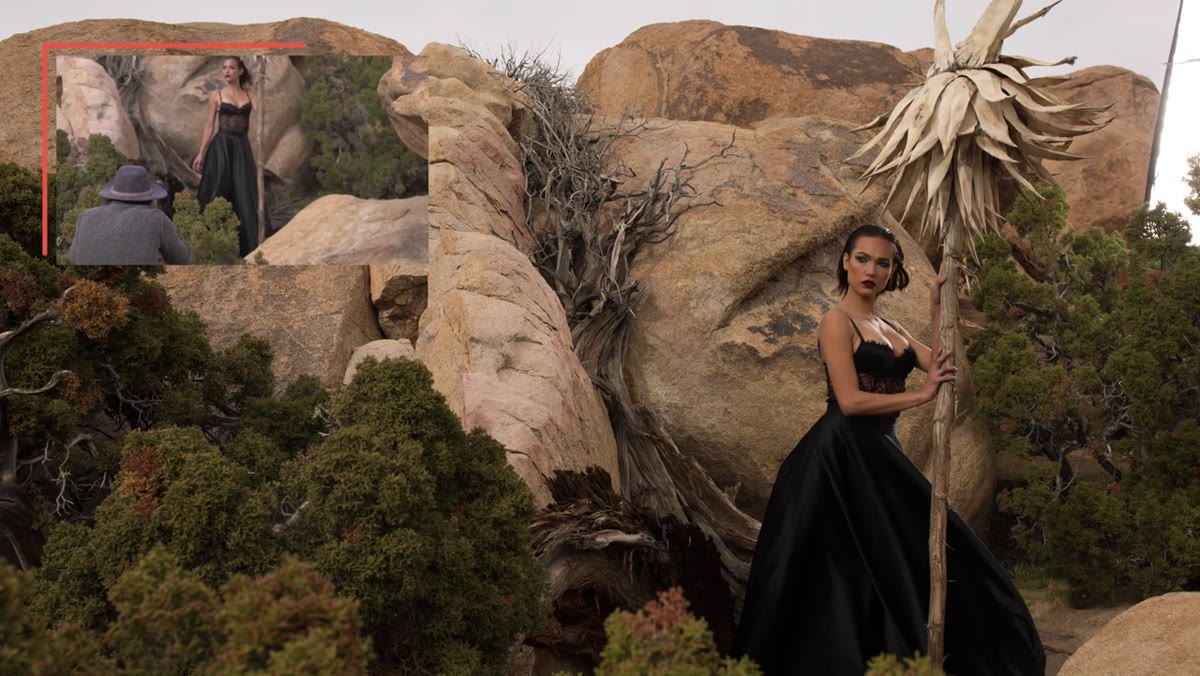
 Rocky outdoor location with ominous tree branch and dramatic background
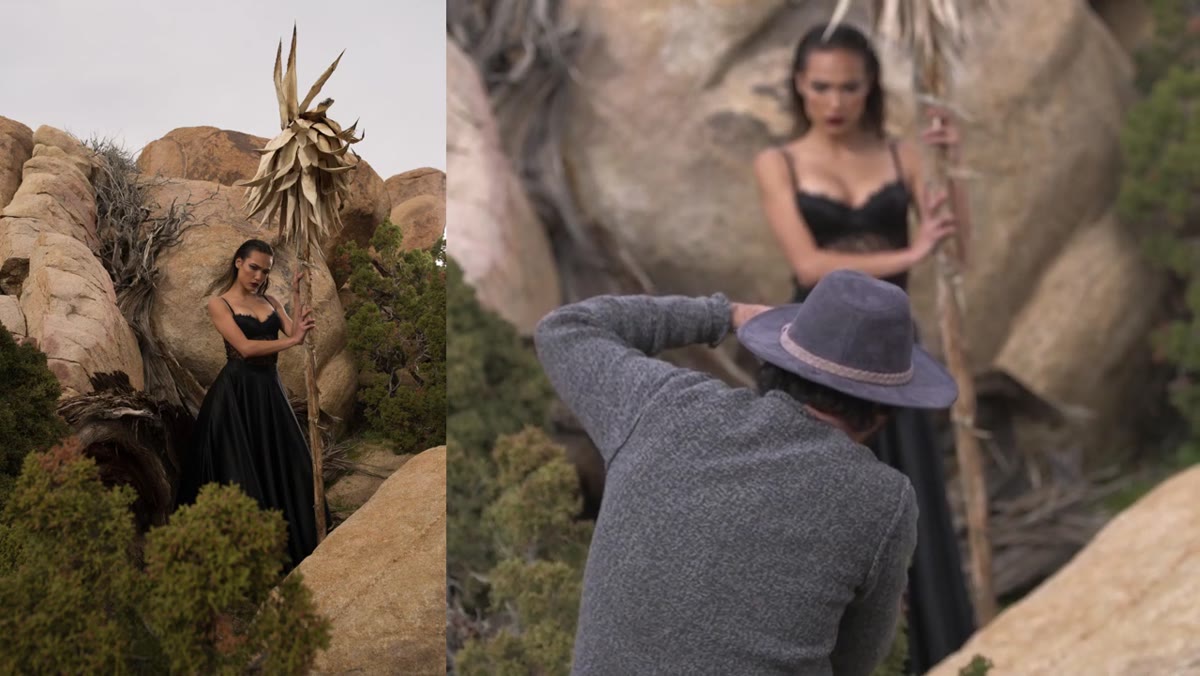
Before you touch a light, look at the background. The goal on a shot like this isn’t just to light the subject, it’s to make the subject read. Nace chose a location with a dark, textured rock backdrop, then placed his subject in front of it. That contrast does a lot of the compositional work before any lighting decision is made.
Rocky outdoor location with ominous tree branch and dramatic background
Before you touch a light, look at the background. The goal on a shot like this isn’t just to light the subject, it’s to make the subject read. Nace chose a location with a dark, textured rock backdrop, then placed his subject in front of it. That contrast does a lot of the compositional work before any lighting decision is made.
When I’m on a location scout, I’m looking for one thing specifically: would this background naturally be darker or lighter than my subject’s skin tone? If the background is mid-toned and cluttered, I know I’ll be fighting it in post. If it’s naturally dark and receding, the strobe can create separation without needing to be aggressive. Pick a background that cooperates.
Step 2: Choose a Modifier That Controls Spill
 Einstein strobe in 60-inch strip box with grid attached
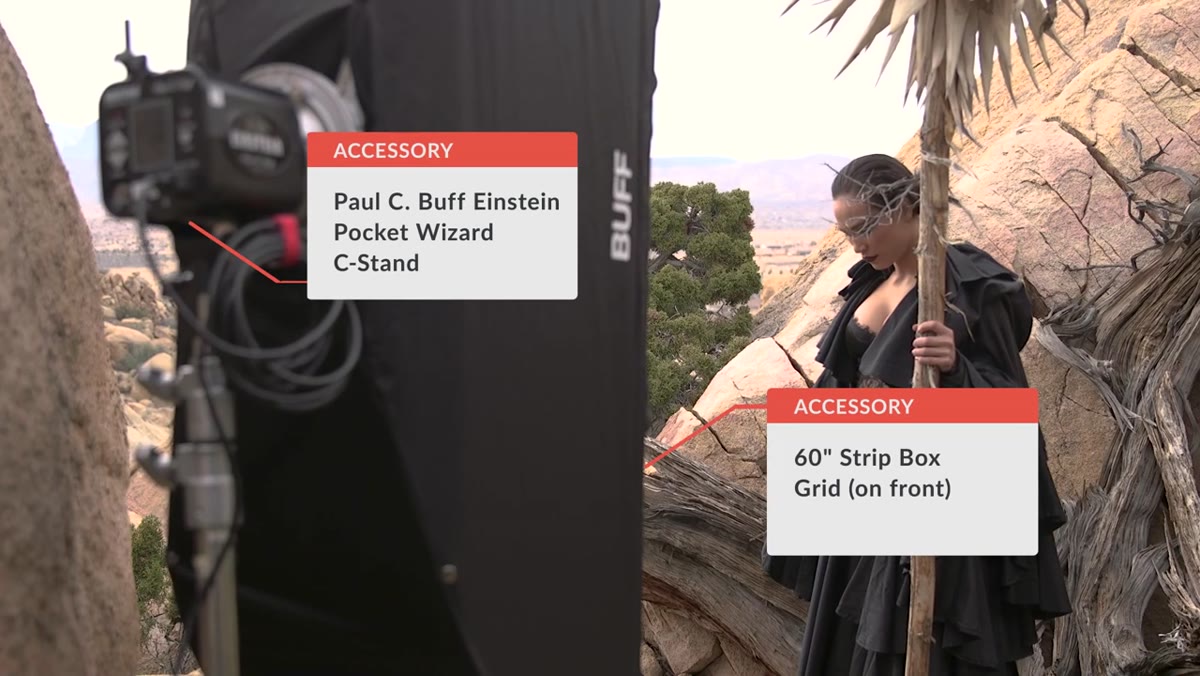
Nace used an Einstein strobe (from Paul C. Buff) placed inside a 60-inch strip box with a grid on the front. Each of those choices is intentional. The strip box creates a long, narrow light shape that wraps along the edge of the body without spreading wide. The grid narrows the beam further and prevents light from spraying onto the background behind the subject.
Einstein strobe in 60-inch strip box with grid attached
Nace used an Einstein strobe (from Paul C. Buff) placed inside a 60-inch strip box with a grid on the front. Each of those choices is intentional. The strip box creates a long, narrow light shape that wraps along the edge of the body without spreading wide. The grid narrows the beam further and prevents light from spraying onto the background behind the subject.
This is the piece most people skip. A bare softbox on a location shoot will light everything within range, which undermines the whole point of rim lighting. If you don’t have a grid for your strip box, improvise with black wrap, or simply move the light further back and angle it more aggressively. The principle is that the light should hit your subject’s edges and fall off before it reaches anything behind them.
Step 3: Set Exposure for Ambient Light First, in Manual Mode
 Camera settings being adjusted for ambient exposure before strobe is added
This is the step most photographers either skip or rush. Before the strobe fires a single frame, Nace dials in a correct ambient exposure. His settings for this shoot were f/6.3, 1/200s shutter, ISO 50. That combination lets a controlled amount of natural light into the frame and produces a well-exposed background.
Camera settings being adjusted for ambient exposure before strobe is added
This is the step most photographers either skip or rush. Before the strobe fires a single frame, Nace dials in a correct ambient exposure. His settings for this shoot were f/6.3, 1/200s shutter, ISO 50. That combination lets a controlled amount of natural light into the frame and produces a well-exposed background.
Once you have those settings locked, switch to full manual mode and don’t touch them again. Your shutter, aperture, and ISO are now only controlling the ambient. The strobe adds on top of that baseline. This mental separation is the core of the technique.
Step 4: Respect the Sync Speed Ceiling
 Shutter speed set to 1/200s to stay within flash sync range
Nace shoots at 1/200s and specifically mentions not going above 1/250s when using strobes with natural light. This is the flash sync speed limit, and violating it produces a dark band across part of your frame because the shutter curtain starts to cross the sensor before it fully opens.
Shutter speed set to 1/200s to stay within flash sync range
Nace shoots at 1/200s and specifically mentions not going above 1/250s when using strobes with natural light. This is the flash sync speed limit, and violating it produces a dark band across part of your frame because the shutter curtain starts to cross the sensor before it fully opens.
For most cameras, 1/200s to 1/250s is the safe ceiling. If you’re getting too much ambient light at that shutter speed, you cannot fix it by going faster without high-speed sync (HSS) capability. Instead, close your aperture, drop your ISO, or use a neutral density filter. I keep a 3-stop ND in my kit whenever I’m shooting strobes outdoors in daylight. It buys back that flexibility without breaking sync.
Step 5: Dial the Strobe Power to Run Slightly Hot
 Strip box strobe positioned to rim-light subject from behind and beside
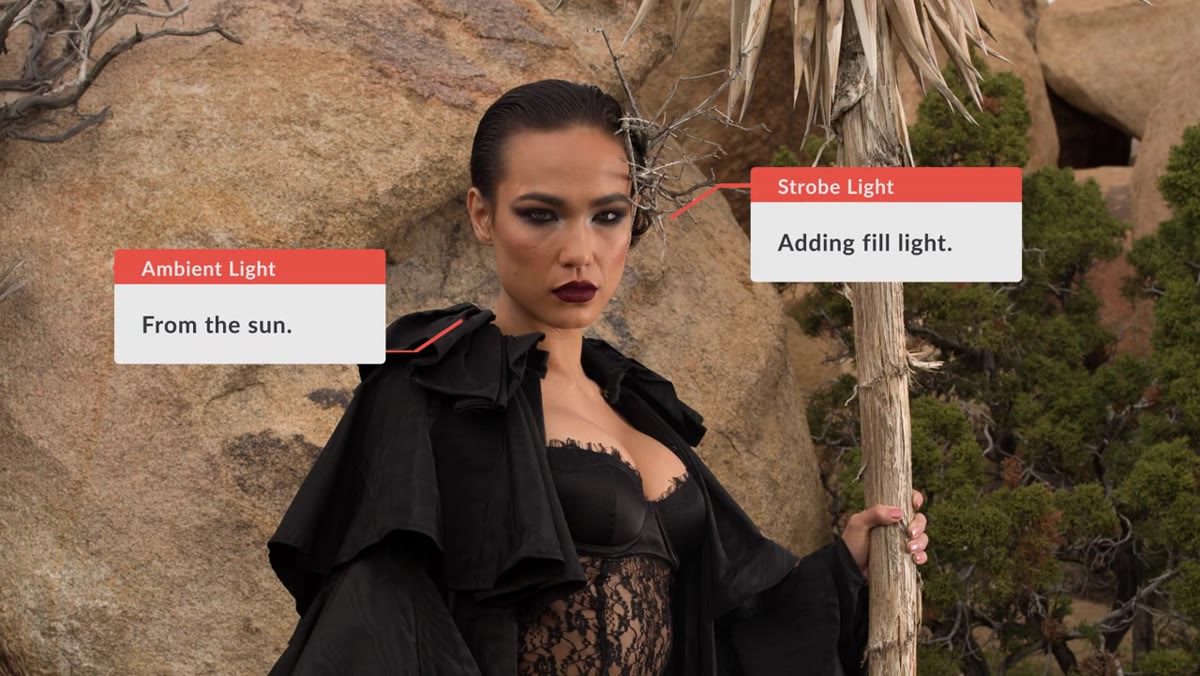
With the ambient baseline locked, Nace brings in the strobe and sets its power so the rim light reads just above the ambient exposure. Not dramatically brighter, just enough to separate the subject’s edge from the background. He describes it as “slightly overexposed” relative to the ambient.
Strip box strobe positioned to rim-light subject from behind and beside
With the ambient baseline locked, Nace brings in the strobe and sets its power so the rim light reads just above the ambient exposure. Not dramatically brighter, just enough to separate the subject’s edge from the background. He describes it as “slightly overexposed” relative to the ambient.
In practice, this means starting at a moderate power setting, firing a test frame, and adjusting up or down. Shooting tethered to a laptop, as Nace does here, makes this calibration much faster because you’re seeing the image at actual size rather than squinting at a 3-inch screen in sunlight. If you don’t have a tethering setup, a histogram check after each test exposure is your next best tool. Look for the subject’s edge to be clipping slightly while the background sits comfortably in the mid-tones.
Step 6: Position the Light for Rim, Not Fill
 Strip box placed beside and slightly behind subject for rim light separation
Nace positions the strip box beside and slightly behind the subject, not in front. This is what creates a rim light rather than a standard key light. The distinction matters because a rim light creates a halo of definition along the subject’s silhouette without flattening the face or competing with the ambient mood of the scene.
Strip box placed beside and slightly behind subject for rim light separation
Nace positions the strip box beside and slightly behind the subject, not in front. This is what creates a rim light rather than a standard key light. The distinction matters because a rim light creates a halo of definition along the subject’s silhouette without flattening the face or competing with the ambient mood of the scene.
If you position a strip box too far forward, it becomes a sidelight and starts to fill in shadows you might actually want to keep. On a shoot with a moody or dramatic creative direction, those shadows are part of the image. The light’s job is to define the edge, not erase the depth.
What I’d Add From My Own Experience
Every location strobe setup I’ve done in the past five years starts with what I call the “ambient-only frame.” I fire one shot with the strobe physically turned off, look at it on my laptop or histogram, and confirm the background is landing where I want it before the flash enters the equation. That frame becomes my reference point. If the strobe starts doing something unexpected to the overall exposure, I go back to that reference and ask which variable shifted.
I also label my strip box grid with masking tape noting the last three power settings I used for outdoor rim work. Sounds excessive, but when you’re setting up in fading light with a client waiting, having a starting point cuts setup time in half.
The single most important thing to take from Nace’s method is the sequencing. Ambient exposure first, locked in manual, then layer the strobe on top as a controlled addition. Most lighting mistakes happen when photographers try to solve both problems simultaneously. Treat them as two separate exposures sharing one frame and the decisions become straightforward.
Watch the full tutorial on YouTube to see the complete shoot walkthrough and how this technique carries into the Photoshop compositing work that follows.
Comments
Leave a Comment