The Setup That Taught Me Darkness Has to Be Engineered
A few years back I had a beauty client who came in with a tear sheet. Dark background, dramatic shadow, the subject’s face carved out of almost pure black. She said she wanted that look. I thought I could wing it.
I pulled my key light around to about 45 degrees, killed my fill, and figured the black backdrop would do the rest. The shots came back flat. The shadows were muddy. The background was a dingy gray instead of pure black, and the subject looked more underexposed than dramatic. I had confused “dim” with “dark,” and those are completely different things in the studio.
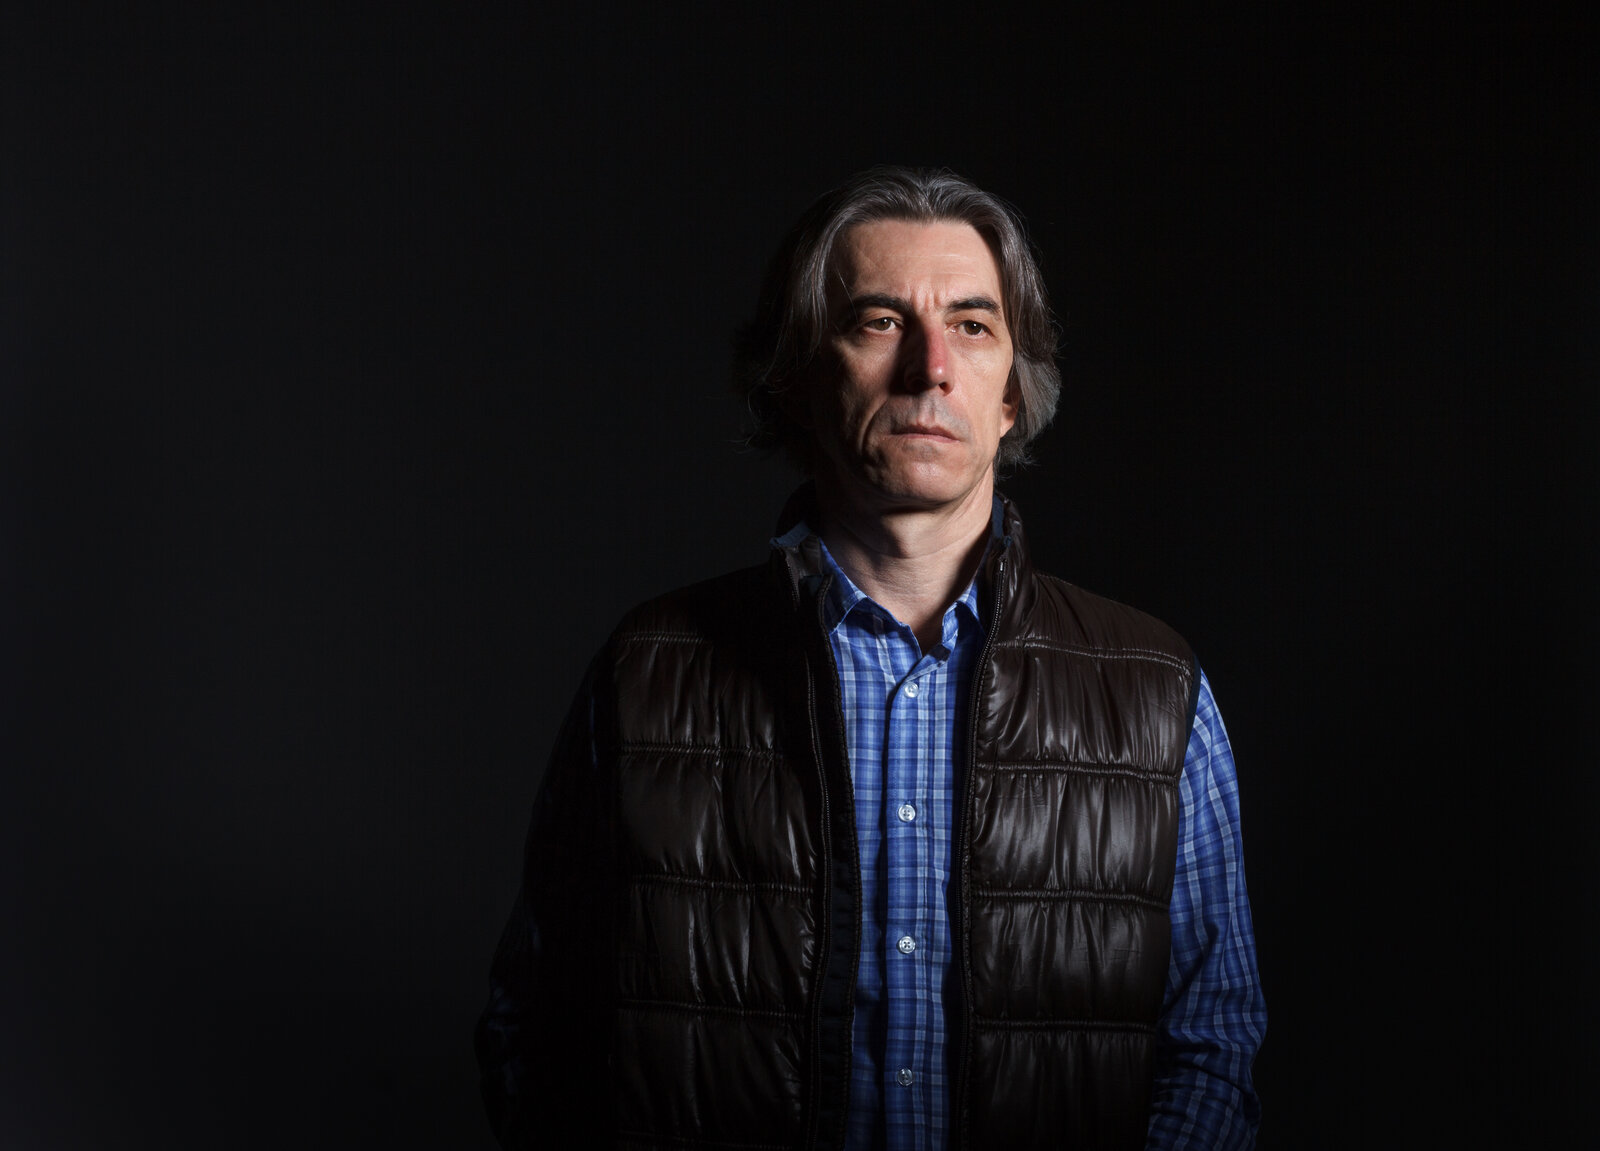
Low key photography is not about taking away light. It is about placing light with enough discipline that shadow becomes a deliberate shape. That distinction changes everything about how you build a setup.
What Makes a Low Key Image Technically Different
Low key lighting means the majority of your frame sits in the shadow tones, with the subject illuminated by a single controlled source or a very tight grouping of sources. The tonal histogram skews hard to the left. You are not underexposing the subject. You are allowing everything around the subject to fall into black.
This requires two conditions to be true at the same time. First, your light must have a high degree of contrast, meaning a steep falloff from the lit area to the unlit area. Second, your ambient light and any light scatter in the room must be low enough that it does not lift those shadows back up into gray.
Falloff is determined by the inverse square law. A small modifier close to the subject loses intensity rapidly as you move away from it. A 1x1.3 foot Westcott Rapid Box XL at 18 inches from the face will go dark fast. A large softbox at eight feet away spreads light more evenly across the entire room and fills your shadows whether you want it to or not. Low key work generally wants small and close, or a gridded modifier to contain the spill.
The ambient problem is just as important and more often ignored. Studio walls, floor bounce, the modeling light on your second strobe you forgot to turn off, even light coming under the door from the hallway. All of it adds up. I shoot in a dedicated space in Los Angeles and I still tape a sheet of black foam core to the white baseboard near any low key setup.
Building the Ratio: Numbers That Actually Work
I base almost every low key setup on a 4:1 or 8:1 key-to-fill ratio, often with no intentional fill at all. If there is fill, it is from a reflector positioned on the shadow side at distance, not a second strobe.
My standard starting point: one Profoto B10 Plus at full power through a Profoto RFi 1x1.3 foot softbox with the internal diffusion panel only, placed 20 to 24 inches from the subject’s face, set to ISO 100, f/8, at 1/200 second on a Canon R5. That gives me proper exposure on the lit side of the face and lets the unlit side go black on its own if my room control is right.
Grid the modifier if you have spill issues. The Profoto 50-degree grid for that box costs about $90 and is worth every cent for interior walls. Without it, you will chase blown background problems all session.
I keep a small lighting journal where I sketch every setup, label every light position and its power reading from a Sekonic L-858D. When I come back to a look six months later, I am not guessing. The sketch takes two minutes to make and has saved me from hours of re-dialing.
Hair Lights, Rim Lights, and What Not to Add
The instinct on a low key portrait is to add a hair light or a rim to separate the subject from the background. Sometimes that is right. More often it ruins the image.
A hard rim at the back of the skull on a dark-toned subject can look stunning. But add too much power and it reads as a mistake, like you accidentally fired a strobe. I keep a rim, when I use one, at one-quarter to one-eighth the power of my key. On my Profoto units that usually means dropping the rim to 2.5 on the power dial when my key is at 5.0. Label everything. I have masking tape on every head in my studio with the modifier name and default power setting for each setup type, including low key. It sounds obsessive until the third time it saves a session.
For hair lights I often skip the strobe entirely and use a Nanlite Forza 60B LED with a snoot, set to a tungsten-adjacent 3200K. It adds a color separation that feels intentional on skin and dark clothing, and it does not require a separate trigger channel.
Posing Inside a Low Key Setup
The lit zone is small. That means where the subject moves matters more than in broad or flat setups. If someone tilts their chin up, the nose shadow crosses the lip. If they shift their shoulder forward, the shirt catches light and competes with the face.
My wife first pointed this out to me years ago, watching me direct talent. She noticed that I kept asking people to hold still when what I actually needed was for them to stay inside the light, not inside a pose. Those are different instructions and they produce different results.
With low key, I talk about the edge of the light instead of the position of the body. I tell a subject to find the point where their cheek starts to lose the light, then pull back just slightly from that edge. That gives me the shadow shape I need without the face going dark. It takes about 30 seconds to communicate and it changes how the subject moves for the rest of the session.
The single most important thing about low key lighting is this: control your room before you control your subject. If the ambient and scatter are not solved, no modifier or power setting will save you.
Comments (5)
Shared this with my photography group. Everyone loved it.
Solid advice. Especially the part about taking your time with it.
Really solid breakdown. This pairs perfectly with the photography work I've been writing about.
Clear and practical. No fluff. Appreciate that.
Love this. I referenced a similar technique in one of my recent posts. Always good to see other perspectives.
Leave a Comment