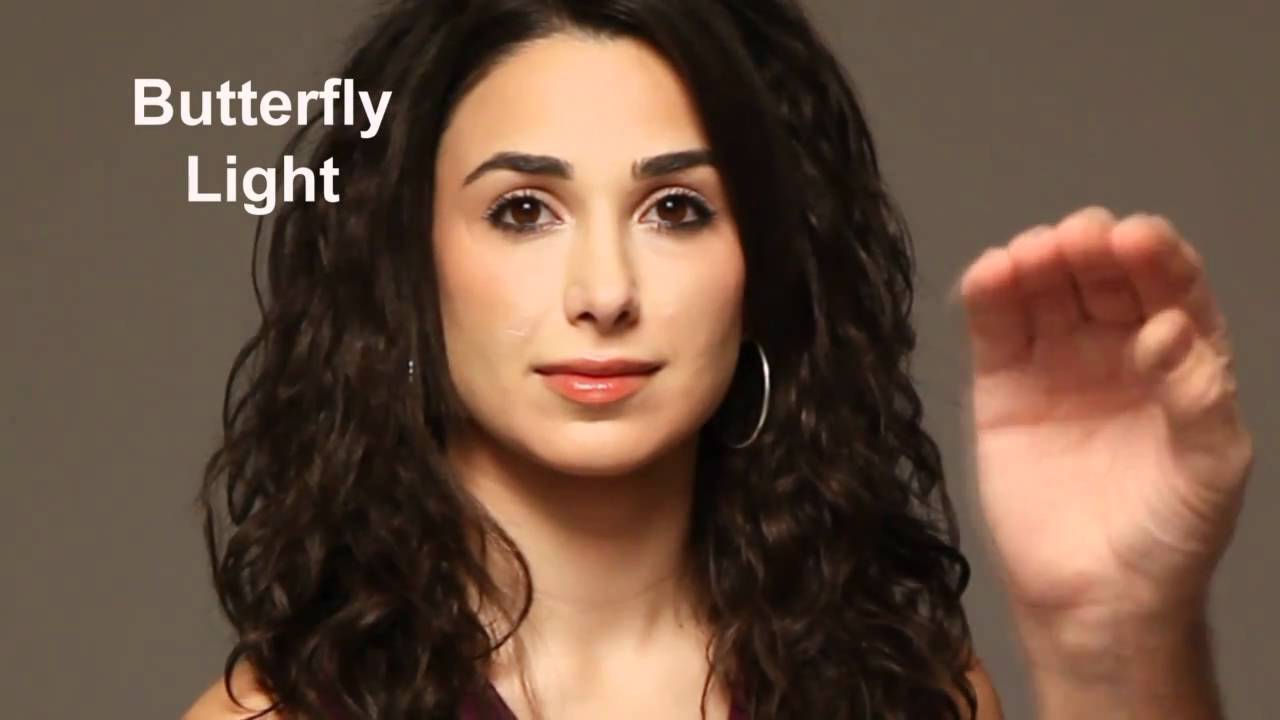
There’s a question I get from almost every photographer who steps into my studio for the first time: “How do you know where to put the light?” My honest answer is that I spent years building a mental map of five core positions, and I drill them every time I work with a new modifier or a new subject. Once those five positions are in your hands, everything else in portrait lighting becomes a variation on a theme. That’s why when I came across Watch the full tutorial on YouTube from The Slanted Lens, I pulled out my phone and opened my lighting diagram app mid-watch. The breakdown is clean, practical, and sequenced in a way that makes the logic of light movement visible, not just the labels.
What I appreciate most is that this tutorial treats posing and lighting as inseparable. You can’t just move a light around a subject who’s planted square to the camera and expect flattering results. The two work together, and the video demonstrates that relationship with real clarity. I’ve sketched versions of these five setups in my lighting journal more times than I can count, and seeing them demonstrated live on a subject rather than on a diagram reinforces things you don’t always clock from a drawing.
Step 1: Start with the Subject Turned, Not Squared
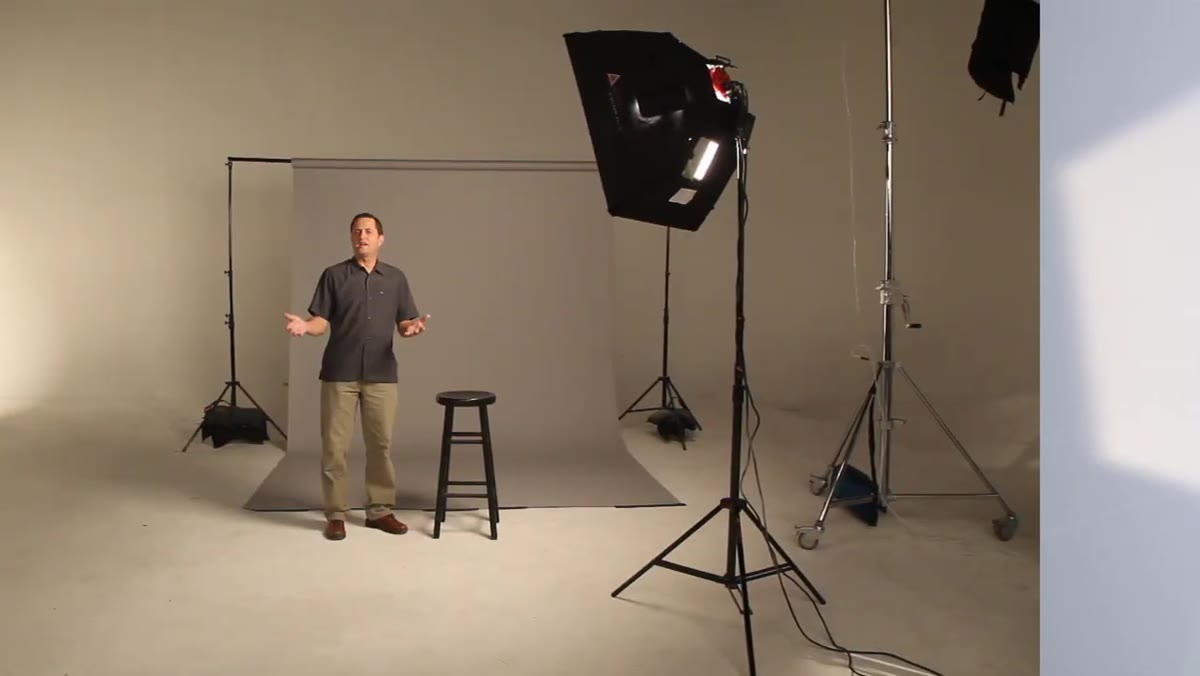 Subject seated, turned slightly left, facing camera
Before touching the light, get your subject off the straight-on position. In the tutorial, the subject is turned slightly to her left, which creates a natural shoulder line and slims the silhouette. For women especially, a squared stance to camera tends to broaden the frame in a way that doesn’t serve the image. I default to roughly a 30-to-45-degree body turn as my starting point in almost every seated portrait. Once the body is turned, ask the subject to look back toward the lens. That combination of turned body and camera-facing gaze is where most of your portrait lighting setups will begin.
Step 2: Set Up Rembrandt Light
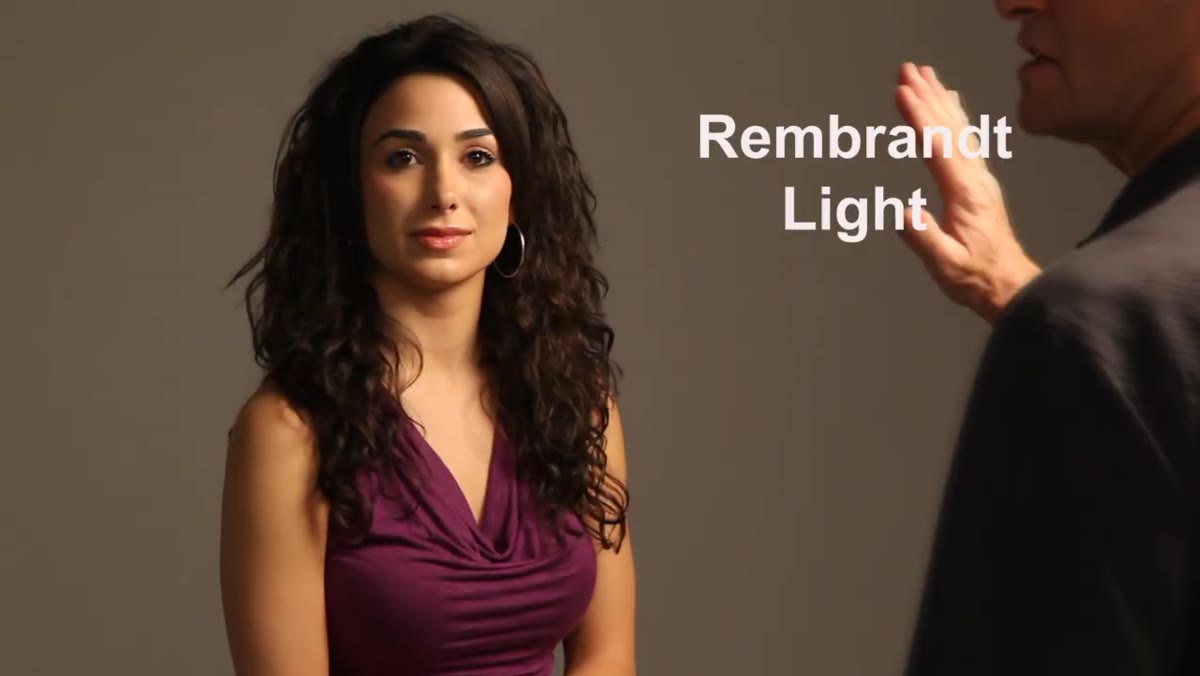 Single softbox positioned camera-right, triangle shadow on subject’s cheek
With the subject turned, position your single light source slightly to camera right and above eye level, angled down at roughly 45 degrees. What you’re looking for is the shadow falling from the nose to close the loop with the shadow from the cheekbone, creating a small triangle of light on the shadow side of the face. That’s the Rembrandt pattern. No fill, no reflector – just a single source showing you what the light is doing on its own. The tutorial uses a softbox here, which is my go-to modifier for this pattern because it gives you a soft enough shadow edge to read the triangle clearly without it turning into a muddy blob. If the triangle disappears, the light is too far forward. If it doesn’t close, bring the light back slightly.
Step 3: Push to Split Light
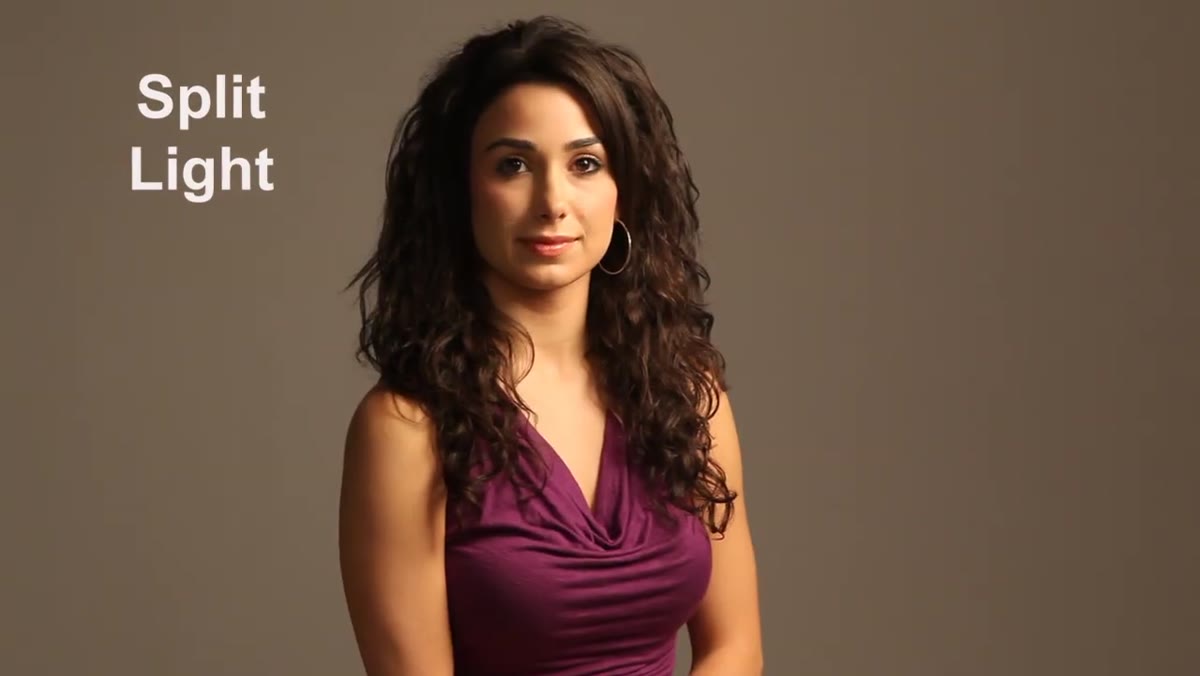 Light moved behind subject, strong highlight and shadow dividing face vertically
From the Rembrandt position, continue moving the light around toward the side of the subject, behind the plane of the face, until the highlight and shadow split cleanly down the bridge of the nose. This is split lighting – high contrast, deliberate, and dramatic. The tutorial is direct about what fill does to the character of this setup: the less you fill the shadow side, the more dramatic and statement-making the image feels. When I’m shooting for editorial clients who want edge, I’ll leave the shadow side almost untouched. For corporate portraits where the subject needs to look approachable, I’ll drop in a reflector at about a 2:1 or 3:1 ratio to soften the contrast without losing the shape.
Step 4: Understand Broad Light by Rotating the Subject
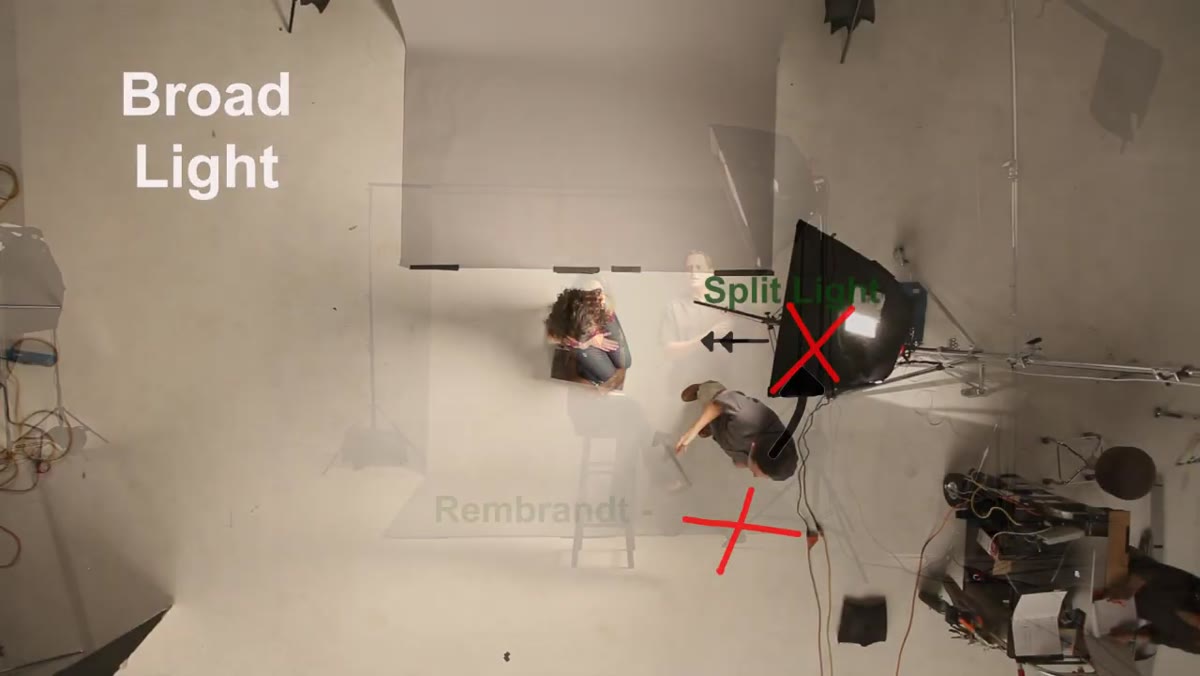 Subject turned away from light source, lit side facing camera
Broad light is the same light position as Rembrandt, but the subject rotates to face away from the source. Now the camera is looking at the wider, lit side of the face rather than the shadow side. The tutorial is refreshingly candid here – broad light is a valid tool, but it’s not always the most flattering choice because emphasizing the broader plane of the face can make it read as wider. That said, it happens naturally when subjects are moving and looking around, so understanding it means you can anticipate it rather than be caught off guard. If your light is positioned correctly, the transition between Rembrandt, split, and broad should feel fluid – the subject moves, not the light.
Step 5: Build Butterfly (Paramount) Light with a Fill Card
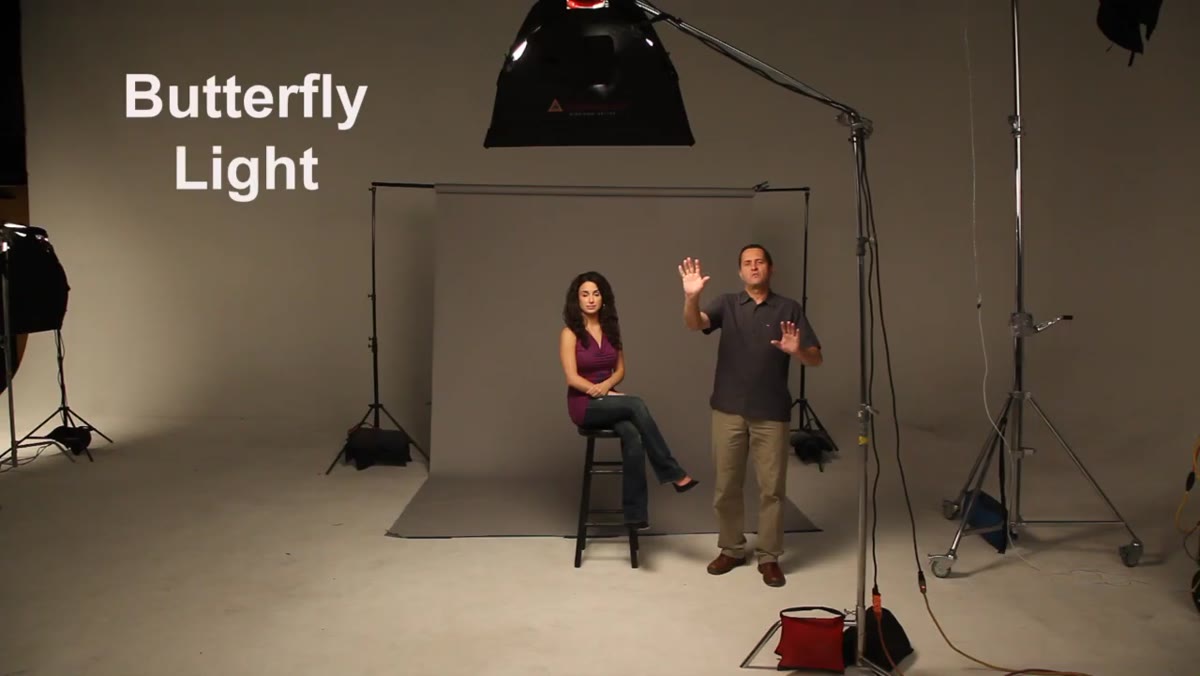 Softbox on boom overhead and in front, shadow beneath nose, fill card on subject’s lap
Move the light source onto a boom directly above and in front of the subject, angled steeply downward. What you’re after is a shadow that drops directly below the nose, symmetrically, with gentle shadows defining both cheekbones. This is butterfly light, also called Paramount light because of its heavy use in classic Hollywood beauty photography. The tutorial adds a white fill card placed on the subject’s lap, bouncing light back up from below to open the chin and reduce the under-nose shadow without eliminating it entirely. Watch the chin position carefully – as the subject drops their chin, the under-chin shadow deepens fast. You want the fill to skim the lip line, not flatten the whole lower face. This setup is genuinely one of the most versatile beauty lights I use, especially for fashion and cosmetics work.
Step 6: Read the Catchlights
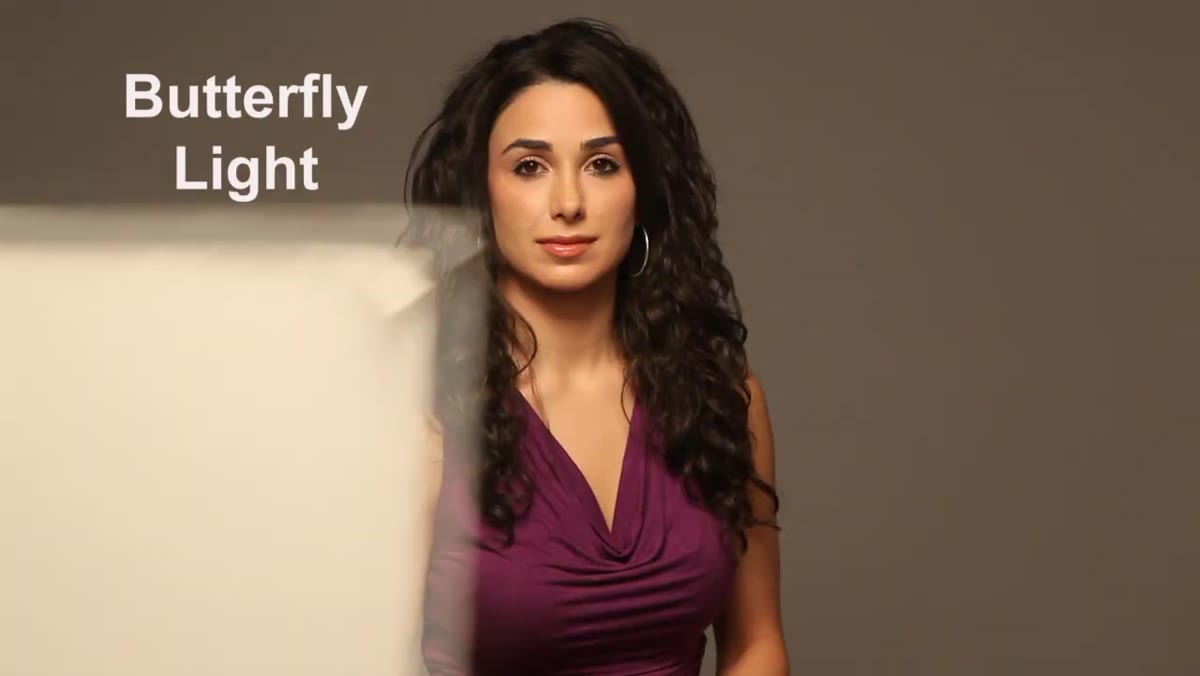 Close-up of subject’s eyes showing catchlight position from overhead softbox
Each lighting pattern produces a catchlight in a different position in the eye, and learning to read those positions tells you what setup is in play even in someone else’s photo. Overhead butterfly light produces a catchlight near the top of the iris. A side-placed light puts it at roughly 10 o’clock or 2 o’clock. This matters practically because the catchlight position affects the energy of a portrait – high catchlights tend to look alert and bright, while very low catchlights can feel flat or even unsettling. I started noticing catchlight positions obsessively after my wife pointed out that she always looked tired in photos where the light was too low. She was right, and I’ve been reading eyes before I press the shutter ever since.
A Note on Running These Five in Sequence
When I demonstrate these setups to assistants or clients who want to understand my process, I run them in exactly this order: Rembrandt, split, broad, butterfly, and then back through them with fill added. Running them as a sequence on a single subject in a single session makes the differences tactile rather than theoretical. You see the light moving, the shadows shifting, the subject’s face changing character with each position. I’d also suggest logging every session in a notebook or your phone – even a rough sketch of the light angle and modifier. After enough entries, patterns emerge about what works for different face shapes, and that library becomes more valuable than any gear you own.
The single most useful idea in this tutorial is that your light position should allow fluid movement between setups as your subject naturally moves. If you have to dramatically reposition the light every time the subject shifts, the light isn’t anchored in the right place to begin with. Get the position right once, let the subject move through it, and the five patterns will appear on their own.
Watch the full tutorial on YouTube to see all five positions demonstrated live on a subject – the difference between reading about Rembrandt and watching the triangle form in real time is significant.
Comments (2)
This is the kind of content that keeps me coming back.
Excellent tutorial. I'd add that from a business standpoint, this technique is incredibly versatile.
Leave a Comment