Running a photography studio is two jobs. One of them involves light. The other involves spreadsheets. I got reasonably good at the first one before I had any business running a studio, and I paid for that gap in knowledge for about three years before I started treating my finances the way I treat a lighting setup: with specificity, with documentation, and with no guessing.
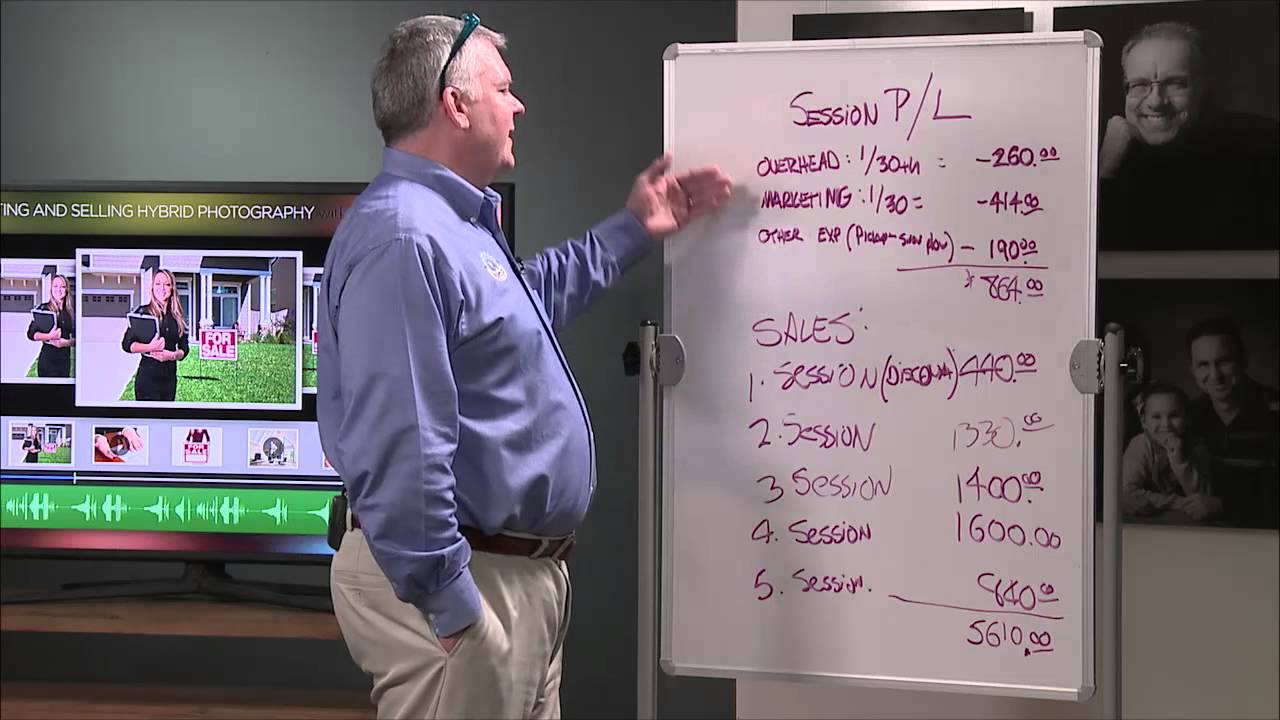
That is why this CreativeLive tutorial on studio profit and loss calculations landed so hard when I first watched it. Watch the full tutorial on YouTube. The presenter walks through a real P&L statement from a working studio, not a hypothetical classroom exercise. Every number is grounded in actual operating costs, and the structure he uses is one you can replicate in a spreadsheet this afternoon. What follows is my breakdown of how the method works and how I have adapted it for my own commercial studio in Los Angeles.
The core insight here is not the specific dollar amounts. Those will vary by market, by square footage, by how many subscriptions you are paying for software you forgot you signed up for. The insight is the unit of measurement he uses to make the numbers manageable.
Step 1: Divide Every Fixed Cost by 30
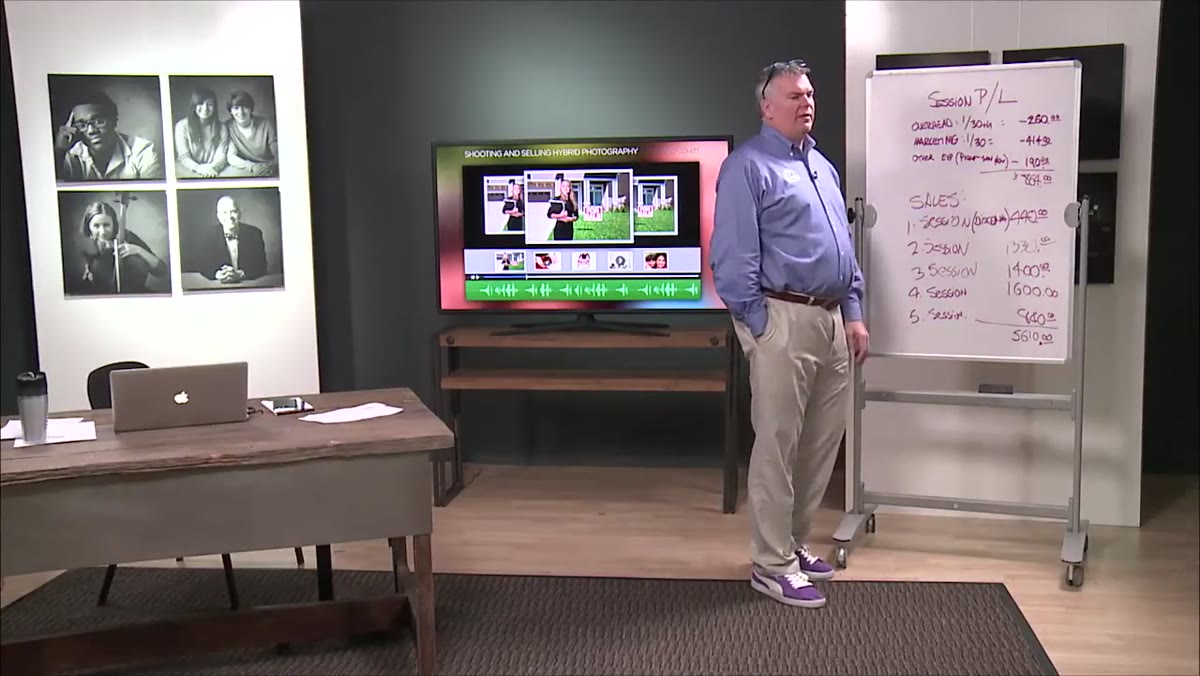
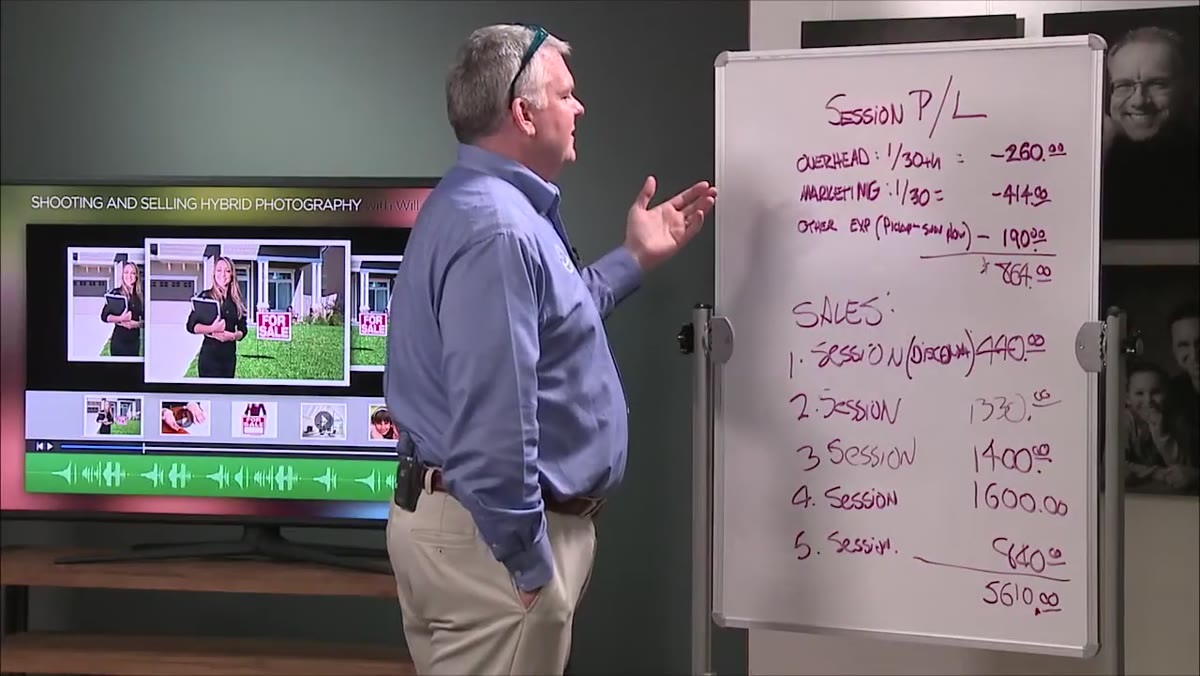 P&L statement showing overhead broken into daily figure
Before you can price a session correctly, you need to know what it costs you to open the door each morning, whether you have a client or not. The tutorial presenter takes every fixed overhead expense, which includes rent, insurance, and utilities, and divides the monthly total by 30. The result is your daily overhead floor. In the example shown, that number lands at roughly $260 per day for a 4,400 square foot space, of which about 3,600 square feet is actually used for the photography operation.
This single move changes how you think about an empty day. A day with no shoots is not a zero-cost day. It is a $260 deficit before you factor in anything else. I taped that realization to my monitor when I first ran this calculation on my own numbers. It is the kind of clarity that forces you to stop treating slow weeks as rest and start treating them as a problem to solve.
Step 2: Map the Full Footprint of the Space, Including What Pays for Itself
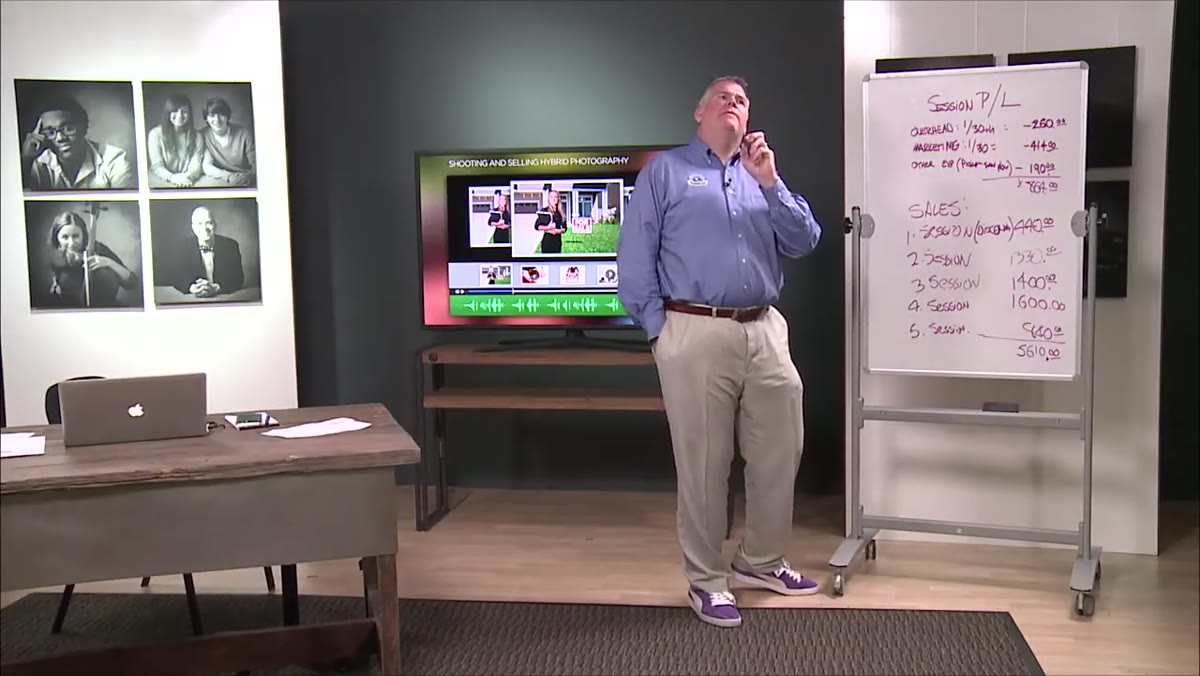 Studio floor plan description showing 4,400 sq ft breakdown
The presenter is not just running a straight photography studio. Part of the space functions as a shared or community facility, which generates a different kind of return: visibility, foot traffic, and association with a named photographer rather than a direct cash payment. The printing lab, which people walk through on their way to another part of the building, is set up with calibrated, daylight-balanced fluorescent lighting bounced off neutral gray walls. Every surface is considered.
This matters for your P&L because not every square foot has to produce revenue directly. Some space earns its keep by closing sales. A beautifully printed, framed wall gallery that clients walk past before a consultation does real selling work. That gallery is a cost that belongs in your overhead calculation, but it is also a marketing tool. Know which costs are doing double duty.
Step 3: Build Marketing Into the Daily Number, Not the Project Budget
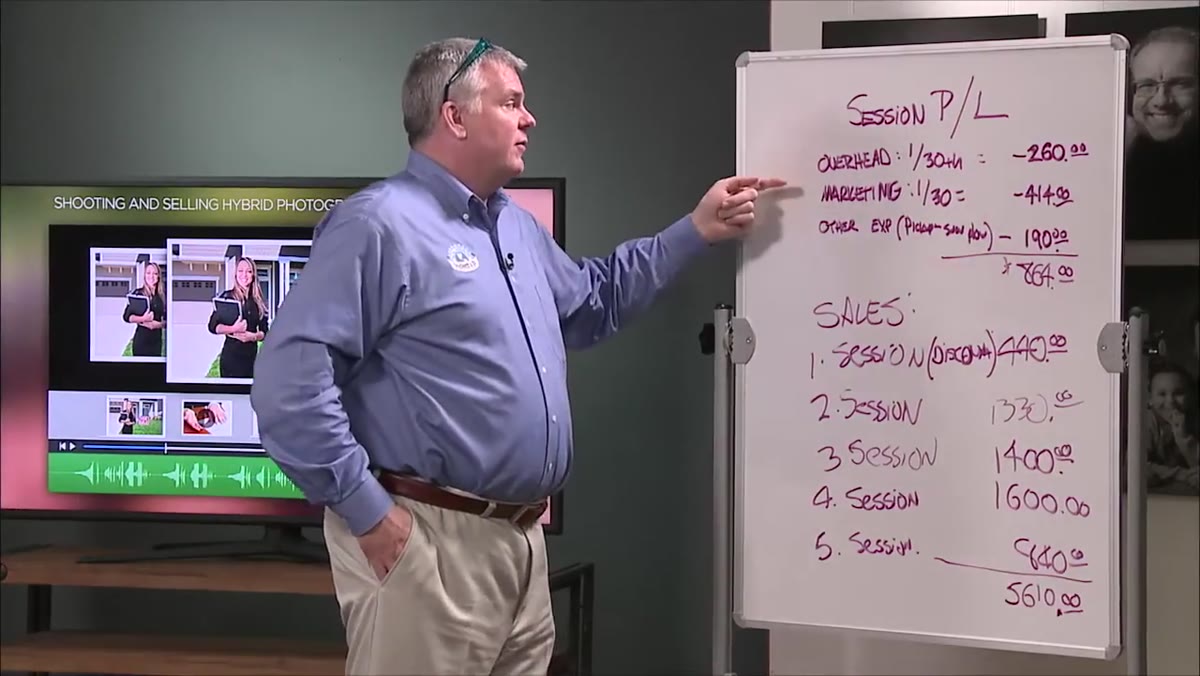 Marketing costs broken down into daily figure of $414
Here is where most studio owners I know get their math wrong. They think of advertising spend as a project-level cost and assign it to individual shoots or campaigns. The presenter treats marketing as a fixed daily overhead item, the same way he treats rent. When he divides his annual marketing spend by 30, the daily figure comes out to $414. That is every Groupon discount, every Yelp promotion, every cross-promotion with a local restaurant or framing shop or even a carpet store.
The cross-promotion strategy he describes is worth noting on its own. Pairing your studio with businesses that serve overlapping clients, where everyone offers a discount if the customer buys from two or more of the participating businesses, means your marketing dollars are compounding across multiple audiences. Individually, each partner’s list is modest. Together, you are reaching a broader pool with shared credibility.
Step 4: Arrive at Your True Daily Overhead Figure Before You Price Anything
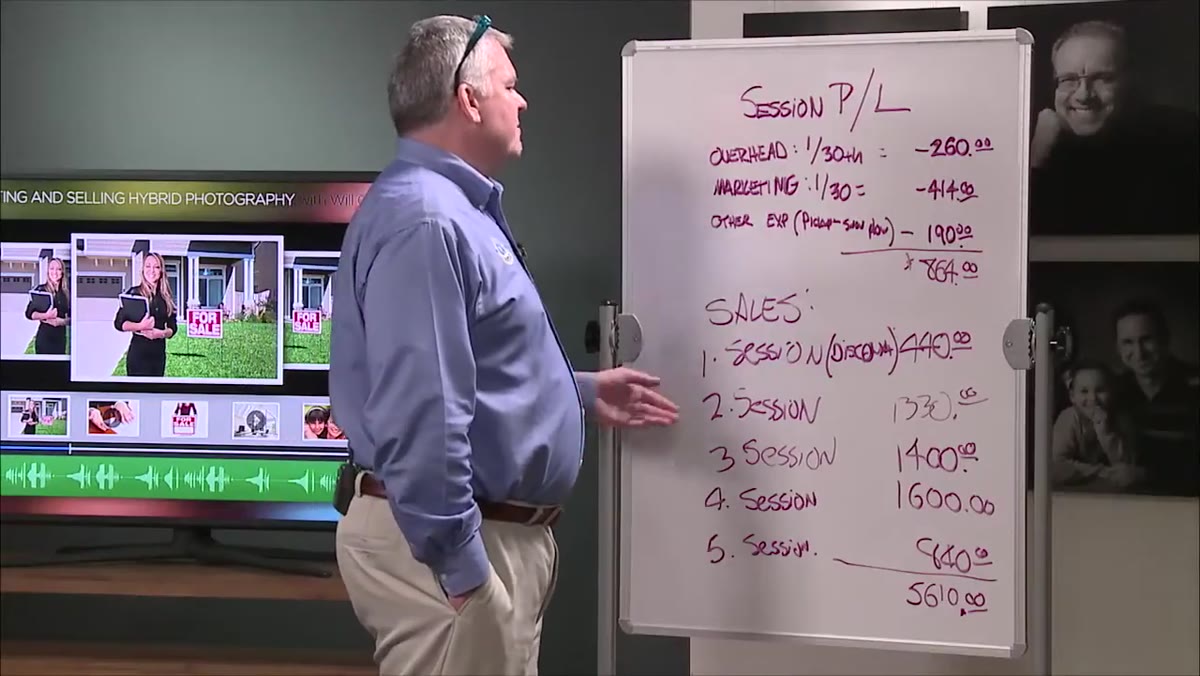
 Total daily overhead figure of $864 on screen
When you stack fixed overhead, marketing, and variable costs like contract labor and maintenance, the presenter’s studio arrives at a total daily overhead of roughly $864. That is the number every session has to work against before the business makes a single dollar of profit.
This is the number that should sit at the top of your pricing conversation with yourself. If you are booking a half-day shoot and charging less than your daily overhead, you are funding someone else’s portraits out of your own pocket. I ran this calculation on a particularly busy month last year and discovered I had been doing exactly that on a recurring client I thought was profitable. The session felt busy and productive. The P&L told a different story.
Step 5: Separate Overhead Subscriptions From Equipment Purchases
 Discussion of software subscriptions folded into overhead costs
A student in the tutorial asks where software subscriptions, templates, and recurring platform fees should sit in the P&L. The answer is clear: those belong in overhead, not in per-project costs. Annual subscriptions to gallery platforms, email card services, client-facing template tools, all of it gets annualized and folded into the monthly overhead figure.
Equipment is handled separately, and deliberately so. Cameras and major gear purchases are excluded from this particular P&L model, partly because of the presenter’s specific situation with test and review equipment, but the underlying principle is sound. Major capital purchases should be tracked through depreciation, not dumped into monthly overhead in a way that distorts your daily cost baseline. Keep your recurring operational costs clean.
What I Do Differently in My Own Studio
The daily overhead model is solid, and I use a version of it. Where I have pushed further is on the calibration side of the printing lab setup the presenter describes. After I ruined a major editorial job years ago because my monitor was not calibrated to match my output, I became almost obsessive about this. Every light source in my printing area is measured with a spectrophotometer quarterly, not just visually assessed. I have a lighting journal where I log every setup, and my print review area has its own dedicated entry, just like a shooting setup would.
The other thing I do is annotate my daily overhead number directly on my pricing sheet, which lives in a shared folder my studio manager can access. Every time I quote a client, the overhead figure is visible at the top of the calculation. It makes every discount a conscious decision rather than a reflexive one.
The most important thing this tutorial teaches is that your studio does not have a pricing problem. It has a math-visibility problem. Once you can see what it actually costs you to operate each day, your pricing decisions stop being guesswork and start being arithmetic. Watch the full breakdown here: Watch the full tutorial on YouTube.
Comments
Leave a Comment