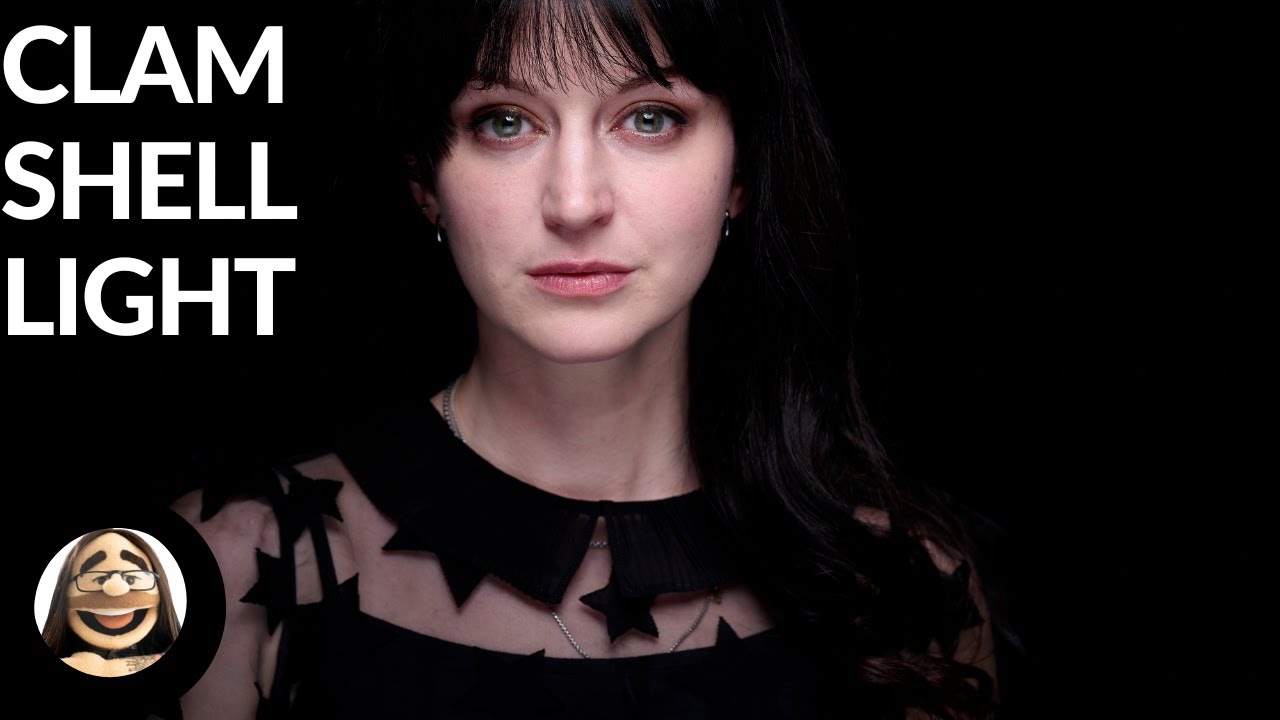
Beauty work is where lighting technique either earns its keep or exposes you. I shoot beauty regularly for brand clients, and the question I get most from photographers watching me set up is some version of: “Why do you have that second light so far out?” That’s the clamshell question, and most people who ask it have been doing the setup slightly wrong. In this Daniel Norton Photographer tutorial on clamshell lighting, Norton walks through the technique with a directness I appreciate. No mysticism. No vague talk about “wrapping light.” Just the positioning logic, the exposure relationship, and the actual order of operations when you’re building the setup from scratch.
What resonates with me is his specific framing of when clamshell becomes necessary. A reflector works fine in some situations, and on-axis fill is my default when geometry allows. But the moment you put a beauty dish with a grid that close to a subject for tight beauty work, you’ve closed off both of those options. The dish is sitting right on top of them, the grid is eating your fill angles, and suddenly you need a second light source below. That’s the context. That’s why clamshell exists. Norton sets that up clearly before he touches a single piece of gear, which is the right way to teach it.
Step 1: Recognize When Clamshell is the Right Tool
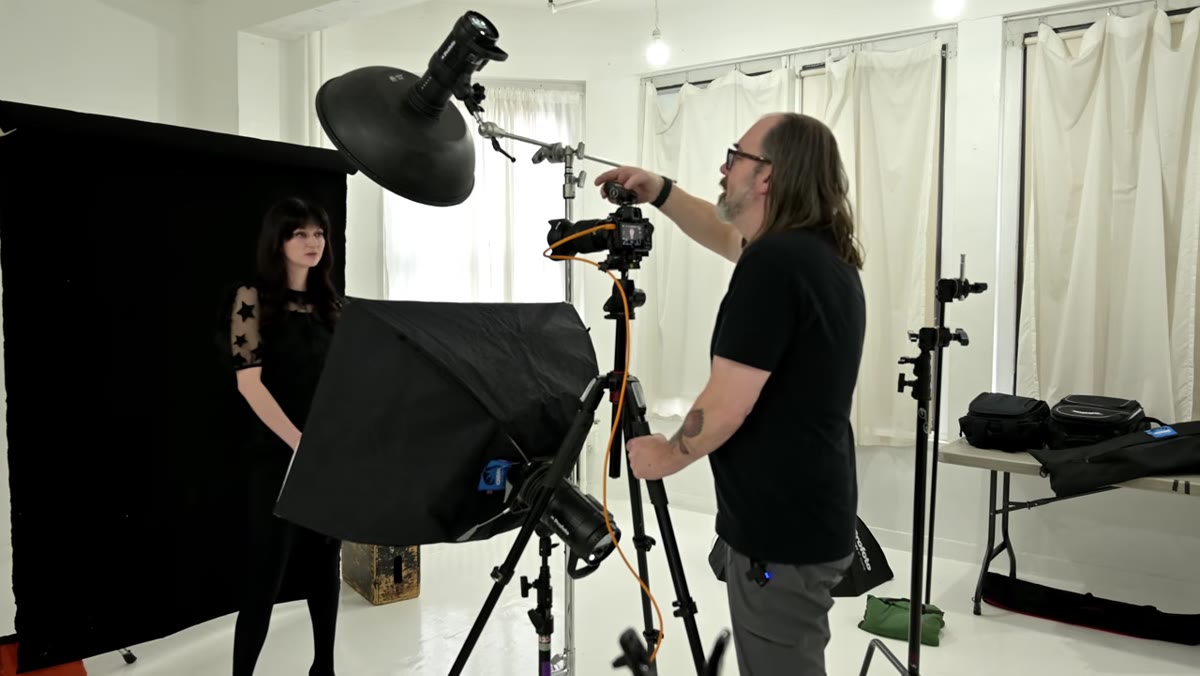
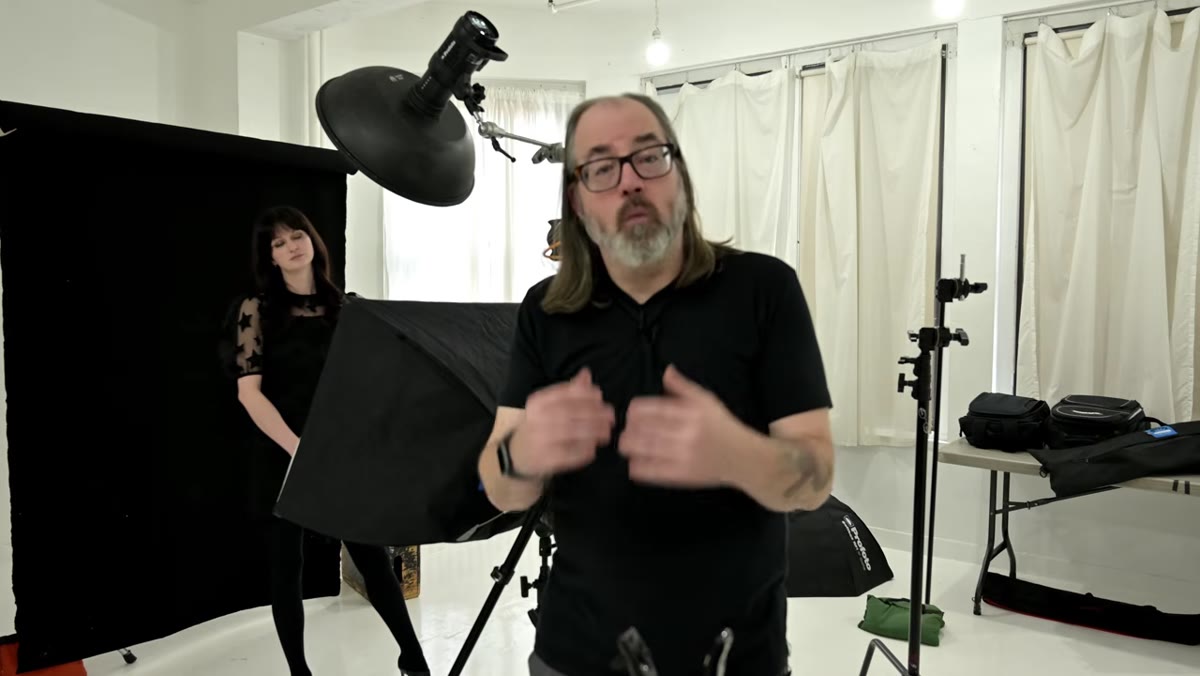 Beauty dish with grid positioned close above subject
Clamshell lighting isn’t a default setup you reach for every session. It’s a solution to a specific geometric problem. When your key light sits close and high, often a beauty dish with a grid for tight headshots, you lose the ability to angle a reflector into the scene without it appearing in frame. You also lose the option of tucking a small fill source on-axis, because the subject’s own face blocks the light path at that distance. When both of those workarounds disappear, a second light source below the subject becomes your best option for even, controlled fill.
Beauty dish with grid positioned close above subject
Clamshell lighting isn’t a default setup you reach for every session. It’s a solution to a specific geometric problem. When your key light sits close and high, often a beauty dish with a grid for tight headshots, you lose the ability to angle a reflector into the scene without it appearing in frame. You also lose the option of tucking a small fill source on-axis, because the subject’s own face blocks the light path at that distance. When both of those workarounds disappear, a second light source below the subject becomes your best option for even, controlled fill.
Step 2: Position the Key Light First
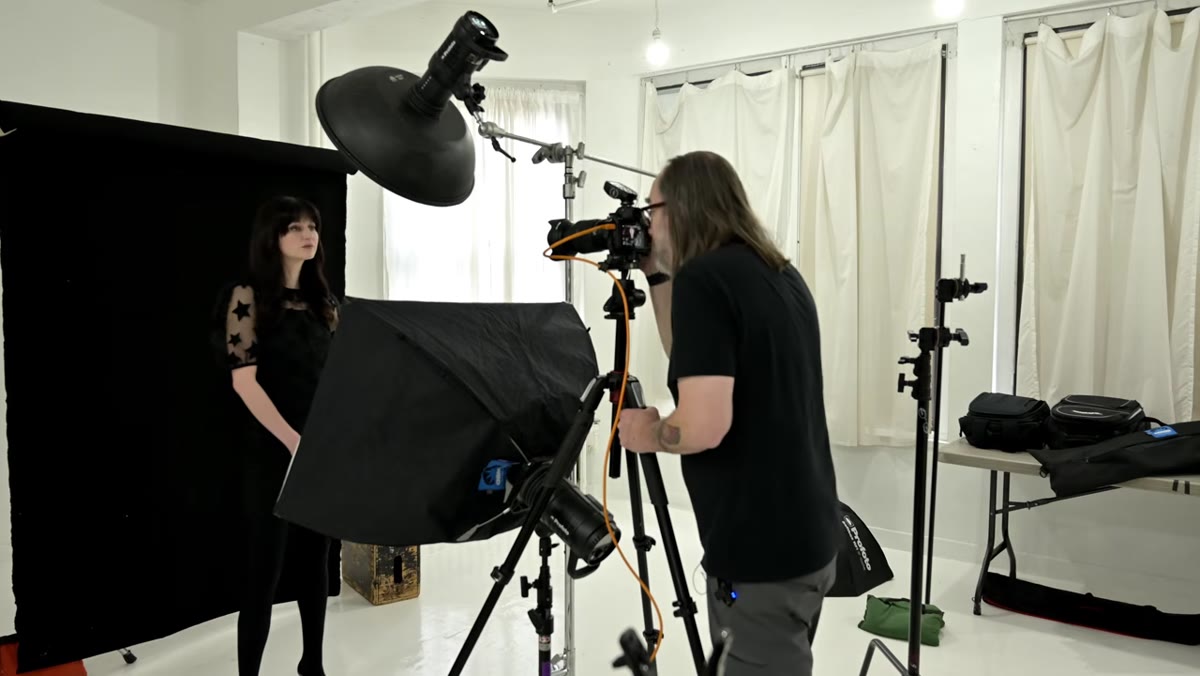 Beauty dish overhead with subject lit from above only
Before the fill light goes anywhere near the scene, your key needs to be locked in. Norton shoots the key alone, evaluates the exposure and the shadow fall, and only then introduces the fill. This is the discipline that separates clean studio work from muddy setups where you’re chasing problems you created by building everything at once. Get your beauty dish where you want it, dial in the exposure until you’re satisfied with what the key alone is doing, and record those settings. I keep a lighting journal on every shoot, and the key-only frame is always my reference point before I add anything.
Beauty dish overhead with subject lit from above only
Before the fill light goes anywhere near the scene, your key needs to be locked in. Norton shoots the key alone, evaluates the exposure and the shadow fall, and only then introduces the fill. This is the discipline that separates clean studio work from muddy setups where you’re chasing problems you created by building everything at once. Get your beauty dish where you want it, dial in the exposure until you’re satisfied with what the key alone is doing, and record those settings. I keep a lighting journal on every shoot, and the key-only frame is always my reference point before I add anything.
Step 3: Understand the Geometry of the Fill Light Position
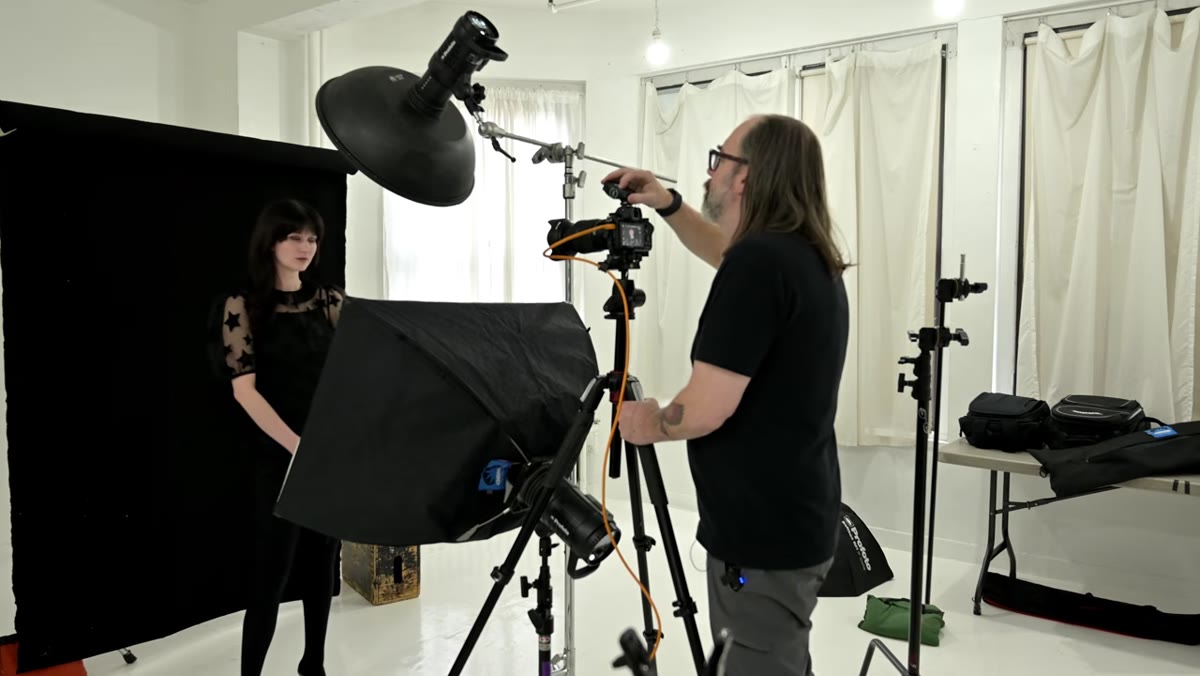
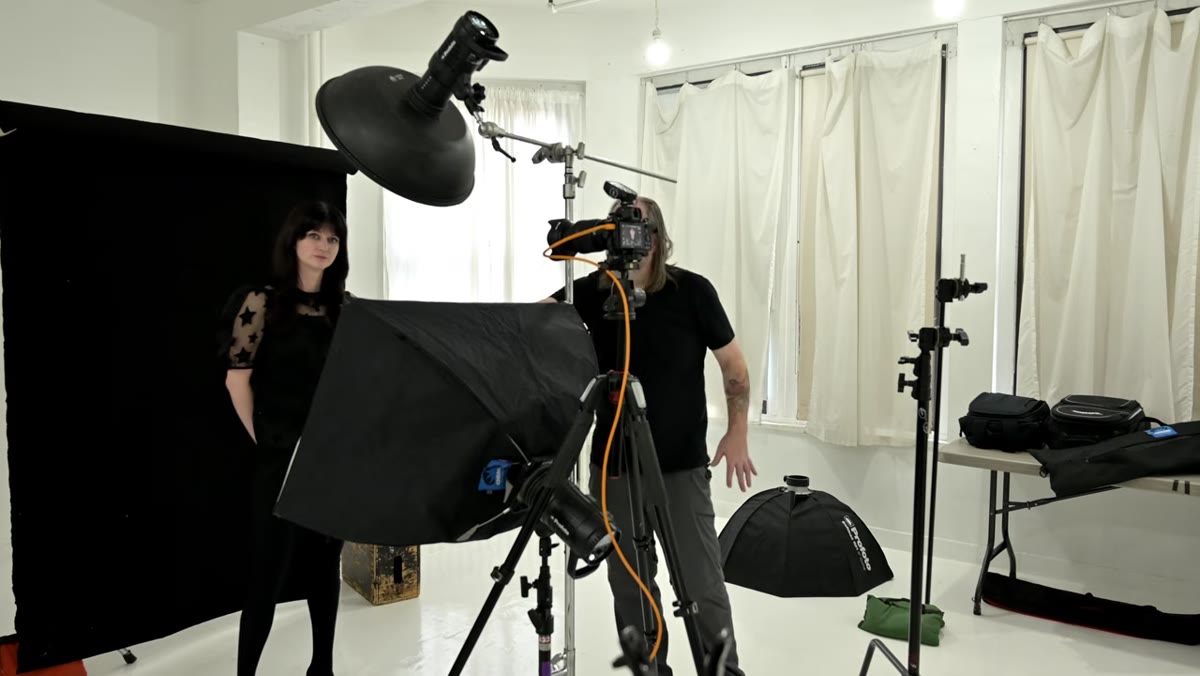 Softbox below positioned nearly flat, angled slightly upward
This is where most photographers make the mistake Norton specifically calls out. The instinct is to place the fill light directly under the subject’s chin, pointing straight up, the way you’d hold a reflector. But a reflector has to be positioned that way because you’re bouncing ambient or spill light back at the subject. A controlled light source is different. With a softbox below, you want the panel positioned nearly parallel to the floor, angled upward only slightly. The light spreads out of the softbox across a wide field, and that spread does the work. Pointing it straight up concentrates the light directly under the chin and gives you exactly the horror-movie shadow effect you’re trying to avoid.
Softbox below positioned nearly flat, angled slightly upward
This is where most photographers make the mistake Norton specifically calls out. The instinct is to place the fill light directly under the subject’s chin, pointing straight up, the way you’d hold a reflector. But a reflector has to be positioned that way because you’re bouncing ambient or spill light back at the subject. A controlled light source is different. With a softbox below, you want the panel positioned nearly parallel to the floor, angled upward only slightly. The light spreads out of the softbox across a wide field, and that spread does the work. Pointing it straight up concentrates the light directly under the chin and gives you exactly the horror-movie shadow effect you’re trying to avoid.
Think about where the shadows actually fall with your key light above. They land under the nose, under the chin, slightly into the eye sockets. You want the fill to wash those areas without creating new shadows of its own. A nearly flat softbox, positioned low and out in front of the subject rather than tucked underneath them, achieves that coverage without the harsh uplight.
Step 4: Shoot the Fill Light Alone to Verify Coverage
 Fill light only, face evenly lit with soft upward shadow
Before combining the two lights, fire the fill alone and evaluate what it’s doing to the face. Norton does this in the tutorial and it’s a step I never skip. What you’re looking for is relatively even illumination across the whole face, with only a soft, gradual shadow moving upward toward the hairline. If the shadow under the nose is stark and the chin is blowing out, the light is too steep. Pull it flatter. The solo fill frame should look strange but not ugly. Flat light, slightly uncanny, without hard shadows. That tells you the coverage area is where you need it.
Fill light only, face evenly lit with soft upward shadow
Before combining the two lights, fire the fill alone and evaluate what it’s doing to the face. Norton does this in the tutorial and it’s a step I never skip. What you’re looking for is relatively even illumination across the whole face, with only a soft, gradual shadow moving upward toward the hairline. If the shadow under the nose is stark and the chin is blowing out, the light is too steep. Pull it flatter. The solo fill frame should look strange but not ugly. Flat light, slightly uncanny, without hard shadows. That tells you the coverage area is where you need it.
Step 5: Set the Fill Two to Three Stops Under the Key
 Both lights combined, balanced clamshell result on subject
The exposure relationship between key and fill is what determines the final look. Norton works in TTL here and dials the fill down two stops from the key. He mentions wanting three stops ideally, which gives you a subtler fill that preserves more dimension in the face. Two stops is a reasonable starting point. At two stops, the fill is visible but not competing. At three stops, it’s doing quiet work, lifting the shadows just enough to keep detail in the darker areas without flattening the image. I prefer to work in manual on both heads once I’ve established a baseline, because TTL can shift on me between frames if the subject moves and the metering changes. But for dialing in the ratio quickly, TTL with exposure compensation is an efficient approach.
Both lights combined, balanced clamshell result on subject
The exposure relationship between key and fill is what determines the final look. Norton works in TTL here and dials the fill down two stops from the key. He mentions wanting three stops ideally, which gives you a subtler fill that preserves more dimension in the face. Two stops is a reasonable starting point. At two stops, the fill is visible but not competing. At three stops, it’s doing quiet work, lifting the shadows just enough to keep detail in the darker areas without flattening the image. I prefer to work in manual on both heads once I’ve established a baseline, because TTL can shift on me between frames if the subject moves and the metering changes. But for dialing in the ratio quickly, TTL with exposure compensation is an efficient approach.
Step 6: Evaluate the Combined Light and Adjust Ratio
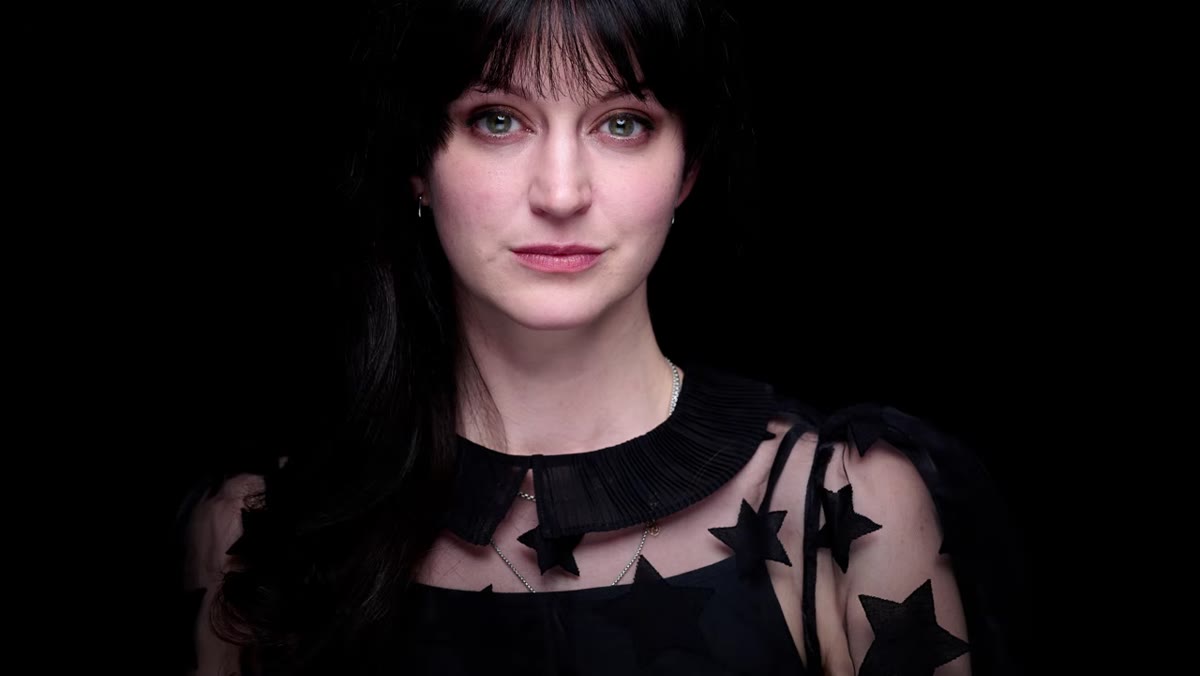 Final clamshell result showing butterfly shadow and even fill
With both lights firing, you’re looking for the butterfly shadow, that soft V-shape under the nose that’s the hallmark of a beauty setup, plus balanced fill under the chin and across the lower face. The result should not look flat. If it does, the fill is too bright. The face should still have depth and dimension from the key, with the fill acting as a quiet correction rather than a second key. Check the catchlights too. With clamshell you’ll get two: one from the dish above and one from the softbox below. That’s expected and considered attractive in beauty photography.
Final clamshell result showing butterfly shadow and even fill
With both lights firing, you’re looking for the butterfly shadow, that soft V-shape under the nose that’s the hallmark of a beauty setup, plus balanced fill under the chin and across the lower face. The result should not look flat. If it does, the fill is too bright. The face should still have depth and dimension from the key, with the fill acting as a quiet correction rather than a second key. Check the catchlights too. With clamshell you’ll get two: one from the dish above and one from the softbox below. That’s expected and considered attractive in beauty photography.
My Addition: Lock the Fill Head Position Physically
One thing the tutorial doesn’t address and that I’ve learned through trial and error: once you find the angle on that lower softbox, lock it physically and label the stand position on the floor with tape. I put masking tape marks on every stand position in my studio. The clamshell fill is especially easy to knock out of position between frames, and even a small upward tilt of that lower softbox changes the shadow quality noticeably. Spending thirty seconds securing the position saves you from mystery problems later in the shoot.
Clamshell lighting is not complicated, but the fill positioning is more precise than it looks. The single thing to carry from this is that your lower light should be spread out, nearly flat, lighting the face from across the space rather than from directly below. Get that geometry right, expose the fill two to three stops under the key, and the technique is straightforward.
Watch the full tutorial on YouTube to see Norton work through the setup live, including how the fill-only frame looks before he brings the key back in.
Comments (2)
Quality content like this is rare. Keep it up.
Really solid breakdown. This pairs perfectly with the workflows work I've been writing about.
Leave a Comment