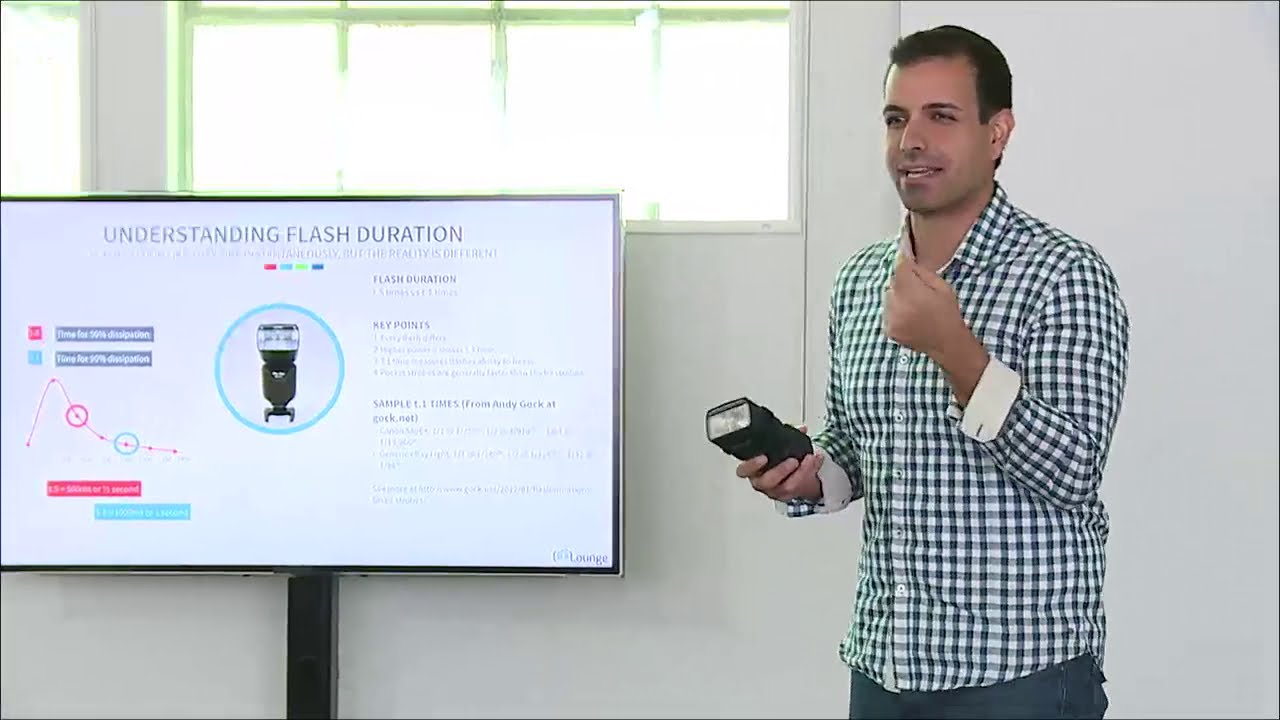
There’s a number buried in your flash’s spec sheet that most photographers never look at, and it’s quietly responsible for more soft, blurry images than any camera shake or missed focus. I spent years blaming myself for motion blur on full-power strobe shots before I understood what was actually happening inside the flash head. The spec sheet said my strobes were fast. My images said otherwise. It wasn’t until I sat down with this CreativeLive tutorial on flash duration that the whole thing finally clicked into a framework I could actually use on set.
Watch the full tutorial on YouTube
The tutorial is part of a larger CreativeLive course, and the instructor is upfront that flash duration is one of those concepts photographers often skip because it sounds technical. That instinct to skip it is exactly wrong. Once you understand what your flash is actually doing during a pop, it changes how you choose power settings, how you evaluate gear, and why that Broncolor pack your colleague keeps defending is worth every dollar. Here’s the walkthrough.
Step 1: Understand That a Flash Doesn’t Fire Instantly
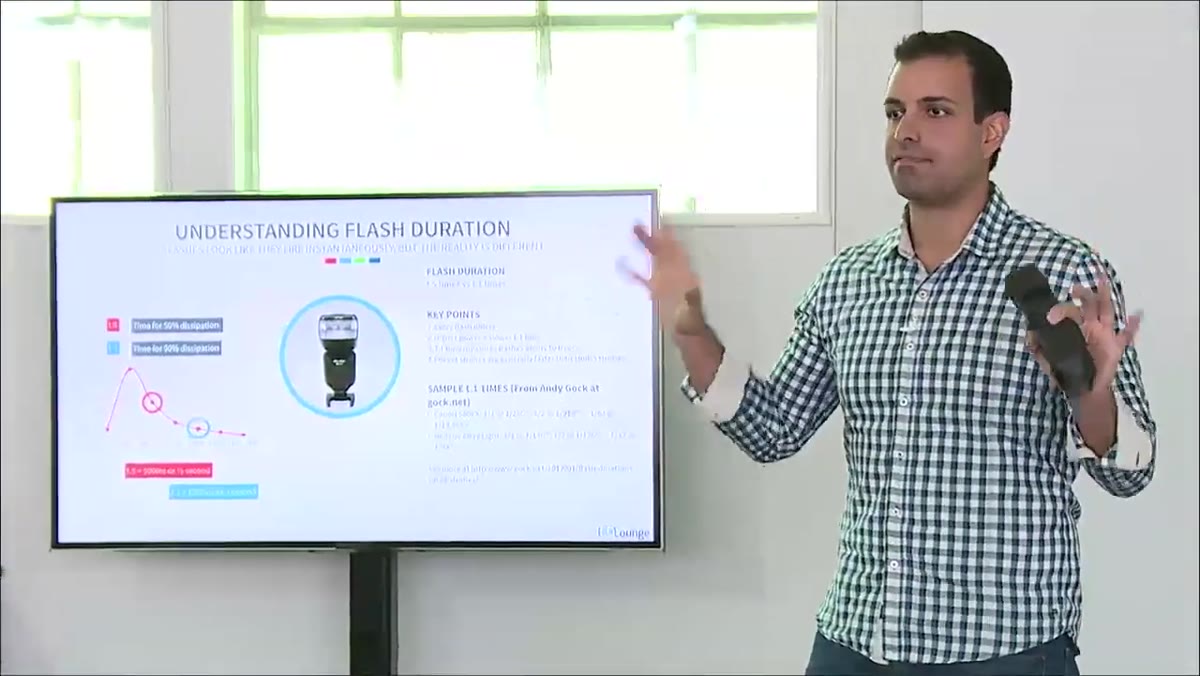 Instructor demonstrating a flash firing at full power
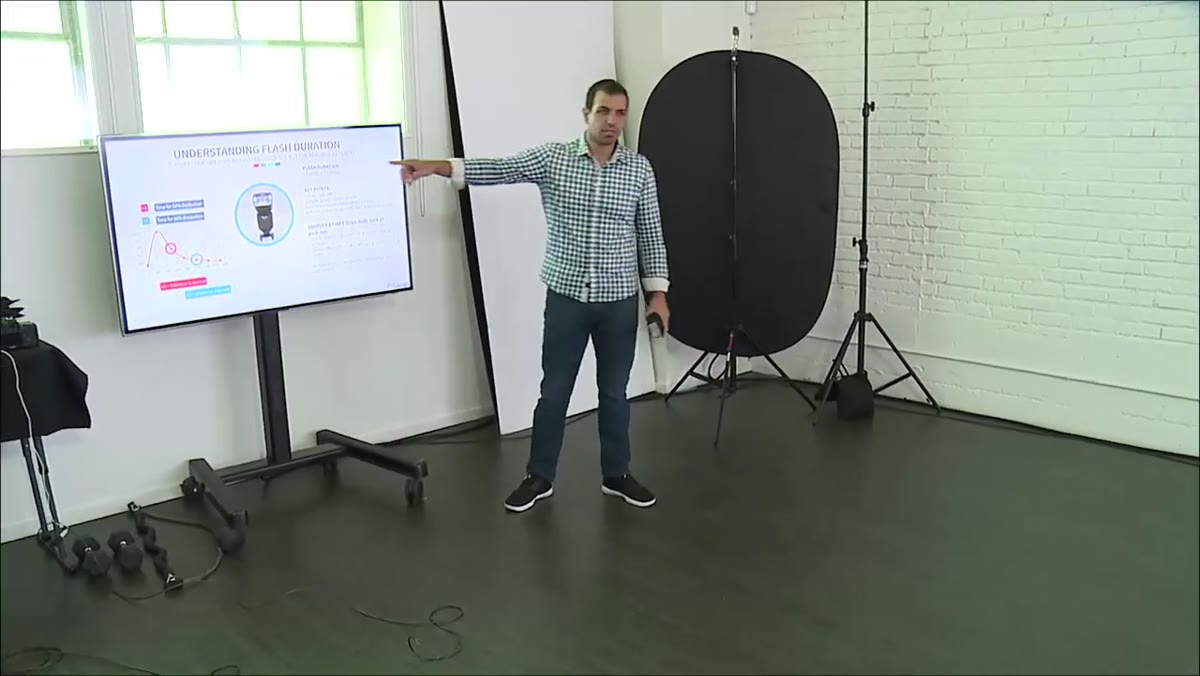
This is the piece that rewired how I think about flash. A strobe doesn’t simply fire and stop, the way a light switch clicks off. It builds up to a peak output, hits that peak, and then trails off back to zero. That trail is real, measurable light. The instructor demonstrates this by firing a strobe at full power and asking the room to watch what happens after the pop. Most people, myself included when I first noticed it, assume the fading glow is their eyes adjusting. It isn’t. The light is genuinely dimming over a measurable period of time. At lower power settings, this happens so quickly you won’t see it. At full power, you can watch it happen with your naked eye.
Instructor demonstrating a flash firing at full power
This is the piece that rewired how I think about flash. A strobe doesn’t simply fire and stop, the way a light switch clicks off. It builds up to a peak output, hits that peak, and then trails off back to zero. That trail is real, measurable light. The instructor demonstrates this by firing a strobe at full power and asking the room to watch what happens after the pop. Most people, myself included when I first noticed it, assume the fading glow is their eyes adjusting. It isn’t. The light is genuinely dimming over a measurable period of time. At lower power settings, this happens so quickly you won’t see it. At full power, you can watch it happen with your naked eye.
If your subject is moving during that fade, they’re still being exposed to light as they move. That’s your blur. Not camera shake, not missed focus. Residual flash output.
Step 2: Recognize the Cycle - Ramp Up, Peak, Trail Off
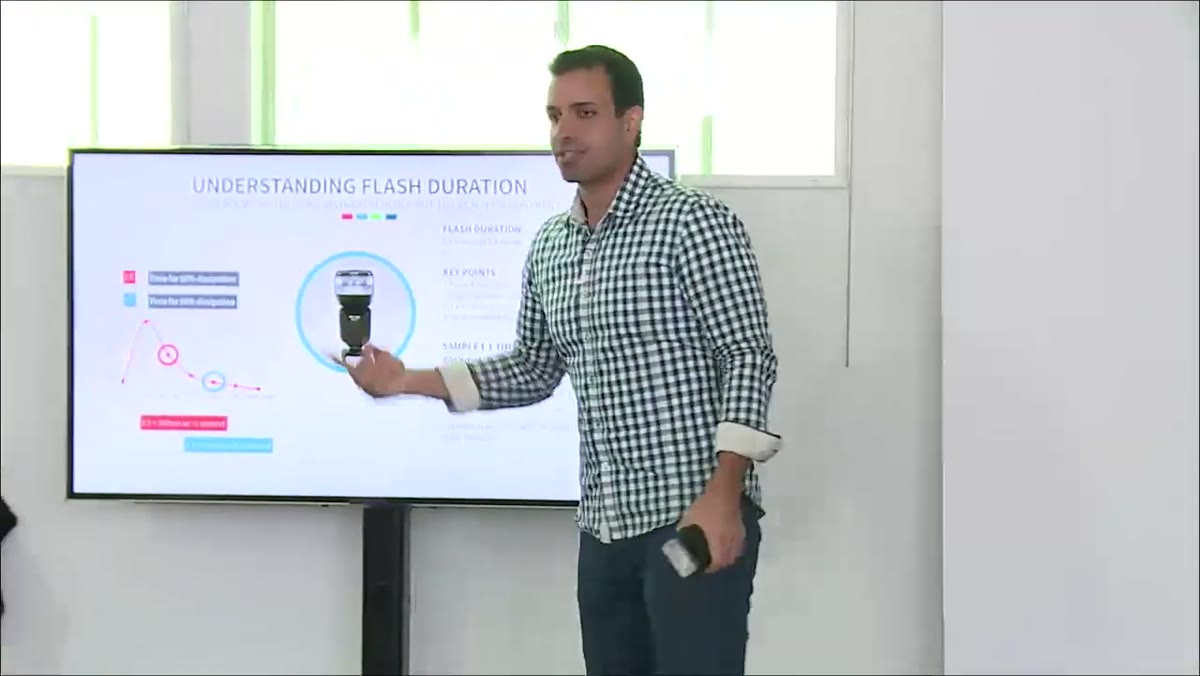 Instructor describing the flash power arc with hand gestures
Think of the flash’s output as a curve, not a spike. It ramps up from zero, hits its maximum output, and then curves back down. The audible pop you hear when a strobe fires corresponds to that peak moment. Everything after the pop is the tail of the curve, and that tail contains a meaningful amount of light. This matters most at full power settings, where the tail is longest. At lower power, say one-sixteenth, the entire curve happens so fast the tail is negligible. This is one reason I often shoot at reduced power when I need to freeze movement, even if it means adding a second light or opening my aperture a stop.
Instructor describing the flash power arc with hand gestures
Think of the flash’s output as a curve, not a spike. It ramps up from zero, hits its maximum output, and then curves back down. The audible pop you hear when a strobe fires corresponds to that peak moment. Everything after the pop is the tail of the curve, and that tail contains a meaningful amount of light. This matters most at full power settings, where the tail is longest. At lower power, say one-sixteenth, the entire curve happens so fast the tail is negligible. This is one reason I often shoot at reduced power when I need to freeze movement, even if it means adding a second light or opening my aperture a stop.
Keeping a note of this in my lighting journal has saved me more than once on fashion work where the model is mid-spin or a sleeve is trailing. You dial down the power before you chase the shutter speed.
Step 3: Learn What T5 Actually Measures
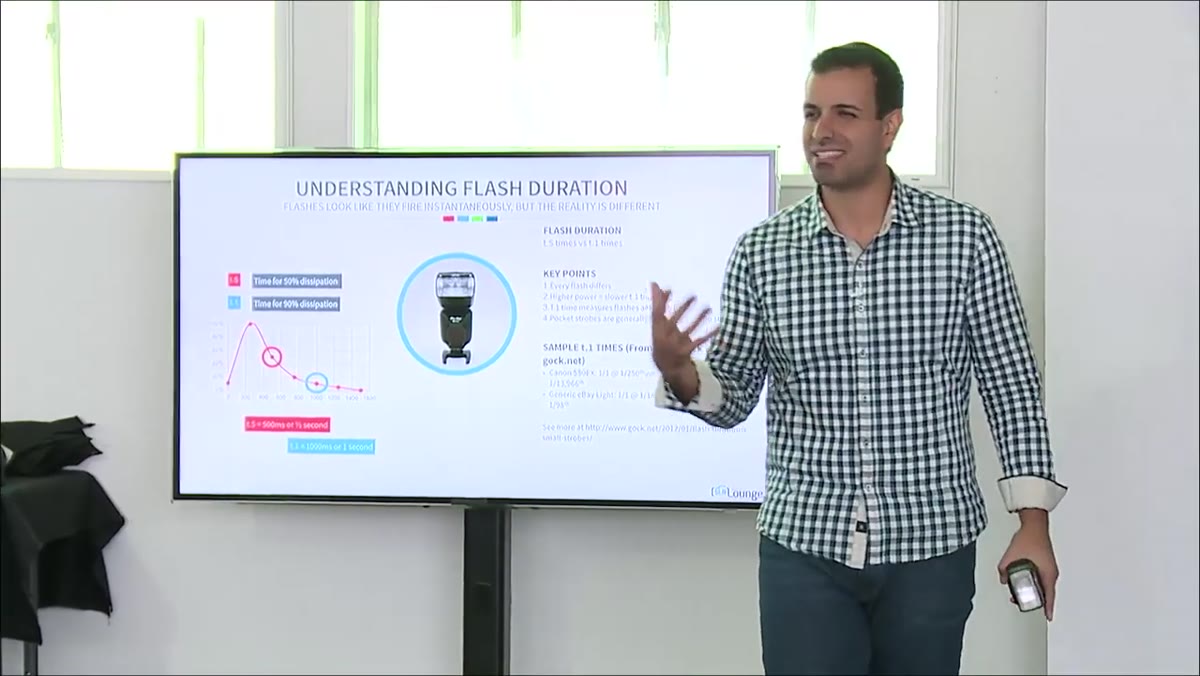 Instructor explaining T5 time definition on screen
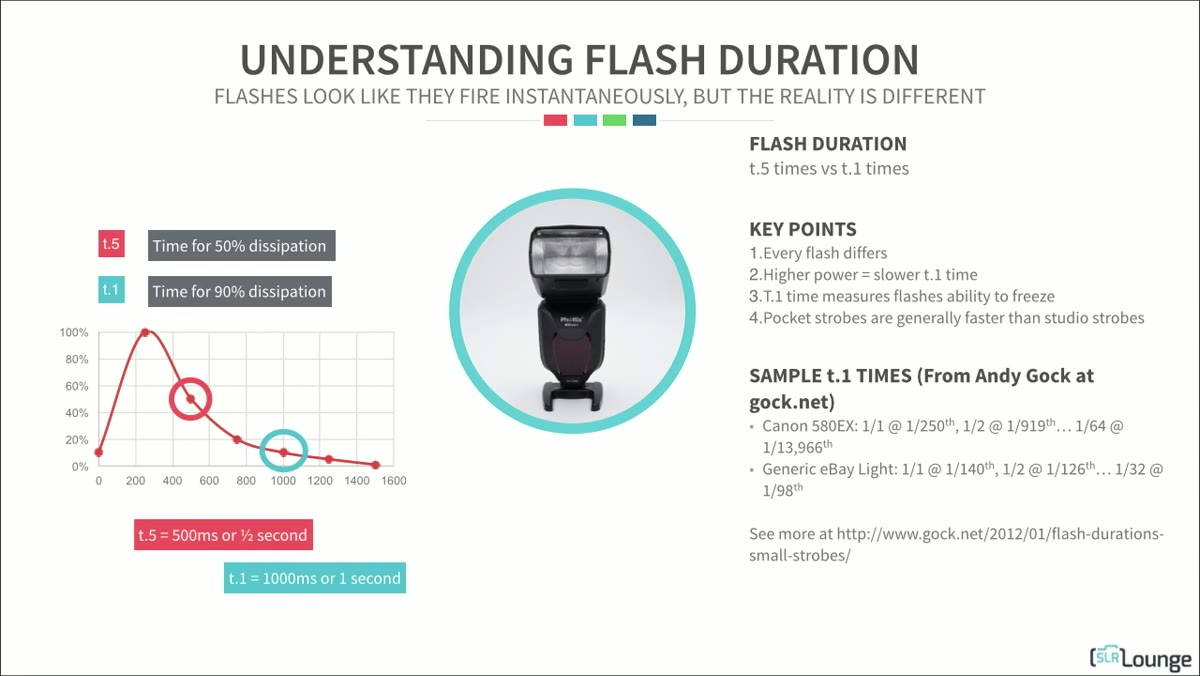
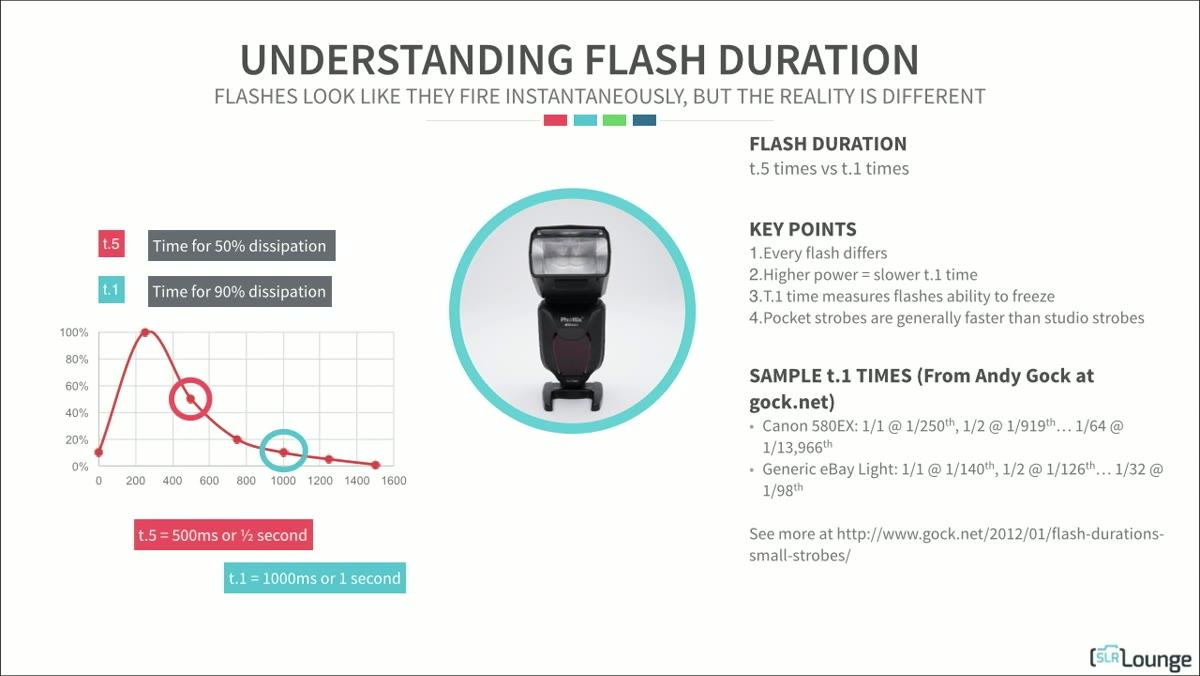
Here’s where manufacturers earn their marketing budgets. Many flash specs advertise a T5 time as the measure of flash duration. The T5 time tells you how long it takes for the flash output to fall to 50 percent of its peak. Half power. That sounds fast, but 50 percent of a full-power studio strobe is still a substantial amount of light continuing to hit your subject after the peak. If your subject is moving at the moment that trailing 50 percent is landing, you’re recording motion blur on top of your sharp peak exposure.
Instructor explaining T5 time definition on screen
Here’s where manufacturers earn their marketing budgets. Many flash specs advertise a T5 time as the measure of flash duration. The T5 time tells you how long it takes for the flash output to fall to 50 percent of its peak. Half power. That sounds fast, but 50 percent of a full-power studio strobe is still a substantial amount of light continuing to hit your subject after the peak. If your subject is moving at the moment that trailing 50 percent is landing, you’re recording motion blur on top of your sharp peak exposure.
When a spec sheet says “flash duration: 1/1000s” without specifying T1 or T5, assume they’re giving you the T5 figure. It’s the more flattering number, and it’s the less useful one.
Step 4: Use T1 as Your Real Benchmark
 Instructor clarifying the T1 measurement standard
The T1 time is the measurement that actually tells you whether a flash can freeze motion. It measures how long the flash takes to dissipate 90 percent of its output. That remaining 10 percent is close enough to zero that it won’t register meaningfully on most subjects. When you’re comparing two flashes and trying to figure out which one will freeze a water splash or a fabric throw, the T1 time is the only number worth comparing.
Instructor clarifying the T1 measurement standard
The T1 time is the measurement that actually tells you whether a flash can freeze motion. It measures how long the flash takes to dissipate 90 percent of its output. That remaining 10 percent is close enough to zero that it won’t register meaningfully on most subjects. When you’re comparing two flashes and trying to figure out which one will freeze a water splash or a fabric throw, the T1 time is the only number worth comparing.
The instructor is blunt about this: manufacturers often don’t publish T1 times because they’re significantly longer than T5 times, and longer looks worse. If a brand doesn’t publish the T1 spec, ask them directly or look for independent lab tests. I’ve started keeping a small reference card in my kit bag that lists the T1 times for each strobe I own at various power settings. It sounds obsessive, and it probably is, but it’s the kind of obsessive that shows up in sharp images.
Step 5: Understand How Power Level Affects Duration
 Instructor stating higher power means slower T1 time
The rule is consistent across almost every flash on the market: higher power means longer flash duration. When you push a strobe to full output, you’re asking the capacitor to dump more energy, and that energy takes more time to complete its cycle. A flash that has an excellent T1 time at quarter power may perform much more like a constant light source at full power, where the trailing output stretches long enough to register motion.
Instructor stating higher power means slower T1 time
The rule is consistent across almost every flash on the market: higher power means longer flash duration. When you push a strobe to full output, you’re asking the capacitor to dump more energy, and that energy takes more time to complete its cycle. A flash that has an excellent T1 time at quarter power may perform much more like a constant light source at full power, where the trailing output stretches long enough to register motion.
This is the core reason why high-end power packs from manufacturers like Broncolor command serious prices. Their engineering maintains fast T1 times even at high power settings. For most location work or portrait sessions, this isn’t a crisis. But if you’re shooting commercial work with moving subjects under high output - product photography with falling liquid, athletic campaigns, anything with fabric movement - a slow T1 time at full power will cost you frames.
Step 6: Compare Pocket Strobes to Studio Strobes
 Instructor comparing pocket strobes versus studio strobes
Speedlights and small battery-powered strobes generally have faster flash durations than large studio monolights and pack systems. The tradeoff is output: they simply don’t put out as much light. This is a useful calibration when you’re building a kit or renting for a specific job. For a beauty shoot where your subject is relatively still and you need maximum control over light shaping, a slower studio strobe at moderate power is a non-issue. For an athletic or movement-focused shoot, a system with documented fast T1 times is worth prioritizing, even if it means renting a pack you don’t own.
Instructor comparing pocket strobes versus studio strobes
Speedlights and small battery-powered strobes generally have faster flash durations than large studio monolights and pack systems. The tradeoff is output: they simply don’t put out as much light. This is a useful calibration when you’re building a kit or renting for a specific job. For a beauty shoot where your subject is relatively still and you need maximum control over light shaping, a slower studio strobe at moderate power is a non-issue. For an athletic or movement-focused shoot, a system with documented fast T1 times is worth prioritizing, even if it means renting a pack you don’t own.
What I’ve Added From My Own Work
When I’m preparing for any shoot that involves significant subject movement, I run a quick diagnostic the day before. I set each strobe to the power level I plan to use on the job, fire at a moving target (I use my own hand waving through frame), and check the result at 100 percent on my monitor. If I see any smearing at the planned power setting, I drop power and compensate elsewhere in the exposure triangle. It takes ten minutes and it’s caught potential problems on commercial jobs more than once. The spec sheet tells you what the flash can do in ideal lab conditions. Your own test tells you what it actually does in your setup.
The single most important takeaway here is this: when a manufacturer advertises flash duration, verify whether they’re quoting T1 or T5, because those numbers can differ by a factor of three or more, and only one of them predicts your ability to freeze motion. Every time you’re evaluating a new strobe, that’s the question to ask first.
Watch the full tutorial on YouTube - the full CreativeLive course goes deeper into how this interacts with sync speed and ambient light control, and it’s worth the time if you’re doing any serious studio work.
Comments
Leave a Comment