I used to think natural light was a philosophy. Somewhere in my early career I convinced myself that reaching for a flash unit was an admission of failure, like I couldn’t read a scene well enough to work with what was there. That belief cost me jobs. It definitely cost me a ruined editorial shoot early on where I misread the color temperature of the ambient light entirely and delivered a full gallery with skin tones that looked like the subjects had been airbrushed in a submarine. Flash wouldn’t have saved me from that mistake, but understanding light control would have.
That’s why this CreativeLive tutorial landed so cleanly for me when I first watched it. Watch the full tutorial on YouTube — it runs fast and it doesn’t waste your time. The presenter frames flash not as a rescue tool but as a control system. Four variables: amount, direction, quality, and color. Once I started thinking in those terms instead of “should I use flash or not,” my shooting changed. Here’s how to work through each one.
Step 1: Understand Flash as a Control System, Not a Light Source
 Presenter listing four flash control categories on screen
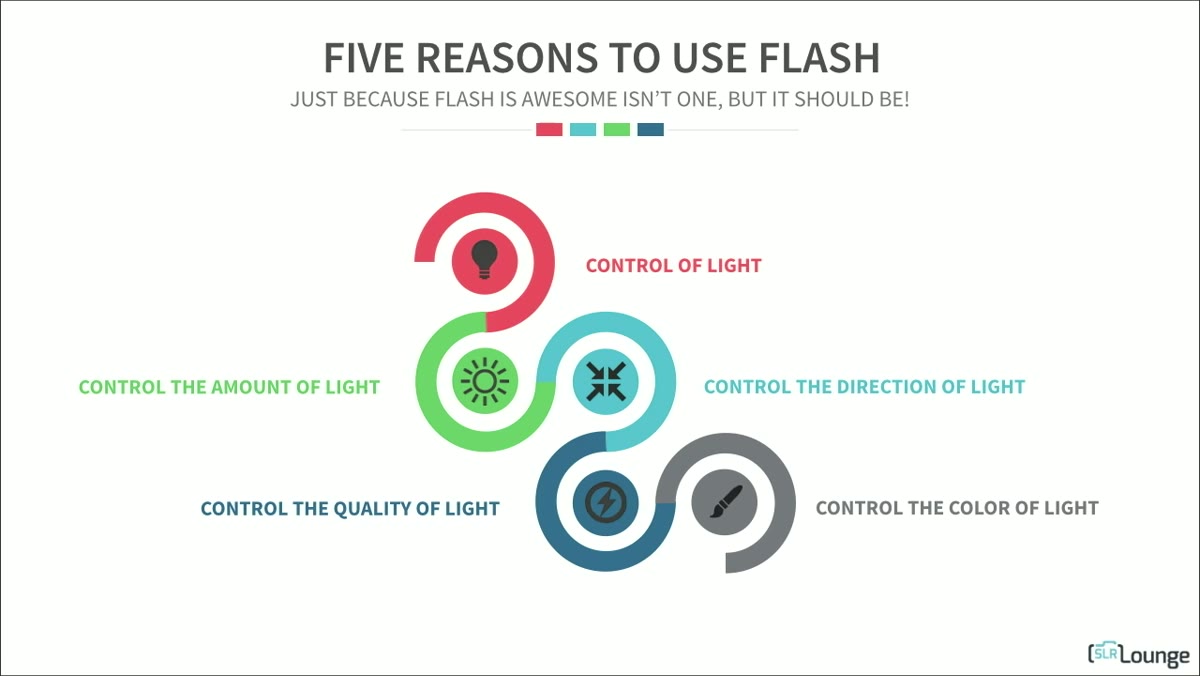
Most photographers treat flash as binary. Either the scene needs it or it doesn’t. The more useful frame is that flash gives you four independent levers you can push or pull regardless of what the ambient light is doing. Amount, direction, quality, color. Each one is a separate decision. You don’t have to change all four at once, and often the most effective shots come from adjusting only one while leaving the others to work with what’s already there.
Presenter listing four flash control categories on screen
Most photographers treat flash as binary. Either the scene needs it or it doesn’t. The more useful frame is that flash gives you four independent levers you can push or pull regardless of what the ambient light is doing. Amount, direction, quality, color. Each one is a separate decision. You don’t have to change all four at once, and often the most effective shots come from adjusting only one while leaving the others to work with what’s already there.
Before you even pick up a flash unit, look at your scene and run through those four categories. Ask which one is actually failing you. That diagnostic habit alone will make you faster and more deliberate on set.
Step 2: Use Flash Amount to Lift, Fill, or Overpower
 Side-by-side comparison of subject with and without flash lift
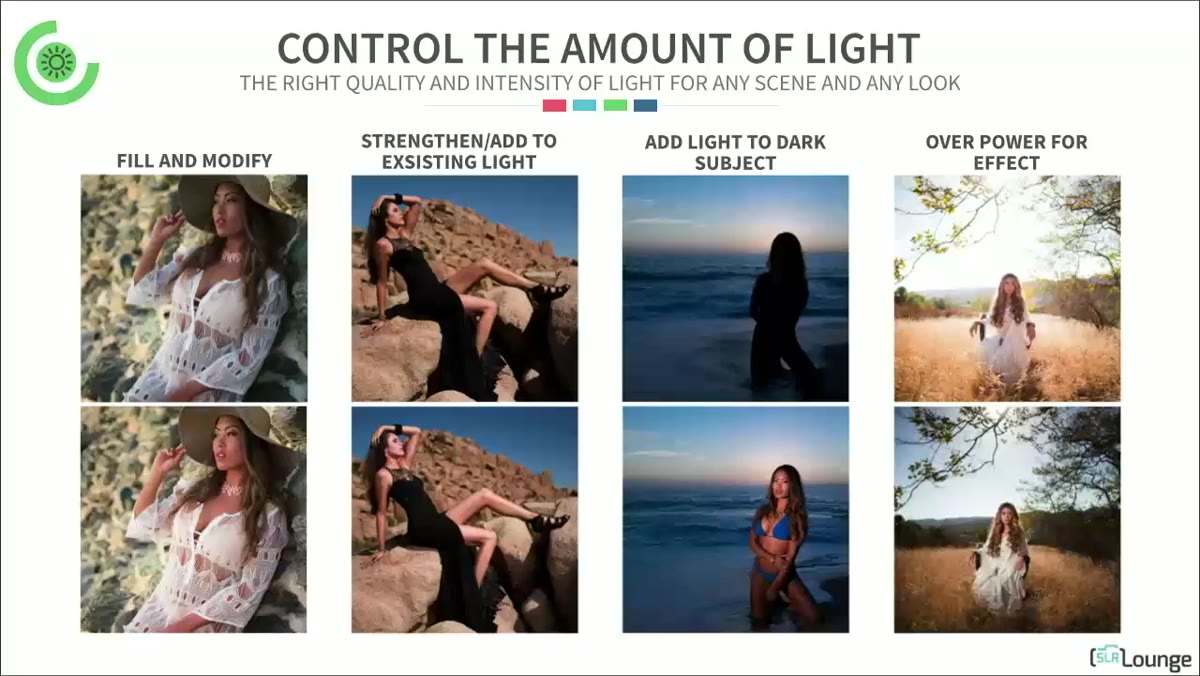
The amount control covers a wider range than most people use. At the low end, you’re talking about fill flash: adding just enough light to open up shadows without the image reading as artificially lit. The tutorial shows this clearly with a before-and-after where the subject simply “lifts” off the background. No dramatic difference, no obvious flash signature. Just a subject that reads as present in the frame instead of swallowed by it.
Side-by-side comparison of subject with and without flash lift
The amount control covers a wider range than most people use. At the low end, you’re talking about fill flash: adding just enough light to open up shadows without the image reading as artificially lit. The tutorial shows this clearly with a before-and-after where the subject simply “lifts” off the background. No dramatic difference, no obvious flash signature. Just a subject that reads as present in the frame instead of swallowed by it.
At the high end, you can dial the flash up past the ambient exposure entirely and effectively overpower the sun. This is useful for midday outdoor portraits where you want a darker, more dramatic sky behind your subject. Set your shutter speed to sync speed, expose for the background at minus one or two stops, then bring the subject back up with flash power. It’s a controllable look that you cannot fake in post without significant effort.
Step 3: Redirect Light With a Bounce, Even On-Camera
 On-camera flash bouncing off reflector to subject’s side
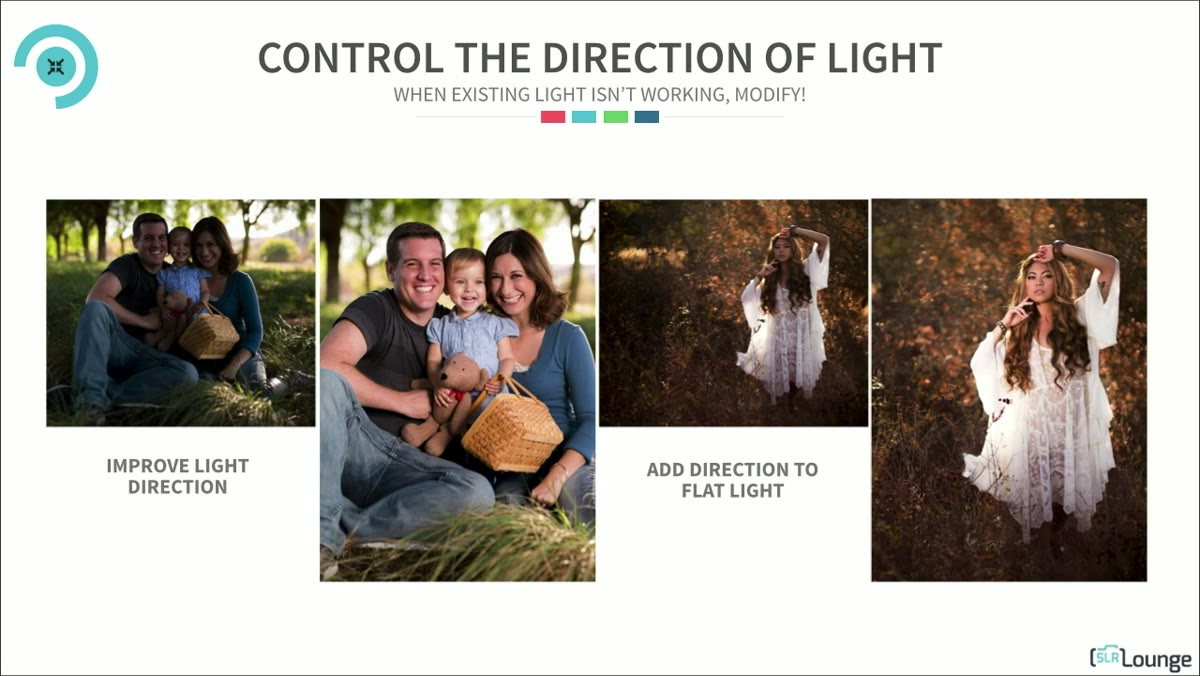
Direction is where a lot of photographers give up on flash too early. They try direct on-camera flash, get flat and unflattering results, and decide flash isn’t for them. But on-camera doesn’t mean pointed straight at your subject. In the tutorial, the presenter demonstrates bouncing an on-camera flash off a reflector held to the side, redirecting the light so it hits the subject at an angle rather than head-on.
On-camera flash bouncing off reflector to subject’s side
Direction is where a lot of photographers give up on flash too early. They try direct on-camera flash, get flat and unflattering results, and decide flash isn’t for them. But on-camera doesn’t mean pointed straight at your subject. In the tutorial, the presenter demonstrates bouncing an on-camera flash off a reflector held to the side, redirecting the light so it hits the subject at an angle rather than head-on.
This is something I do constantly in run-and-gun situations where I can’t set up a full modifier rig. A V-flat or even a white foam core panel propped up on a light stand gives you a bounce surface you can reposition quickly. The flash stays on the camera, the light behaves like it’s coming from a completely different source. The direction of the catch lights in your subject’s eyes will tell you immediately whether it’s working.
Step 4: Match Light Quality to the Look You’re After
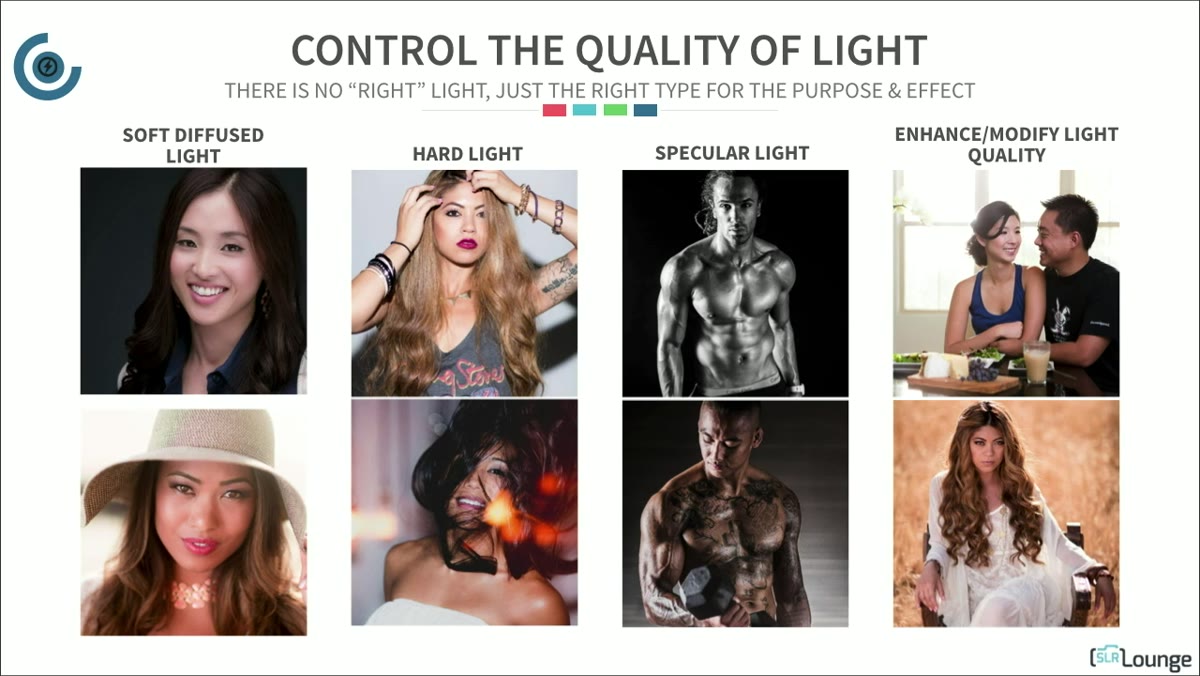 Comparison of soft diffused light versus hard direct flash
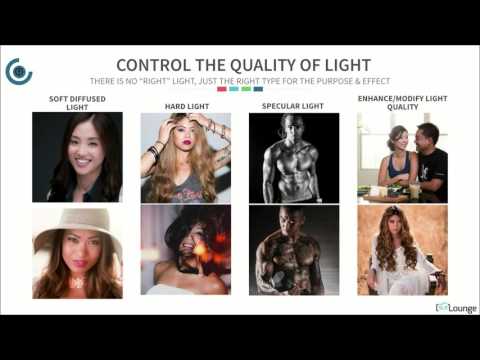
There is no such thing as the wrong light quality. There is a mismatch between quality and intent, and that’s a different problem. Soft, diffused light through a large modifier is flattering for beauty and portrait work because it wraps around the subject and minimizes texture. Hard, direct flash creates strong shadows and pronounced features, which reads as dramatic or editorial. Specular light emphasizes surface texture, which can be useful for product work or any shot where material quality matters.
Comparison of soft diffused light versus hard direct flash
There is no such thing as the wrong light quality. There is a mismatch between quality and intent, and that’s a different problem. Soft, diffused light through a large modifier is flattering for beauty and portrait work because it wraps around the subject and minimizes texture. Hard, direct flash creates strong shadows and pronounced features, which reads as dramatic or editorial. Specular light emphasizes surface texture, which can be useful for product work or any shot where material quality matters.
The mistake is defaulting to soft light because it feels safe. Hard light used deliberately is a creative choice. Direct flash can look intentional and striking when the image is designed around it. Know which quality serves the shot before you start positioning equipment.
Step 5: Use Gels for Color Correction and Stylistic Control
 Photographer adding orange gel to flash unit on location
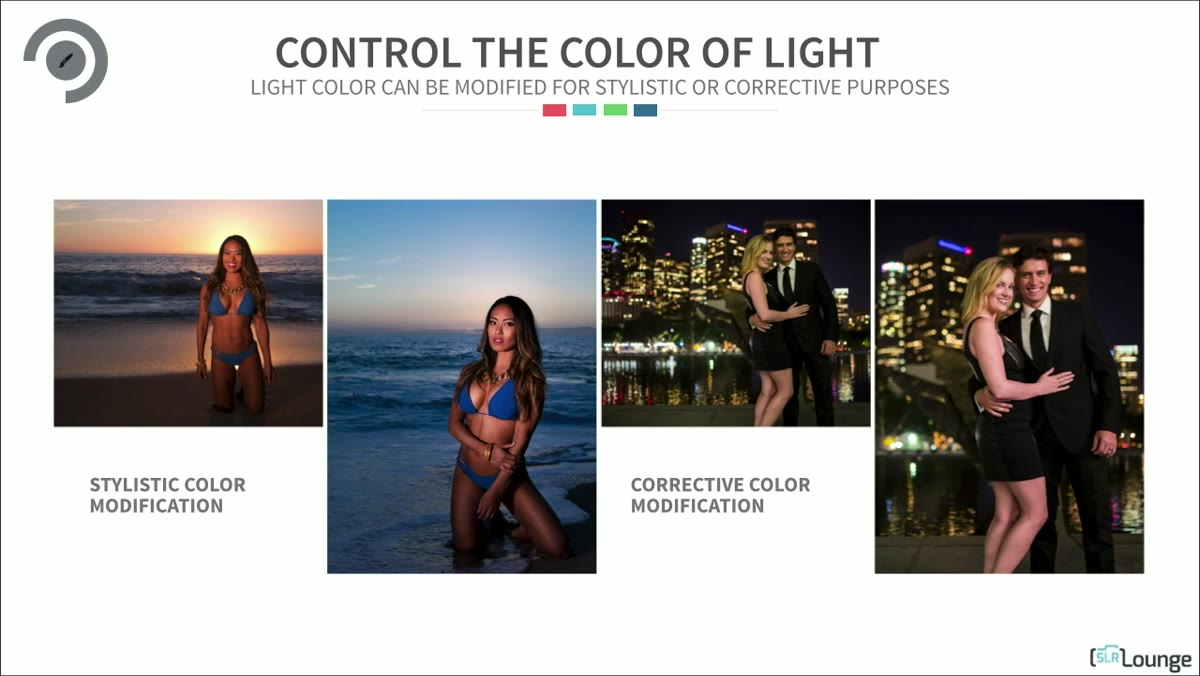
Gels are where flash starts to feel almost like color grading in-camera. The tutorial covers two scenarios: corrective and stylistic. Corrective gelling means matching your flash output to the color temperature of the ambient light. If you’re shooting inside a building with green-biased fluorescent overhead lights, your flash is going to fight that ambient and create two-toned skin. A green gel on the flash brings it into alignment, and then you correct the whole image in post as one unified color cast rather than trying to fix two competing sources.
Photographer adding orange gel to flash unit on location
Gels are where flash starts to feel almost like color grading in-camera. The tutorial covers two scenarios: corrective and stylistic. Corrective gelling means matching your flash output to the color temperature of the ambient light. If you’re shooting inside a building with green-biased fluorescent overhead lights, your flash is going to fight that ambient and create two-toned skin. A green gel on the flash brings it into alignment, and then you correct the whole image in post as one unified color cast rather than trying to fix two competing sources.
Stylistic gelling is more deliberate. The tutorial shows a technique where a gel shifts the background into deep blue while skin tone stays clean. This works because the background is lit only by ambient and the subject is lit only by the gelled or ungelled flash. Separation between light sources lets you control them independently. It’s a simple setup that produces a look that reads as expensive and intentional.
Step 6: Dismiss the Myths That Are Keeping You Off Flash
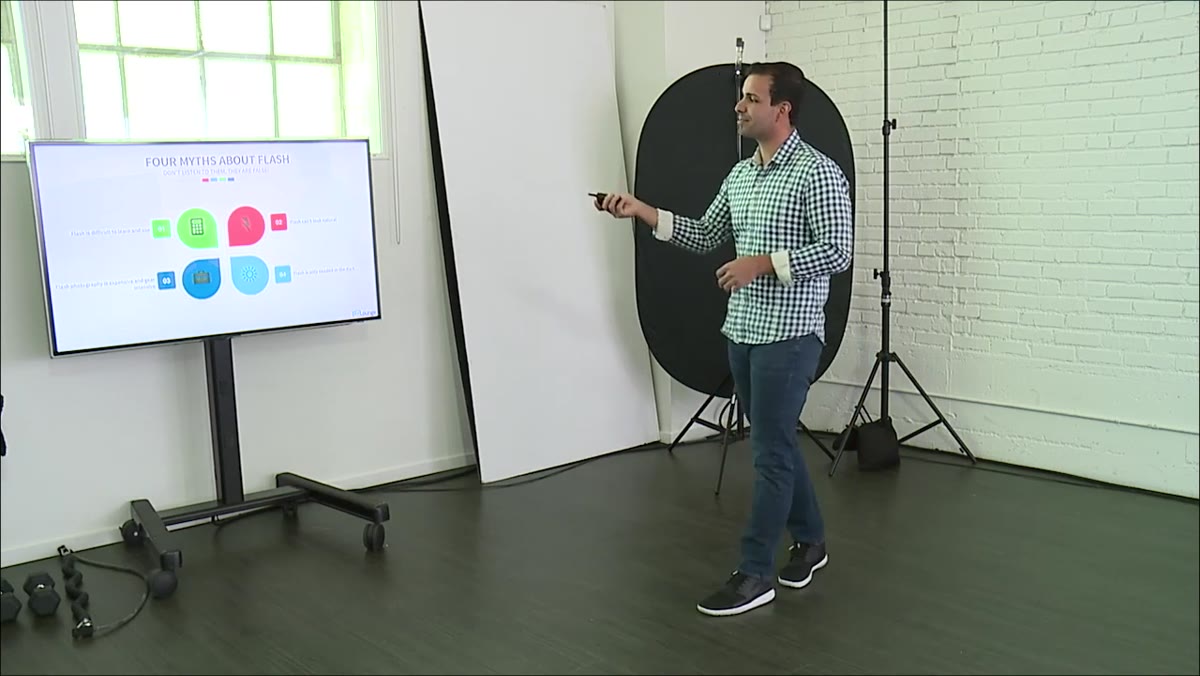 Slide listing common flash myths as false
Flash is too difficult. Flash always looks fake. Flash photography is gear-intensive and expensive. These are the three objections the tutorial addresses directly, and they’re worth taking seriously because they’re partially true and mostly wrong. Flash does have a learning curve, but it’s built on a small number of principles that repeat across every setup. Once you understand how aperture controls flash exposure and shutter speed controls ambient exposure, you have the core of it.
Slide listing common flash myths as false
Flash is too difficult. Flash always looks fake. Flash photography is gear-intensive and expensive. These are the three objections the tutorial addresses directly, and they’re worth taking seriously because they’re partially true and mostly wrong. Flash does have a learning curve, but it’s built on a small number of principles that repeat across every setup. Once you understand how aperture controls flash exposure and shutter speed controls ambient exposure, you have the core of it.
The “expensive” objection has the most truth to it at the high end, but a single speedlight and a medium-sized softbox will handle the majority of portrait and small product work. I’ve watched photographers with that exact kit outshoot people with full Profoto rigs because they understood what they were controlling and why.
What I’d Add From My Own Shooting
I keep a lighting journal where I sketch every setup from every shoot, including the ones that didn’t work. The most useful thing I’ve added to that habit is noting which of the four controls I was primarily adjusting on each shot. That single habit has made me faster at diagnosing problems on set. When something looks wrong, I don’t troubleshoot the whole setup. I run through the four controls in order: amount, direction, quality, color. Nine times out of ten the problem isolates to one of them, and fixing that one thing solves it.
The four-control framework from this tutorial is not a beginner concept. It’s the underlying structure of how experienced photographers think about every light they place. Start using that language now, even if you’re still working with a single speedlight, and your decision-making on set will sharpen faster than any new piece of gear will ever make it.
The single most important idea here: flash is a control system, and each variable is independent. Learn to move one at a time. Watch the full tutorial on YouTube to see these techniques demonstrated in real setups with real results.
Comments (3)
This saved me so much time on my last edit. Wish I'd found this sooner.
This should be required reading for anyone starting out.
This is fantastic. I've been recommending this approach to my readers too.
Leave a Comment