
Newborn photography sits in a category of its own. The subjects can’t take direction, they startle at sudden movement, and the margin for error on safety is zero. For most of my career I’ve focused on fashion and beauty work, where the lighting puzzles are technical and the subjects can tell me when something is uncomfortable. Newborns are the opposite on every count. So when I started getting requests from clients who wanted environmental newborn portraits alongside their brand family campaigns, I knew I needed to learn from someone who had built a real system around this work.
In this CreativeLive tutorial, Watch the full tutorial on YouTube, Kelly Brown walks through what she calls flow posing - a method where each position transitions into the next rather than fully resettling the baby between shots. The efficiency is obvious, but the deeper value is that the baby stays in a continuous state of comfort and security throughout the session. Brown treats every adjustment as a conversation with the baby’s body, reading resistance and response before committing to a new position. That philosophy transferred immediately to how I think about any subject who can’t verbally communicate, including sleeping portrait clients and infants in commercial work.
The tutorial is quiet and methodical, which is exactly what makes it useful. There are no dramatic reveals. There is just a photographer solving small problems one at a time, and explaining her reasoning as she goes.
Step 1: Orient the Baby to Your Light Source First
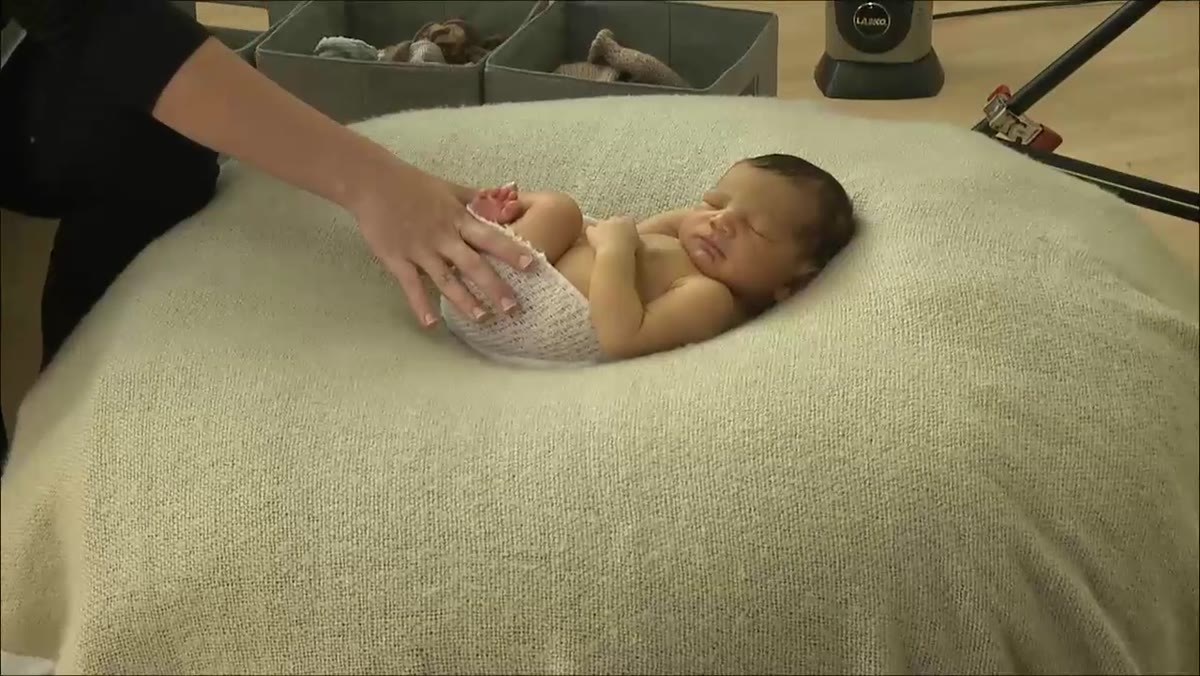 Kelly Brown turning newborn toward window light source
Before Brown makes any posing decision, she establishes her relationship to the light. She identifies the window as her primary source and orients the baby toward it. This is the same instinct I follow in every studio setup - I label my key light with masking tape before I put a subject in the space, so there’s no ambiguity about where the light is falling when I start working. With natural window light you don’t get to reposition the source, so the baby has to come to the light rather than the other way around.
Kelly Brown turning newborn toward window light source
Before Brown makes any posing decision, she establishes her relationship to the light. She identifies the window as her primary source and orients the baby toward it. This is the same instinct I follow in every studio setup - I label my key light with masking tape before I put a subject in the space, so there’s no ambiguity about where the light is falling when I start working. With natural window light you don’t get to reposition the source, so the baby has to come to the light rather than the other way around.
Brown also makes a practical concession here: she adjusts the baby’s orientation slightly to improve the camera angle for her audience, while noting that the light quality stays strong either way. That kind of flexibility, knowing which variable you can move and which you can’t, is a mark of someone who has worked in enough different spaces to understand what actually matters.
Step 2: Secure the Wrap Before Transitioning
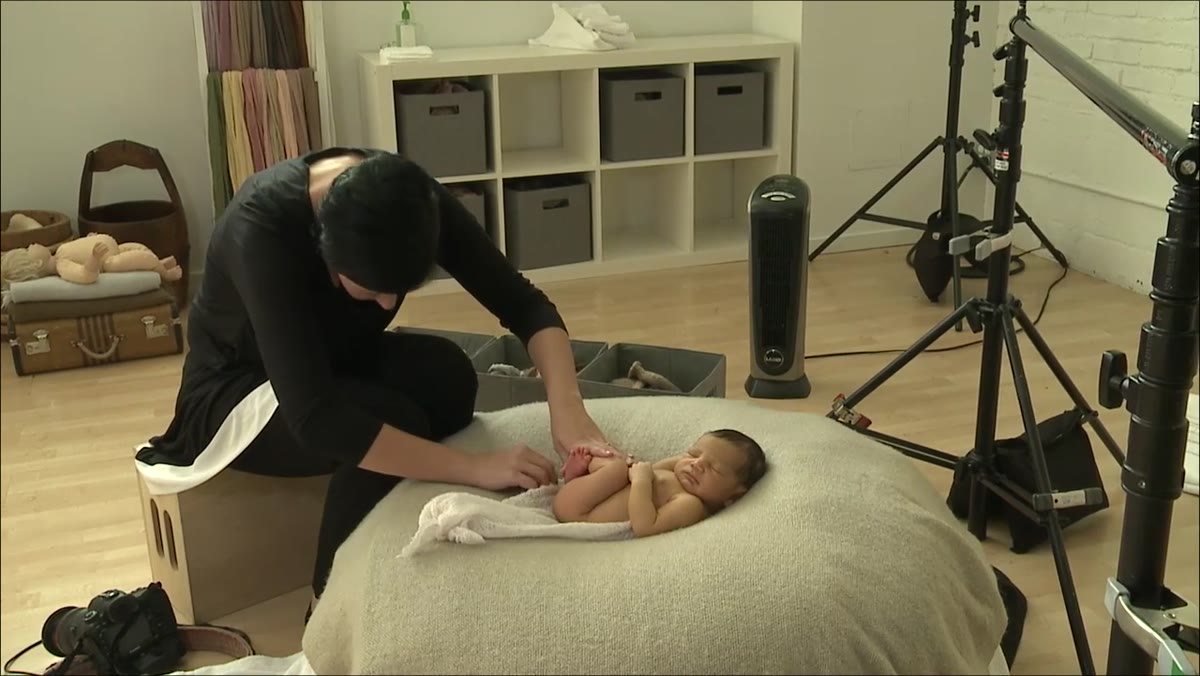 Kelly pulling cloth wrap smooth before repositioning baby
Before Brown physically moves the baby into a new position, she manages the wrap. She pulls the fabric smooth and adjusts it so that the transition won’t create bunching, pulling, or fabric that ends up in the wrong place mid-move. This step looks like housekeeping, but it is actually structural. A wrap that catches or pulls during a turn will cause the baby to startle, and a startled newborn means starting the settling process from scratch.
Kelly pulling cloth wrap smooth before repositioning baby
Before Brown physically moves the baby into a new position, she manages the wrap. She pulls the fabric smooth and adjusts it so that the transition won’t create bunching, pulling, or fabric that ends up in the wrong place mid-move. This step looks like housekeeping, but it is actually structural. A wrap that catches or pulls during a turn will cause the baby to startle, and a startled newborn means starting the settling process from scratch.
Think of this the way you would think about flagging a light before you reposition it. You don’t carry a hot head across the studio and then deal with the spill. You solve the problem before it becomes a problem.
Step 3: Move the Baby in One Continuous, Supported Motion
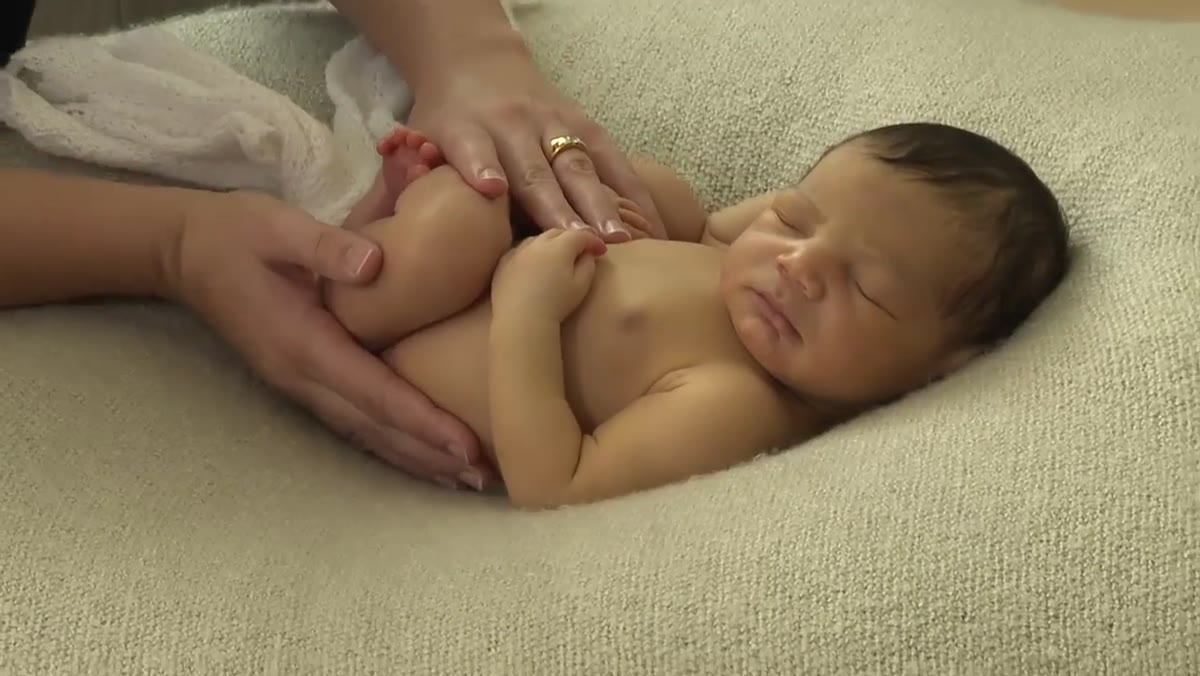 Kelly guiding baby’s bottom and elbow simultaneously through turn
Brown’s actual technique for rotating the baby is what separates flow posing from standard repositioning. She places her fingers specifically on the elbows, keeping them in line with the body, and uses her little finger to manage the wrap while the turn happens. She brings the bottom around first, then guides the feet down. The whole motion is one continuous arc rather than a series of individual adjustments.
Kelly guiding baby’s bottom and elbow simultaneously through turn
Brown’s actual technique for rotating the baby is what separates flow posing from standard repositioning. She places her fingers specifically on the elbows, keeping them in line with the body, and uses her little finger to manage the wrap while the turn happens. She brings the bottom around first, then guides the feet down. The whole motion is one continuous arc rather than a series of individual adjustments.
The key safety principle she articulates is about the hands. If you don’t position the elbow and hand correctly before the turn, the hand ends up displaced and you have to force it back down after the fact, creating resistance and discomfort. Solving for the endpoint during the setup is a principle I apply to lighting modifiers all the time - where does the light need to be at the end of this sequence, and am I setting it up to get there cleanly?
Step 4: Settle the Hips Into the Bean Bag, Not Just Onto It
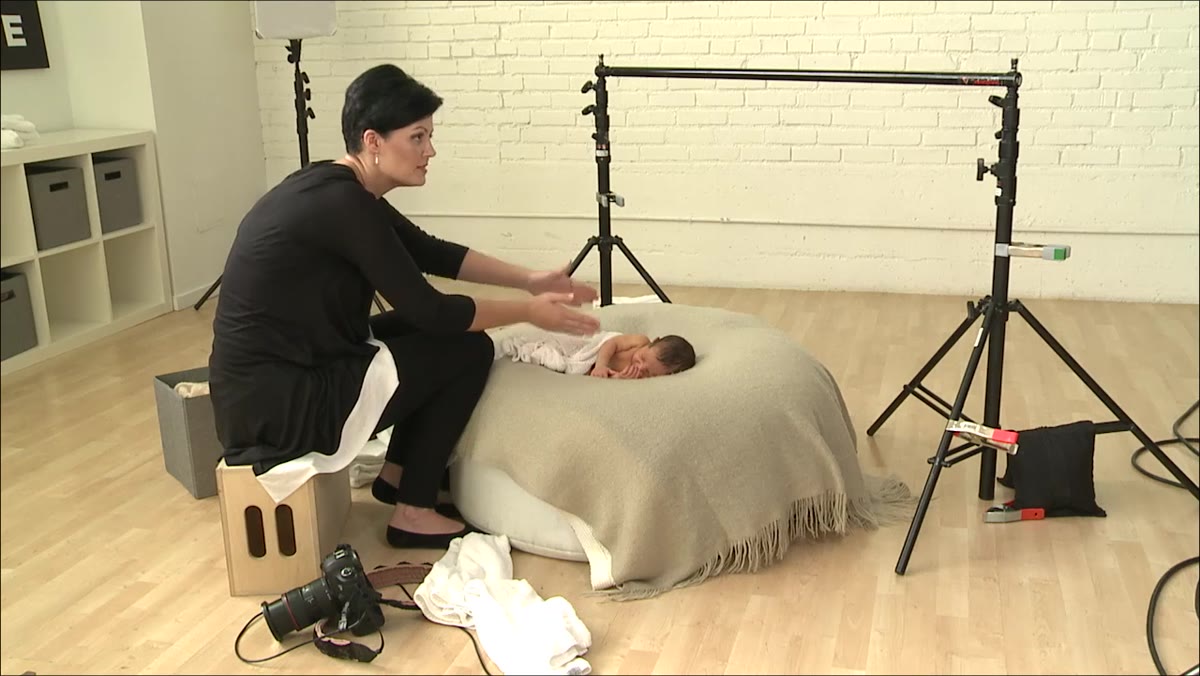 Kelly pressing baby’s hips down and back into bean bag surface
Once the rotation is complete, Brown’s focus shifts to the hips. She turns them away from the ceiling so they’re angled into the bag, then uses one hand behind the baby and one on the shins and knees to push the bottom back and down. The goal is to let the baby sink into the surface rather than rest on top of it. A bean bag that is truly doing its job disappears under the subject.
Kelly pressing baby’s hips down and back into bean bag surface
Once the rotation is complete, Brown’s focus shifts to the hips. She turns them away from the ceiling so they’re angled into the bag, then uses one hand behind the baby and one on the shins and knees to push the bottom back and down. The goal is to let the baby sink into the surface rather than rest on top of it. A bean bag that is truly doing its job disappears under the subject.
This is posing physics. When the hips are settled deep into the bag, the whole body relaxes. The tension you might otherwise see in the shoulders, the legs, the face, resolves because the body’s center of gravity has been properly supported.
Step 5: Use a Cloth Nappy to Create Resistance and Smooth the Surface
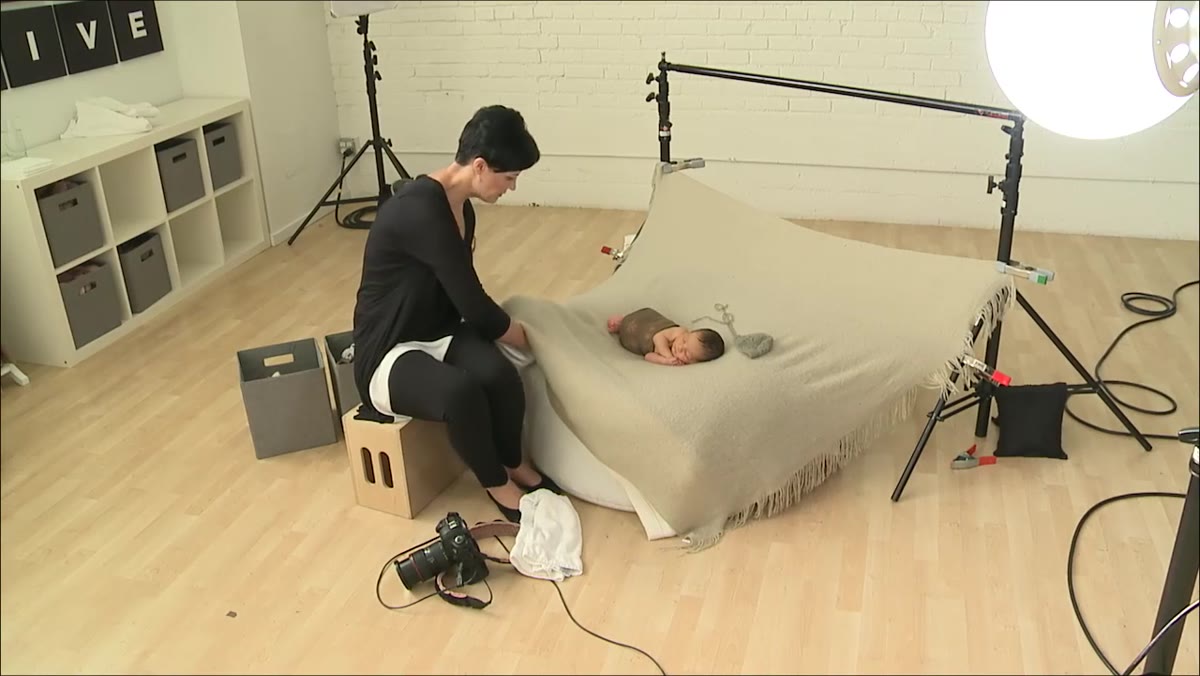 Tucking cloth nappy underneath baby’s feet for support and smoothness
Brown uses a cloth nappy tucked underneath the baby to serve two functions at once. First, it smooths the surface around the feet to reduce shadows caused by fabric bulges when the light hits. Second, it creates a subtle resistance that the baby can feel and push against, which Brown notes provides a sense of security. Newborns respond to contact. An unsupported limb floating in space is less comfortable than one that has something to press into.
Tucking cloth nappy underneath baby’s feet for support and smoothness
Brown uses a cloth nappy tucked underneath the baby to serve two functions at once. First, it smooths the surface around the feet to reduce shadows caused by fabric bulges when the light hits. Second, it creates a subtle resistance that the baby can feel and push against, which Brown notes provides a sense of security. Newborns respond to contact. An unsupported limb floating in space is less comfortable than one that has something to press into.
From a practical standpoint, smooth blanket surfaces also mean less retouching. Brown mentions this directly. Every wrinkle you remove before the shot is a wrinkle you don’t have to clone out later.
Step 6: Layer Textures and Wrap Details With Intention
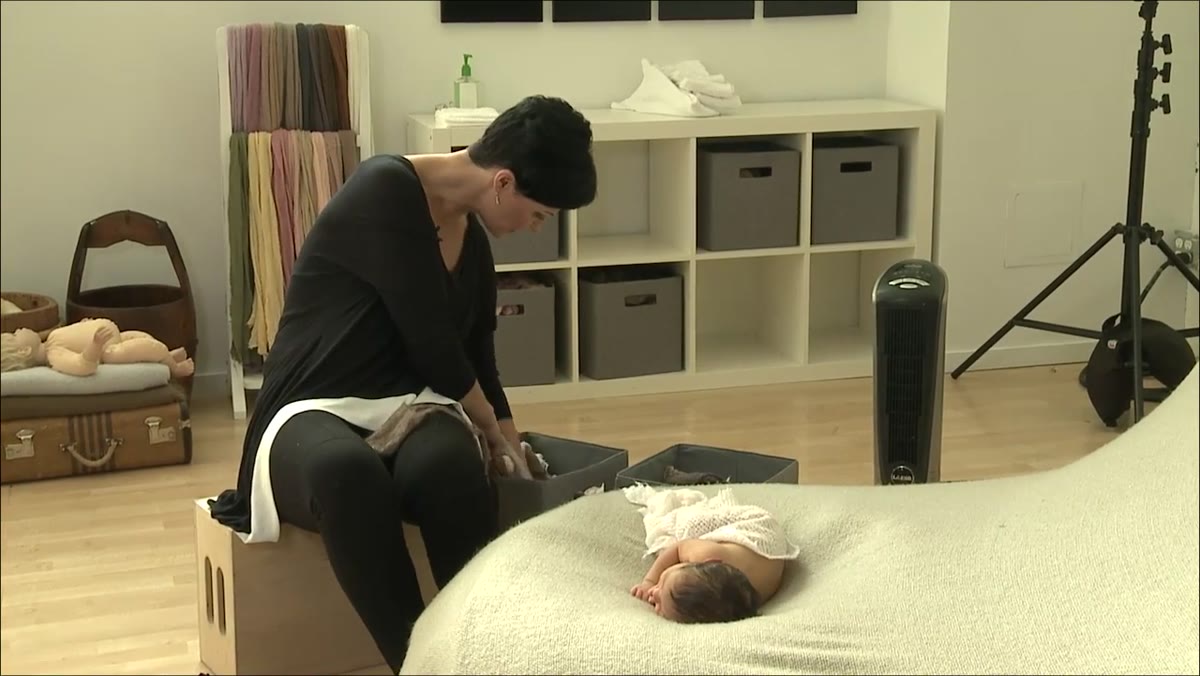 Kelly selecting second fabric layer with complementary color and texture
Brown adds a second fabric layer at this stage, chosen for color and texture compatibility with the first. She is deliberate about what gets tucked in and what gets draped. Shorter pieces she tucks tight so there’s no awkward stub of fabric interrupting the image. Longer pieces she drapes to create movement. She’s also using her arm weight, not pressure, just the passive weight of her arm resting across the baby, to keep the baby calm while she works the fabric with her other hand.
Kelly selecting second fabric layer with complementary color and texture
Brown adds a second fabric layer at this stage, chosen for color and texture compatibility with the first. She is deliberate about what gets tucked in and what gets draped. Shorter pieces she tucks tight so there’s no awkward stub of fabric interrupting the image. Longer pieces she drapes to create movement. She’s also using her arm weight, not pressure, just the passive weight of her arm resting across the baby, to keep the baby calm while she works the fabric with her other hand.
This is prop and textile styling applied to a living subject, and it requires the same compositional thinking you’d use when deciding how much of a reflector to show in a beauty shot.
What I’d Add From the Studio Side
Brown is working with window light, which is beautiful and forgiving for skin tones. In a controlled studio environment, I’d want to replicate that quality with a large octabox positioned high and slightly to the side, no harder than a 150cm modifier. The soft wraparound light she gets from the window naturally flatters the baby’s skin and minimizes the harsh shadows that a smaller or more direct source would create. I keep a note in my lighting journal from the first time I tested this setup: the modifier needs to be close enough that it becomes the dominant source without any fill competing from behind the camera. That’s what gives the shadows their gentle roll rather than a hard edge.
The wrapping and posing technique translates directly regardless of your light source. The safety logic is the same, the flow logic is the same. Only the power settings change.
The single most important lesson in this tutorial is that comfort precedes everything else. Before Brown thinks about composition, before she considers props or color, she makes sure the baby is genuinely settled. Every technical decision, the wrap management, the hip placement, the resistance surface, exists in service of that one goal. A comfortable baby holds a pose. An uncomfortable baby holds nothing.
Watch the full tutorial on YouTube to see Kelly Brown’s hands-on technique in real time. The details in how she applies pressure, reads the baby’s responses, and transitions between positions are worth watching more than once.
Comments (4)
Been doing this wrong for years apparently. Thanks for the wake-up call.
Great article! I actually covered something related on my site — the gear angle is really complementary to this.
Great breakdown. The step-by-step approach really helps.
I've been looking for exactly this kind of tutorial. Perfect timing.
Leave a Comment