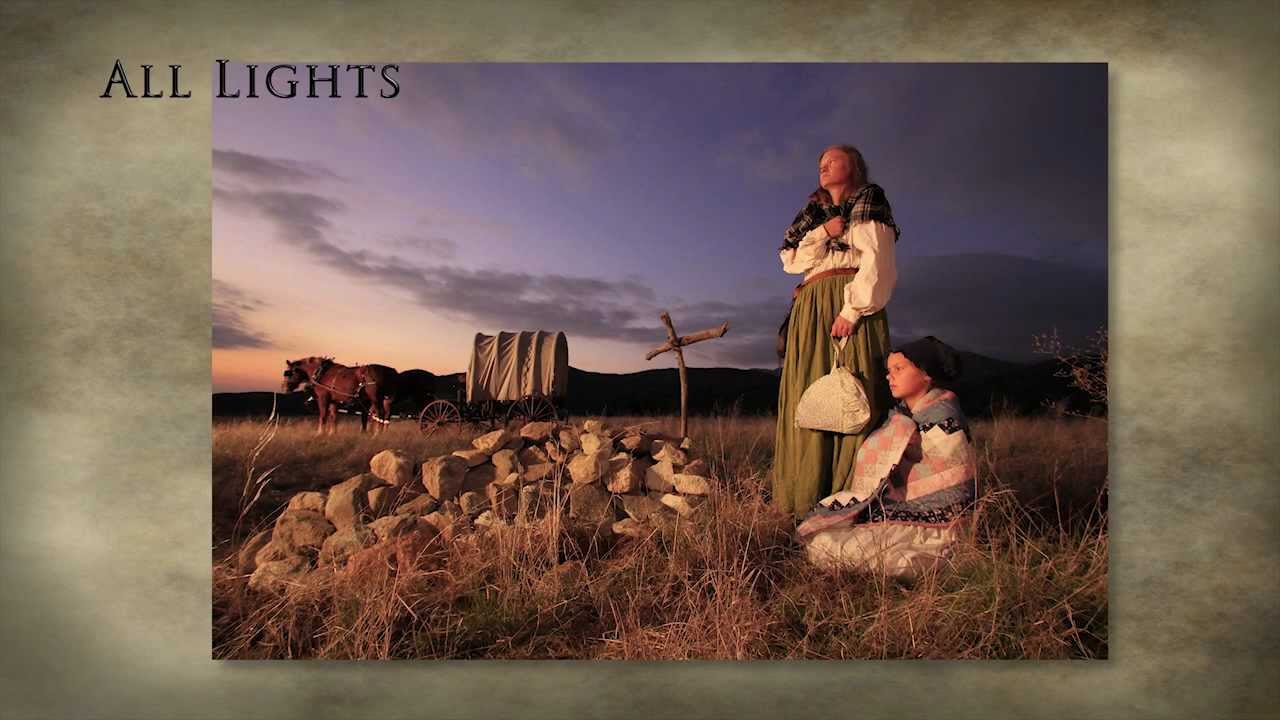
There is a specific kind of panic that hits when you are on location, the ambient light is dropping faster than you planned, and you still have half your shot list to finish. I have been there more times than I care to count, and for years my solution was either to push ISO until the image fell apart or to pack up and reschedule. Neither option is acceptable when a client is standing next to you. What changed my approach was learning to treat natural light and strobes not as two separate tools but as a continuous lighting system where one takes over from the other. In this The Slanted Lens tutorial, photographer Jay P. Morgan walks through exactly that handoff during a real promotional shoot, working against a setting sun with a wagon, a gravesite, and a tight deadline.
Watch the full tutorial on YouTube
What makes this tutorial worth studying is that it is not a controlled classroom demo. The light is actually failing. Decisions are being made in real time. That is the environment most of us work in, and watching a photographer manage it step by step is more instructive than any staged walkthrough.
Step 1: Scout the Sun Position Before You Set Anything Up
 Photographer using Sunseeker iPhone app in 3D mode
Before a single light stand goes up, Morgan uses a sun-tracking app called Sunseeker on his iPhone to map exactly where the sun will be on the horizon at the time of the shoot. He uses the 3D mode to overlay the sun’s path onto the actual location. This is not a nice-to-have step. If you do not know where the sun is going to land, you are guessing, and on a location shoot with limited time, guessing costs you the shot.
Photographer using Sunseeker iPhone app in 3D mode
Before a single light stand goes up, Morgan uses a sun-tracking app called Sunseeker on his iPhone to map exactly where the sun will be on the horizon at the time of the shoot. He uses the 3D mode to overlay the sun’s path onto the actual location. This is not a nice-to-have step. If you do not know where the sun is going to land, you are guessing, and on a location shoot with limited time, guessing costs you the shot.
I have a similar habit. Any outdoor shoot where the sun is a factor, I check the sun position the day before and again the morning of. The goal at this stage is to identify your key light angle before your subjects or any props are placed.
Step 2: Position Your Subject So the Sun Becomes Your Key Light
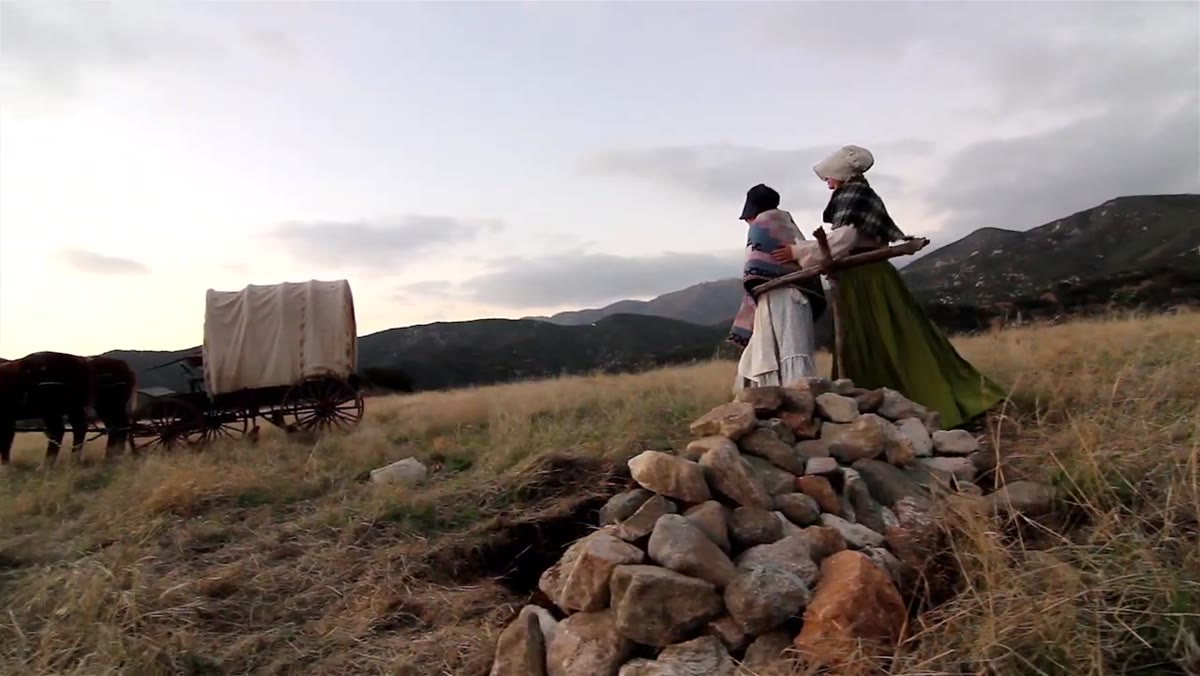
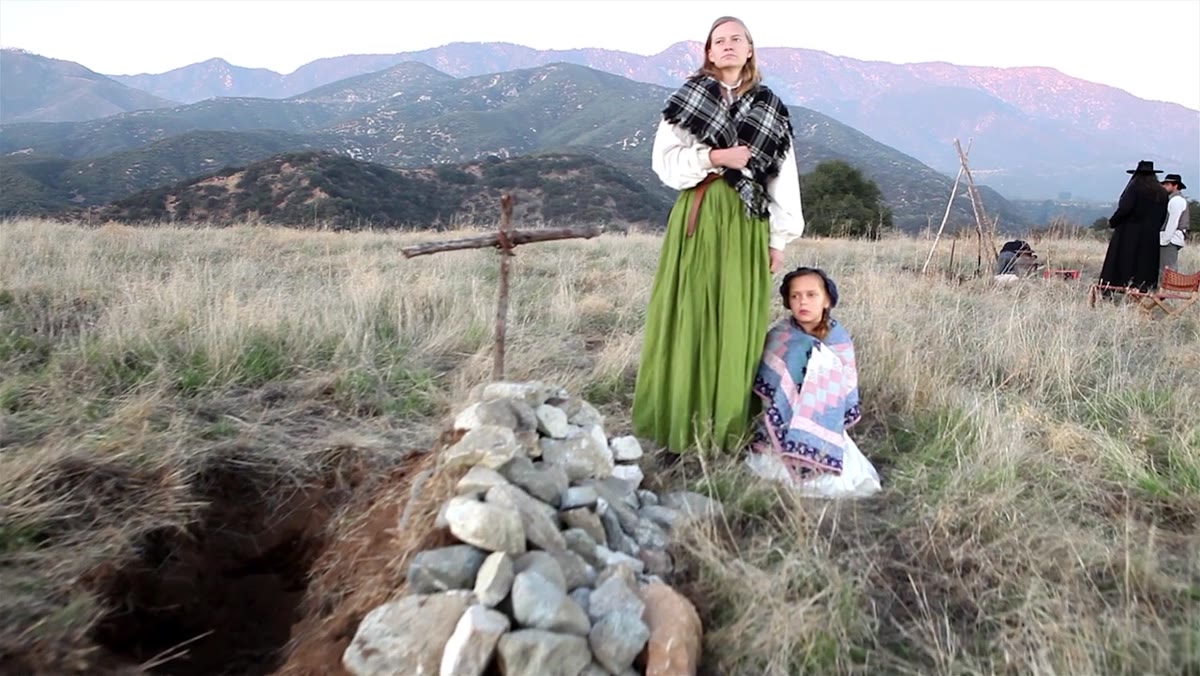 Wide shot showing subject and wagon being repositioned relative to sun angle
Morgan’s target position puts the sun just slightly behind the subjects from the camera’s perspective. Not a full backlight, not a flat front light. The sun is angled to kiss the near side of the faces and create a natural rim on the opposite side. To get there, he physically rotates the entire scene: the wagon, the people, and even the gravesite prop, until the light relationship is correct.
Wide shot showing subject and wagon being repositioned relative to sun angle
Morgan’s target position puts the sun just slightly behind the subjects from the camera’s perspective. Not a full backlight, not a flat front light. The sun is angled to kiss the near side of the faces and create a natural rim on the opposite side. To get there, he physically rotates the entire scene: the wagon, the people, and even the gravesite prop, until the light relationship is correct.
This is the move most photographers skip because it feels laborious. But adjusting your subject’s position relative to an existing light source is the same logic you use in the studio when you rotate a softbox. The light does not move; the subject does. On location with a fixed light source like the sun, that physical rotation is your only modifier.
Step 3: Expose for the Sky First, Then Build From There
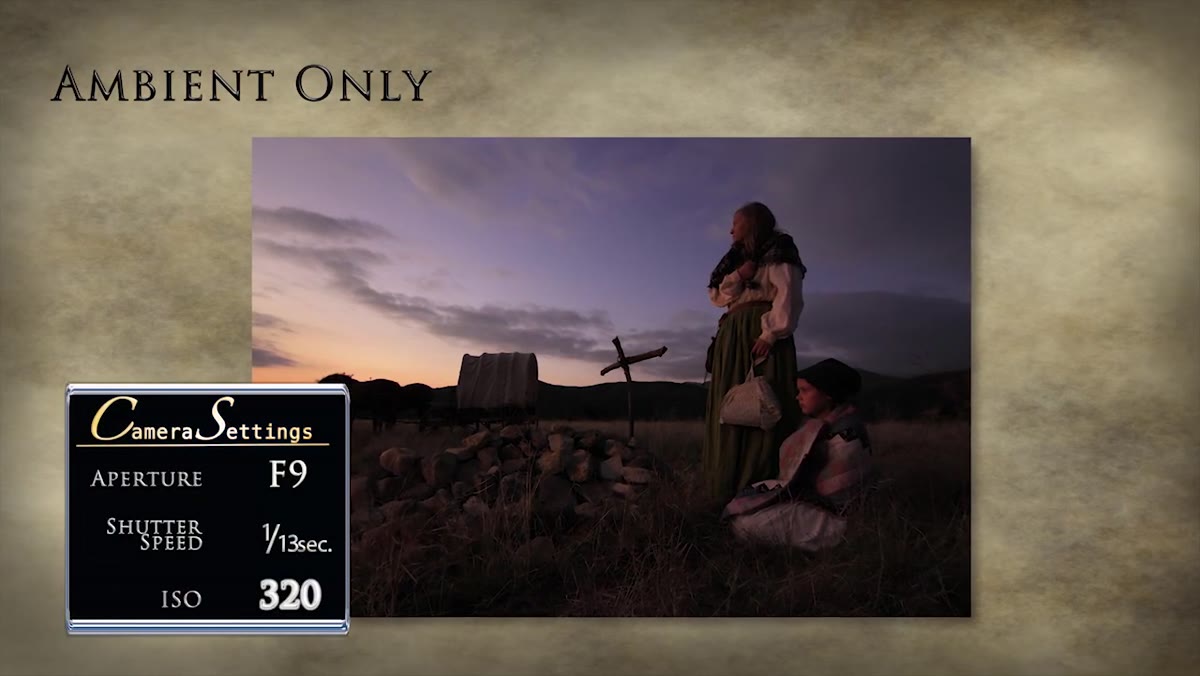 Camera settings display showing F9, 1/13 second, ISO 320
Once the ambient light has dropped to a workable but low level, Morgan locks in an exposure that preserves the sky: f/9, 1/13th of a second, ISO 320. The priority here is the background. A blown-out or muddy sky will kill the image regardless of how good the foreground lighting is. He notes that he extends the shutter slightly to burn in the sky further as the light falls.
Camera settings display showing F9, 1/13 second, ISO 320
Once the ambient light has dropped to a workable but low level, Morgan locks in an exposure that preserves the sky: f/9, 1/13th of a second, ISO 320. The priority here is the background. A blown-out or muddy sky will kill the image regardless of how good the foreground lighting is. He notes that he extends the shutter slightly to burn in the sky further as the light falls.
This is where I see photographers make their most expensive mistake: they expose for the subject and let the sky go. On location, especially at golden hour or dusk, the sky is part of the composition. Expose for it first, then use artificial light to bring your subject up to meet it.
Step 4: Place Strobes to Mimic the Direction of the Departing Sun
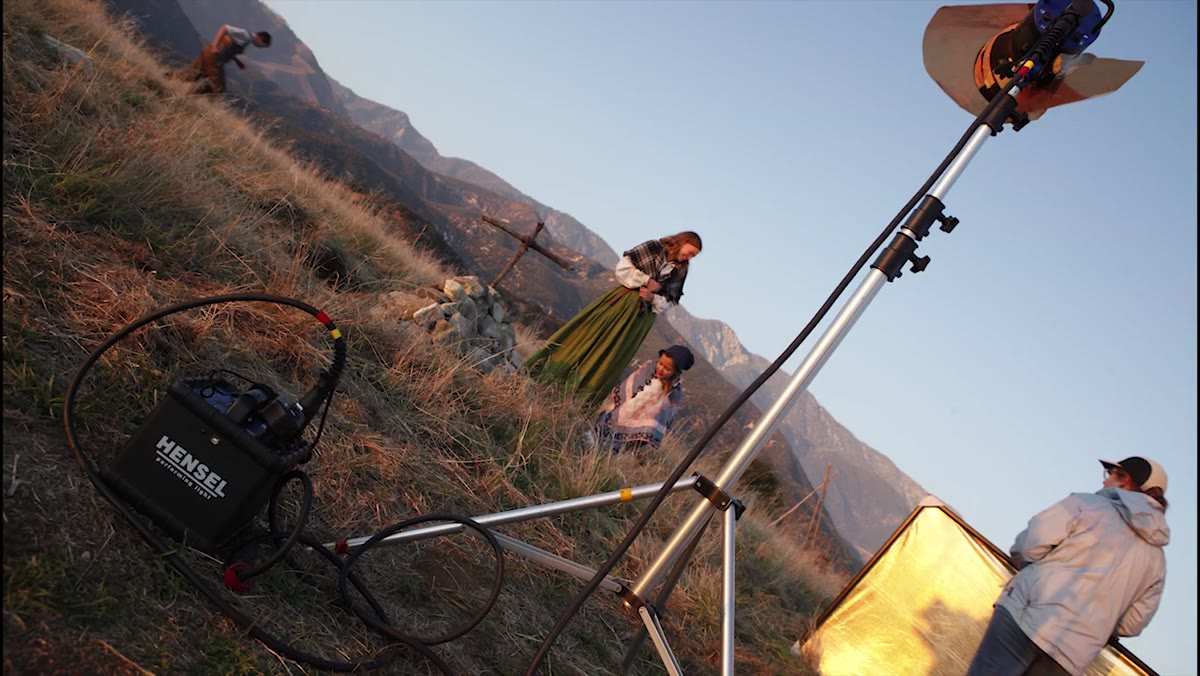 First strobe being positioned on same axis as original sun angle
With the ambient light now too weak to serve as a key, Morgan introduces strobes. The critical detail is placement: the first strobe goes where the sun was. Same angle, same side. This is not an accident. It means the shadows fall in the same direction they always did, the rim light continues from the same position, and the image does not suddenly feel artificial.
First strobe being positioned on same axis as original sun angle
With the ambient light now too weak to serve as a key, Morgan introduces strobes. The critical detail is placement: the first strobe goes where the sun was. Same angle, same side. This is not an accident. It means the shadows fall in the same direction they always did, the rim light continues from the same position, and the image does not suddenly feel artificial.
The second strobe is aimed at the wagon to separately illuminate the large prop. Two sources, two subjects, both mimicking a single directional sunlight. The result reads as a continuous streak of warm light across the scene rather than two distinct flash pops.
Step 5: Add a CTO Gel to Match the Warm Color of Late Sun
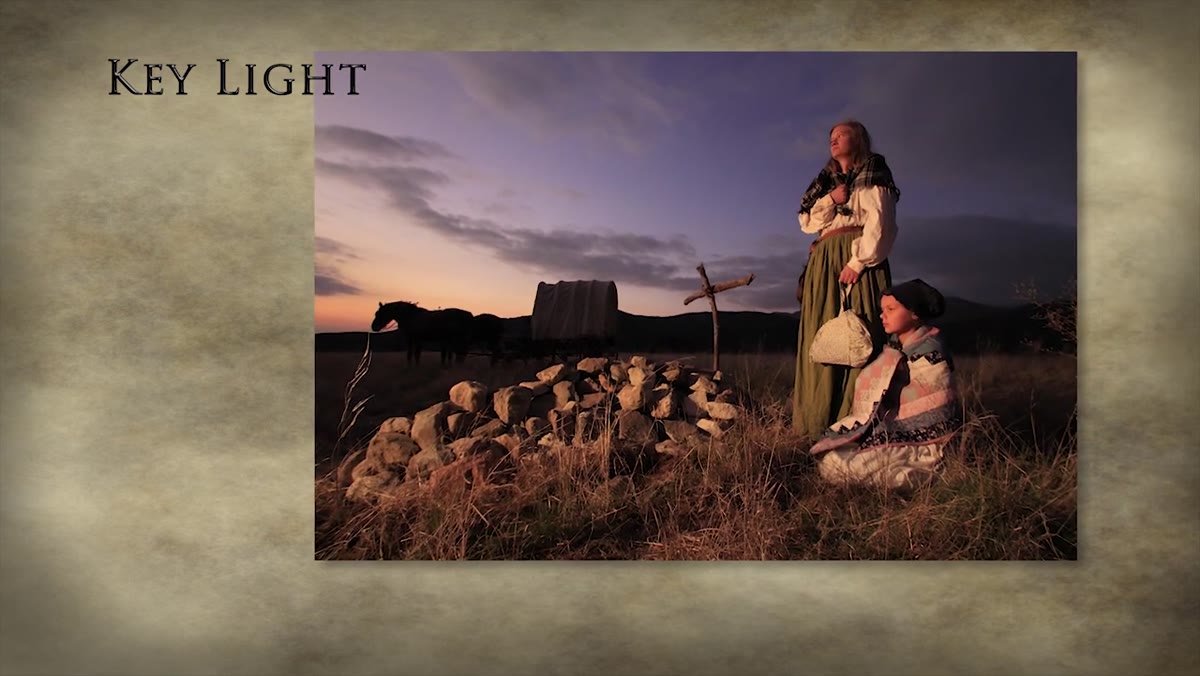 CTO gel visible on strobe aimed at subject’s face
Morgan places a CTO (color temperature orange) gel on the strobe lighting the face. This is a deliberate overcorrection. He intentionally makes the strobe warmer than the existing ambient so the face has rich, warm tones in camera. He plans to remove roughly 1000 degrees of warmth in post, which simultaneously cools the faces back to neutral and shifts the sky toward a deeper blue.
CTO gel visible on strobe aimed at subject’s face
Morgan places a CTO (color temperature orange) gel on the strobe lighting the face. This is a deliberate overcorrection. He intentionally makes the strobe warmer than the existing ambient so the face has rich, warm tones in camera. He plans to remove roughly 1000 degrees of warmth in post, which simultaneously cools the faces back to neutral and shifts the sky toward a deeper blue.
This is a technique I use regularly on beauty and editorial work. Shooting warmer in camera gives you more to work with in raw processing, and it protects skin tones from going flat when you pull the color balance toward blue for the sky. The gel costs you thirty seconds on set and saves you significant time in retouching.
Step 6: Drag the Shutter to Let Ambient Fill the Shadows
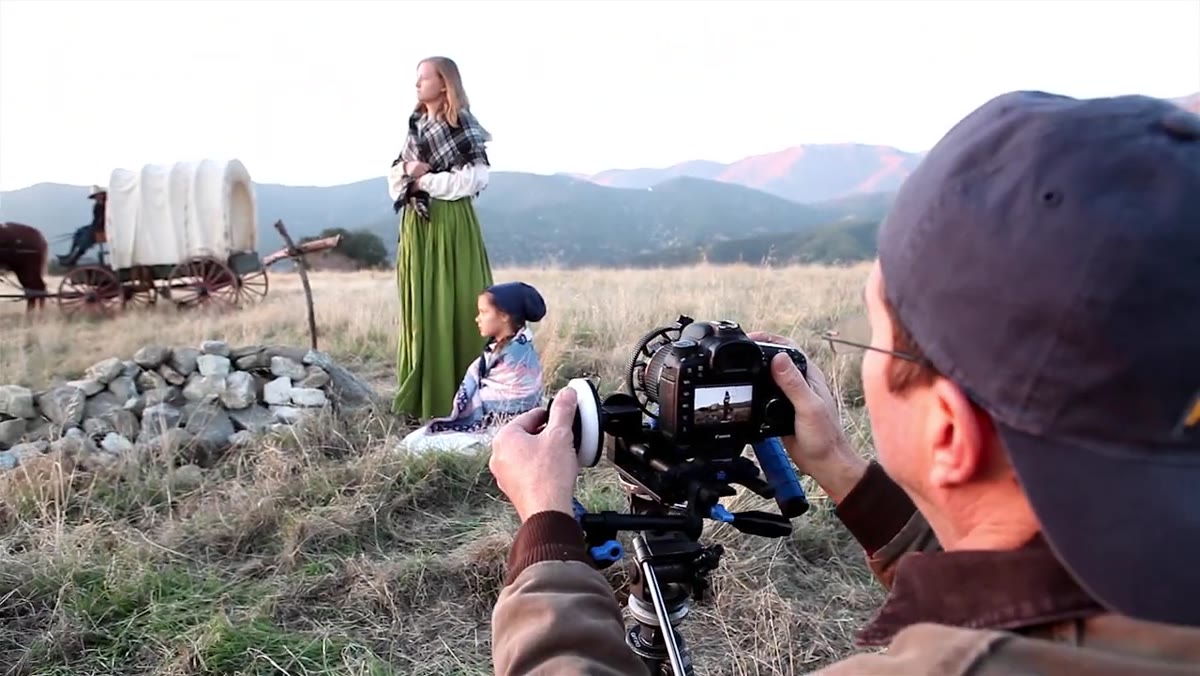 Final combined image showing strobe and ambient light blended across scene
With strobes handling the key light, Morgan uses a slower shutter to let the remaining ambient light act as a fill for the shadow areas. This is shutter drag, and it is the technique that makes the image feel like a single cohesive light environment rather than a flash photo. The ambient wraps into the darker areas while the strobes define the lit surfaces.
Final combined image showing strobe and ambient light blended across scene
With strobes handling the key light, Morgan uses a slower shutter to let the remaining ambient light act as a fill for the shadow areas. This is shutter drag, and it is the technique that makes the image feel like a single cohesive light environment rather than a flash photo. The ambient wraps into the darker areas while the strobes define the lit surfaces.
The balance between strobe power and shutter length determines how much ambient you retain. More ambient fill means softer shadows and a more natural feel. Less ambient means harder contrast and a more dramatic separation between subject and background.
What I Would Add: Shooting a Bracketed Test Frame as You Transition
The one thing I do on every location shoot that this tutorial does not show is shooting a bracketed test frame at the moment I decide to bring strobes in. Before I gel anything or adjust shutter speed, I shoot one frame at three different shutter speeds: my target, one stop slower, and one stop faster. Those three frames tell me immediately how much sky I have to play with and whether the ambient fill is too strong or too weak before I commit to a final exposure. It takes forty-five seconds and has saved me from discovering a problem only after the light is completely gone.
The single most important idea in this tutorial is one that applies equally to studio work: define where your light is coming from before you build the image, and then do not contradict that direction with any other source you add. Morgan never lets his strobes fight the sun. They extend it. That discipline is what makes the final frame feel real.
Watch the full tutorial on YouTube
Comments (2)
Shared this with my photography group. Everyone loved it.
Excellent tutorial. I'd add that from a compositing standpoint, this technique is incredibly versatile.
Leave a Comment