I’ve been overcomplicating things again.
Last month I was setting up a corporate headshot session and found myself reaching for a third light before I’d even fired a test shot. Kicker here, hair light there, fill card propped against a C-stand. By the time the client walked in, my set looked like I was photographing a car for a dealership catalog. The images were fine. Technically clean. And completely without tension.
That frustration is exactly why this Joel Grimes tutorial landed the way it did.
Why a 7-Foot Umbrella Reads as “Dramatic” and Not “Soft”
Most photographers think of large umbrellas as flattering light sources. Spread the light, soften the shadows, make everyone look approachable. Grimes flips that assumption. He’s not chasing approachable. He’s after cinematic.
The key is the front diffusion panel. The Westcott 7-foot white/black umbrella paired with their white diffusion front creates a massive, wrap-around source, but the black backing prevents any light from bouncing back behind the modifier. That containment is what gives you control. The shadow side of the face goes genuinely dark because nothing is kicking light back into it. You’re not fighting spill. You’re using physics to your advantage.
I keep a lighting journal where I sketch every setup after a shoot, and I’ve started marking which modifiers have black versus white interior backing specifically because the difference in shadow behavior is that significant. Grimes makes this point clearly in the video and it’s worth writing down.
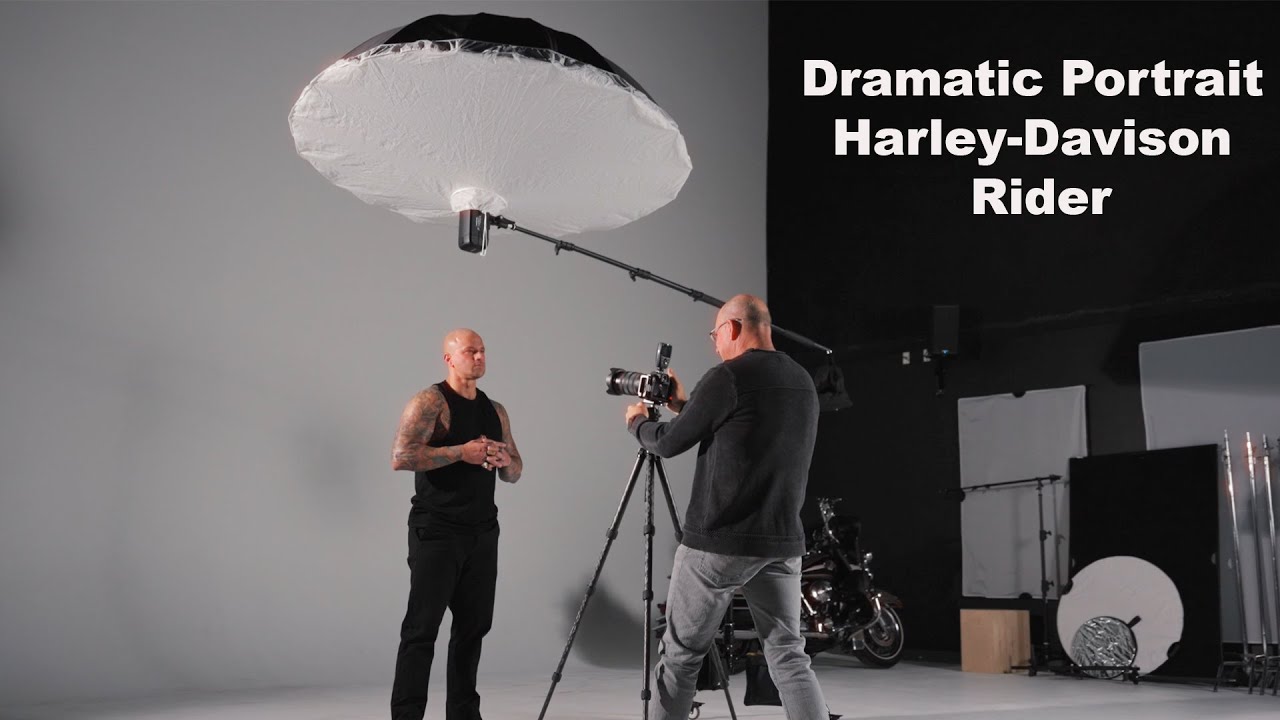
The Exact Setup: Position, Power, and Distance
Grimes places the single FJ400 strobe almost directly to the side of the subject, maybe 15 to 20 degrees in front of the face plane. Not a Rembrandt. Not a butterfly. Closer to a pure split. The 7-foot umbrella is positioned high, angling down, which carves the light across the subject’s face and lets gravity do half the shaping work for you.
Power on the FJ400 is kept relatively low given the size of the modifier. He’s working in a controlled studio environment at Westcott’s Ohio headquarters, so he can dial the ambient down and let the strobe be the only source in the image. Camera settings land around 1/200s shutter, somewhere between f/8 and f/11, and ISO 100. That combination kills the ambient and forces every photon in the frame to come from his one light.
The distance from the modifier to the subject is where most photographers guess wrong. Grimes keeps the umbrella closer than feels comfortable, well inside five feet. Closer distance means the light falls off faster across the face, which steepens the shadow transition and adds perceived contrast even from a soft source. Pull the light back and the image goes flat. Push it in and you get drama. That’s the whole game.
Posing the Subject to Match the Light
The subject here is a Harley-Davidson rider, and Grimes works the posing to reinforce the lighting rather than fight it. The subject’s body is turned slightly away from the light. The face is then turned back toward it, which creates a layered shadow system: the body is in partial shadow, the near side of the face catches the light, and the far side falls off.
Grimes also asks the subject to drop the chin slightly and push the forehead forward. That subtle move changes the angle at which light hits the brow ridge, deepening the eye sockets and adding intensity without changing anything about the actual lighting setup. It’s the kind of direction that takes thirty seconds to give and ten years to understand why it works.
I always test new poses with a light meter in hand before the subject even walks on set. It sounds obsessive but I’ve learned from watching setups like this that the difference between a good pose and a great one is often two inches of head position.
Where I’d Push This Further (and Where It Falls Apart)
I’ve run a similar single-source umbrella setup in my own studio and the results hold up well for subjects with strong facial structure. The problem comes when you’re photographing someone with a very round face or prominent ears. That aggressive side placement with zero fill puts the far ear in nearly complete shadow and can create an unflattering silhouette on the shadow-side cheek.
My fix is to introduce a 4x4 white foam core card about six feet off the shadow side of the subject, letting the tiniest amount of reflected ambient wrap back in. I’m not adding a second light. I’m not changing the modifier. But that card softens the fall-off by maybe half a stop and rescues the shadow detail without compromising the drama. Grimes doesn’t use a fill card in this setup and it works beautifully for this particular subject. Know your subject before you commit to zero fill.
The Gear That Makes This Possible
The Westcott FJ400 II is doing specific work here that a cheaper strobe can’t replicate as cleanly. The color consistency across power settings matters when you’re shooting a dark-jacketed subject against a dark background. Any color shift in the strobe at lower power settings will muddy your blacks. The FJ400 holds color temperature tight across its range, and Grimes relies on that.
If you want to replicate this exact setup, Westcott offers a kit bundle that pairs the FJ400 II with the 7-foot umbrella and diffusion front, which is exactly what Grimes uses in this video. Running through the setup with matched gear removes one variable and lets you focus on learning the technique instead of troubleshooting equipment inconsistencies.
The single most important lesson here is that drama in a portrait comes from what you subtract, not what you add. One light, placed with intention, will outperform a cluttered four-light setup every time if you understand what the shadows are supposed to do.
Watch the full video to see how Grimes moves around the set and adjusts in real time. The visual demonstration is genuinely worth your time.
Comments
Leave a Comment