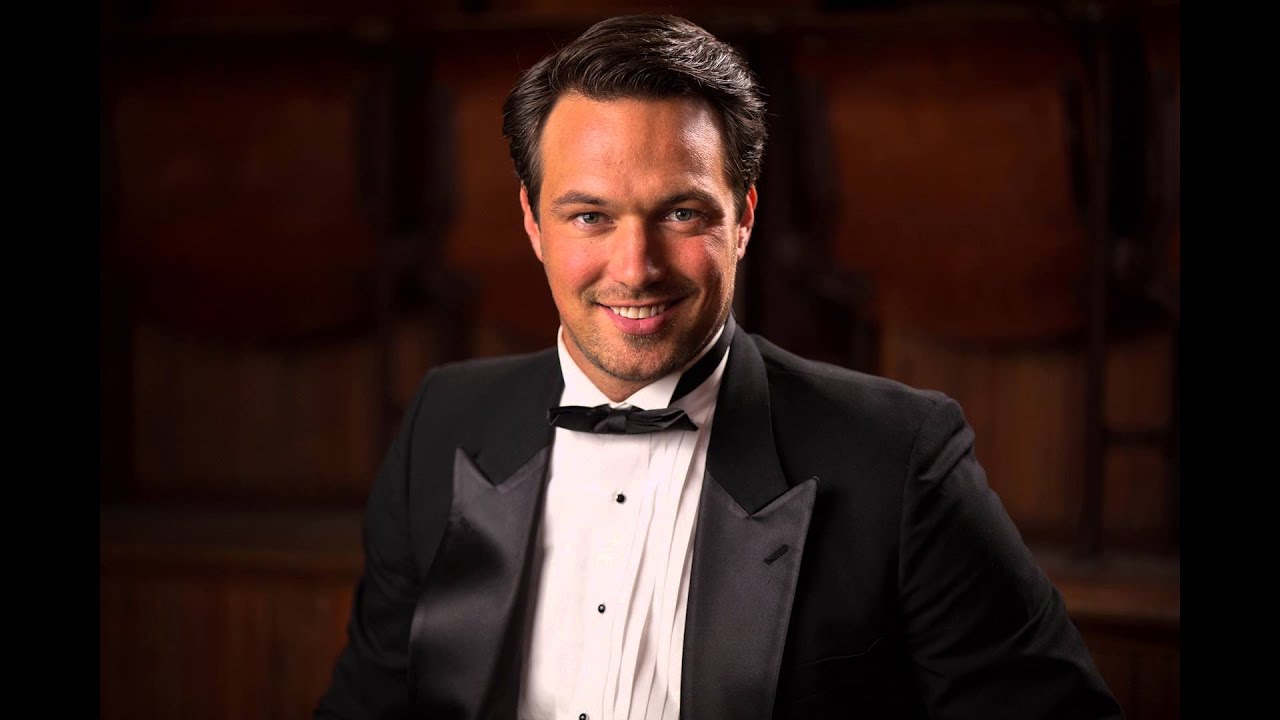
Groom portraits are the forgotten child of wedding photography. Every tutorial, every lighting course, every lighting diagram pinned to a studio wall is overwhelmingly built around the bride. The groom gets five minutes between the ceremony and the cocktail hour, a pat on the shoulder, and a standing pose in front of whatever wall happens to be nearby. I’ve been guilty of this myself, and the results show it. The images are flat, rushed, and forgettable.
What I found valuable in this Scott Kelby tutorial on lighting a groom with hot shoe flash is that Kelby treats the groom portrait as a legitimate setup worth thinking through. Same care, same modifier, same deliberate two-light logic he’d apply to anyone else. Watch the full tutorial on YouTube and you’ll see it’s a short video, but the technique inside it is complete enough to walk into a venue and execute without guessing.
The other thing that caught my attention is how low his power settings are. I keep a lighting journal where I sketch every setup I shoot, and I’ve gone back through it and noticed my own tendency to push flash power higher than necessary. Kelby’s numbers here are a useful reality check. Here’s the full breakdown.
Step 1: Choose a Location With Character Behind Your Subject
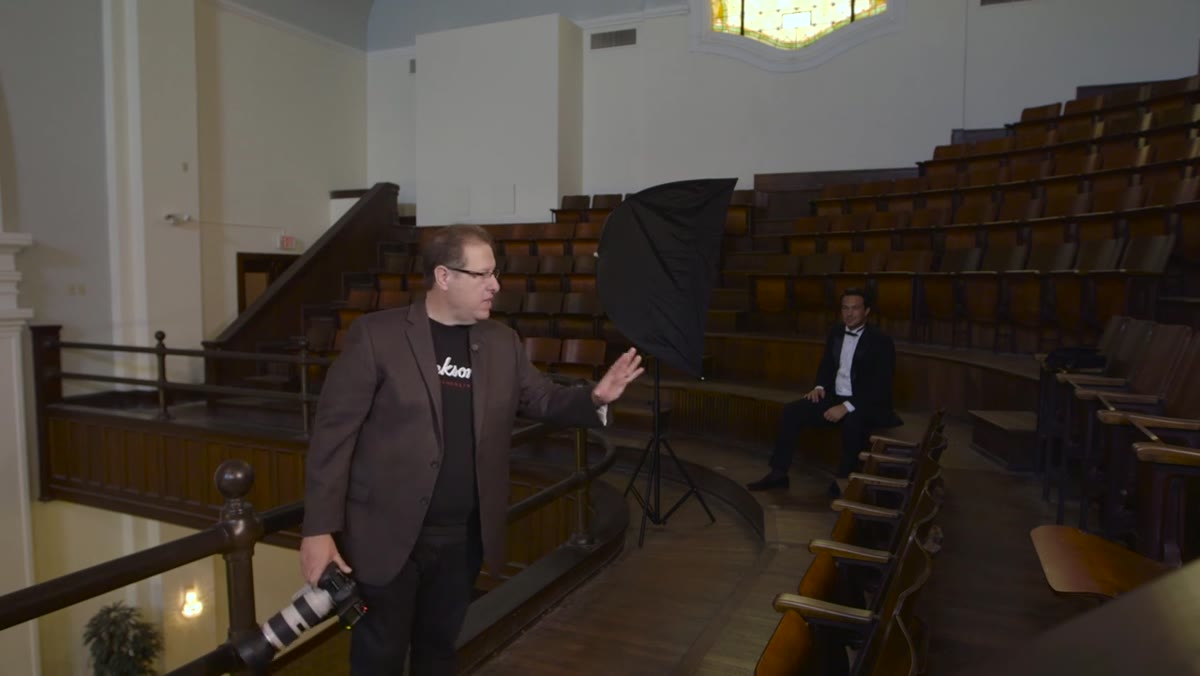 Groom seated in front of warm wood paneling
Before a single light gets positioned, Kelby makes a deliberate location choice. He picks a spot inside the venue specifically because the wood background behind the groom has texture and warmth. The groom is seated, which Kelby notes isn’t his default, but the environment earns the pose. This matters because the background isn’t going to be blown out or thrown into blackness. It stays present in the frame. When you’re choosing your shooting position, get low if your subject is seated. Eye level or slightly below reads more natural and less clinical than shooting down at someone in a chair.
Groom seated in front of warm wood paneling
Before a single light gets positioned, Kelby makes a deliberate location choice. He picks a spot inside the venue specifically because the wood background behind the groom has texture and warmth. The groom is seated, which Kelby notes isn’t his default, but the environment earns the pose. This matters because the background isn’t going to be blown out or thrown into blackness. It stays present in the frame. When you’re choosing your shooting position, get low if your subject is seated. Eye level or slightly below reads more natural and less clinical than shooting down at someone in a chair.
Step 2: Set Your Camera for a Dark-Room Exposure Without Flash
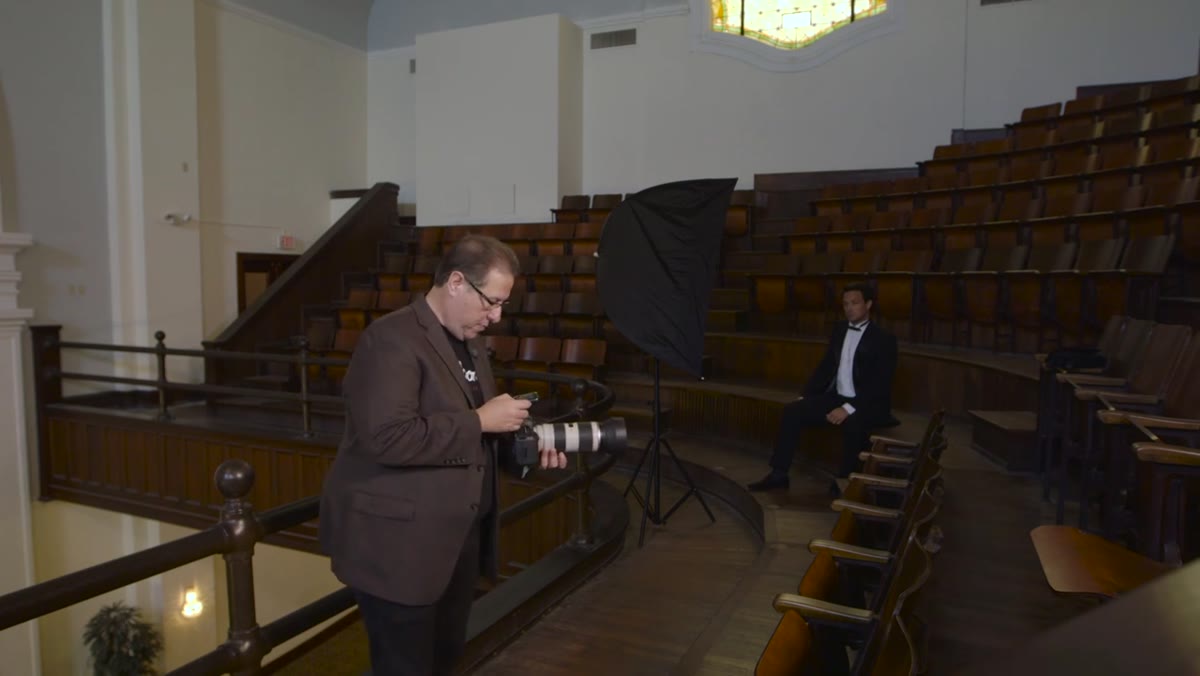 Camera LCD showing underexposed ambient-only frame
Before the flash goes on, Kelby fires a test shot with no light at all. His settings are 1/125s, f/2.8, ISO 200. The image is essentially black. That’s intentional. By setting the camera to expose properly for a room with almost no usable ambient light, he ensures the flash is going to do all the work. The ambient contribution is near zero, which gives him full control over the look. This is a habit worth adopting every time you walk into an unfamiliar venue. The dark test shot tells you exactly what you’re working with before you introduce any artificial light. At f/2.8 you also have enough depth of field to keep the subject sharp while the background falls off naturally, which flatters the wood texture without turning it into a distraction.
Camera LCD showing underexposed ambient-only frame
Before the flash goes on, Kelby fires a test shot with no light at all. His settings are 1/125s, f/2.8, ISO 200. The image is essentially black. That’s intentional. By setting the camera to expose properly for a room with almost no usable ambient light, he ensures the flash is going to do all the work. The ambient contribution is near zero, which gives him full control over the look. This is a habit worth adopting every time you walk into an unfamiliar venue. The dark test shot tells you exactly what you’re working with before you introduce any artificial light. At f/2.8 you also have enough depth of field to keep the subject sharp while the background falls off naturally, which flatters the wood texture without turning it into a distraction.
Step 3: Place a Softbox at 45 Degrees as Your Key Light
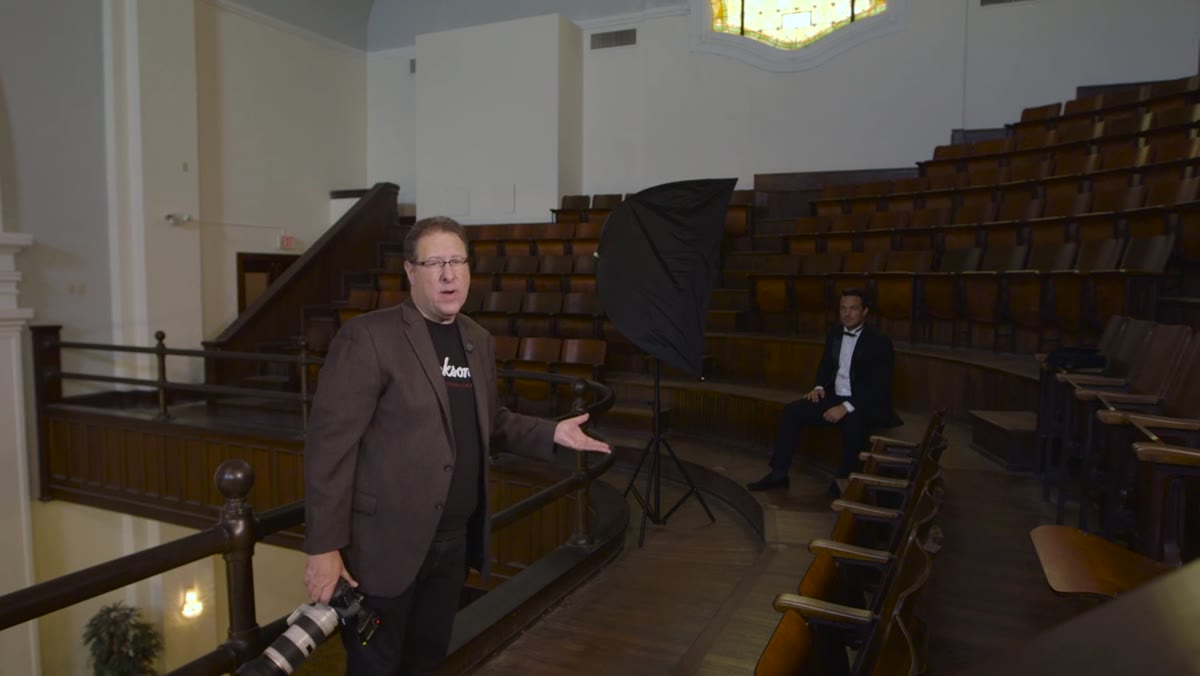 Softbox positioned at 45-degree angle to seated subject
Kelby’s main modifier here is an Apollo softbox, the same one he used for the bride earlier in the shoot. It goes in front of the groom at a 45-degree angle. Standard Rembrandt-adjacent placement, nothing exotic. What’s notable is the power level: just over 1/16, roughly halfway between 1/16 and 1/8. The light is physically close to the subject, which is why the power can be that low. The inverse square law is doing the work. Closer light means a larger apparent light source relative to the subject, which means softer shadows. If you want more contrast and edge in the light, don’t change your power. Move the modifier back. Kelby explicitly makes this point: distance controls quality, power controls exposure.
Softbox positioned at 45-degree angle to seated subject
Kelby’s main modifier here is an Apollo softbox, the same one he used for the bride earlier in the shoot. It goes in front of the groom at a 45-degree angle. Standard Rembrandt-adjacent placement, nothing exotic. What’s notable is the power level: just over 1/16, roughly halfway between 1/16 and 1/8. The light is physically close to the subject, which is why the power can be that low. The inverse square law is doing the work. Closer light means a larger apparent light source relative to the subject, which means softer shadows. If you want more contrast and edge in the light, don’t change your power. Move the modifier back. Kelby explicitly makes this point: distance controls quality, power controls exposure.
Step 4: Shoot and Evaluate the Single-Light Result
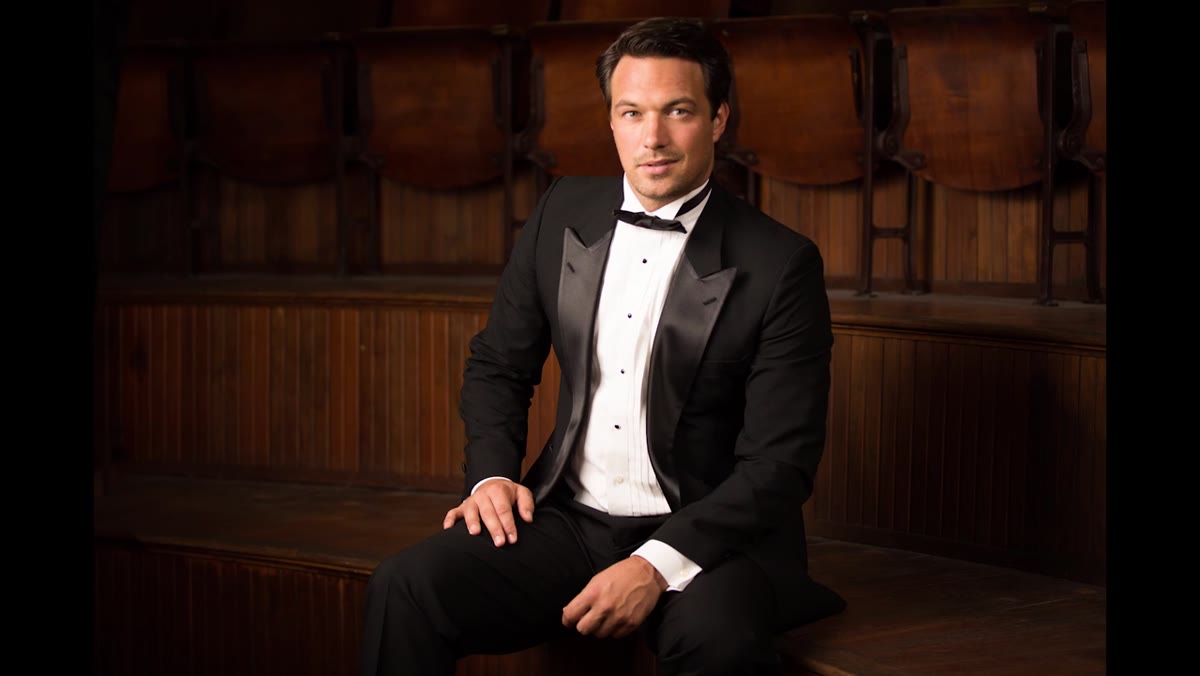 Well-lit groom portrait with shadow on far side of face
Once the softbox is on, Kelby shoots and immediately evaluates. The light is soft, flattering, and produces a natural shadow on the far side of the groom’s face. He shoots a range of frames, including a tight crop that fills the frame with the groom’s face. This is worth doing before you add any second light. Get your key light exactly where you want it, confirm the exposure looks right on the back of the camera, and make sure the shadows are landing where you intend. Adding a second light before you’ve resolved the first one means you’ll have no idea which light is causing any problem you encounter.
Well-lit groom portrait with shadow on far side of face
Once the softbox is on, Kelby shoots and immediately evaluates. The light is soft, flattering, and produces a natural shadow on the far side of the groom’s face. He shoots a range of frames, including a tight crop that fills the frame with the groom’s face. This is worth doing before you add any second light. Get your key light exactly where you want it, confirm the exposure looks right on the back of the camera, and make sure the shadows are landing where you intend. Adding a second light before you’ve resolved the first one means you’ll have no idea which light is causing any problem you encounter.
Step 5: Add an Apollo Strip Bank as a Kicker From Behind
 Strip bank positioned behind subject aimed downward
The second light is an Apollo strip bank, a narrow rectangular softbox. Kelby positions it behind the groom, angled downward. The goal is what he calls a kicker: a rim of harder, more directional light that separates the subject from the background and adds dimension. The strip bank produces harder light than the large softbox by design. Its smaller face relative to the subject’s size means less wrap, more edge. The contrast between the soft key light on the front and the edgy strip bank on the back is the whole point. That combination is what takes a competent portrait and makes it look considered.
Strip bank positioned behind subject aimed downward
The second light is an Apollo strip bank, a narrow rectangular softbox. Kelby positions it behind the groom, angled downward. The goal is what he calls a kicker: a rim of harder, more directional light that separates the subject from the background and adds dimension. The strip bank produces harder light than the large softbox by design. Its smaller face relative to the subject’s size means less wrap, more edge. The contrast between the soft key light on the front and the edgy strip bank on the back is the whole point. That combination is what takes a competent portrait and makes it look considered.
Step 6: Test the Back Light Alone Before Combining Both Sources
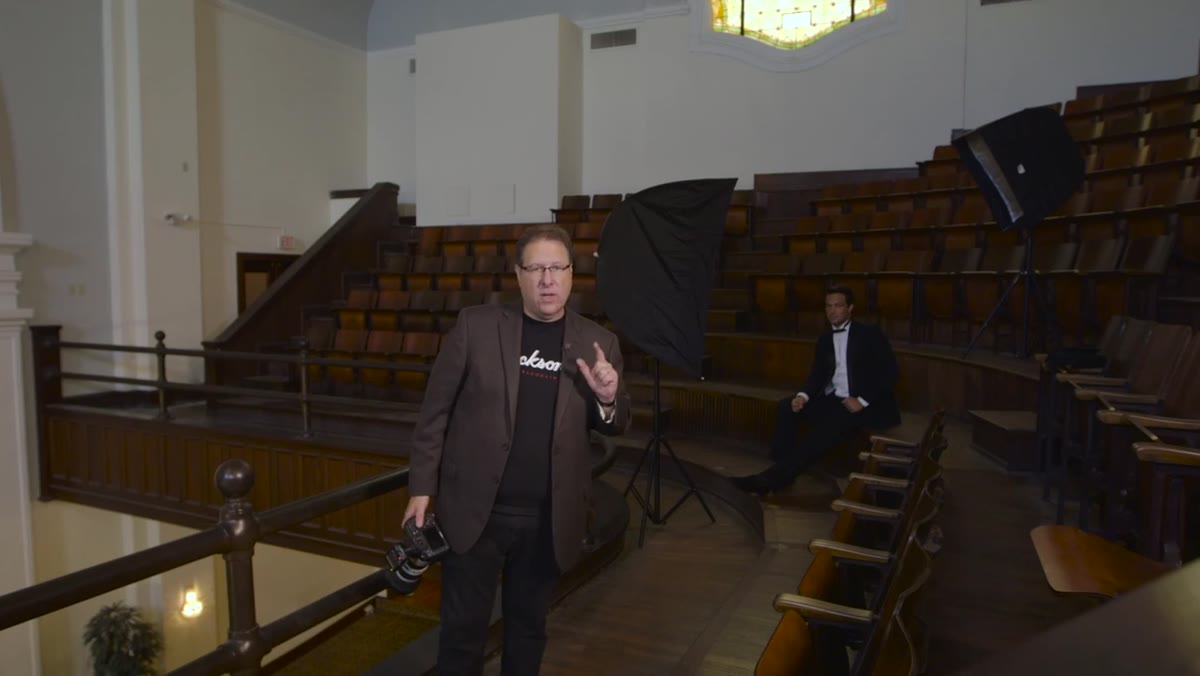 Strip bank only lit, front light disabled, rim light visible
This is the step most photographers skip and the one that causes the most problems. Kelby turns off the front softbox completely and fires a test frame using only the strip bank. He’s looking specifically at where the light is landing: the shoulder, the hair, the edge of the face. In the first test, the strip bank is hitting the groom’s nose more than he wants. He adjusts the position slightly, tilts it, and fires again. Once it looks right in isolation, he turns the key light back on. If you skip this step and evaluate both lights together, you lose the ability to isolate problems. A nose that’s catching too much rim light is invisible when the key light is also on. Turn things off. Look at one source at a time. I label every light in my studio with masking tape so I can identify them instantly when I’m troubleshooting, and this single-light evaluation process is exactly why that habit matters.
Strip bank only lit, front light disabled, rim light visible
This is the step most photographers skip and the one that causes the most problems. Kelby turns off the front softbox completely and fires a test frame using only the strip bank. He’s looking specifically at where the light is landing: the shoulder, the hair, the edge of the face. In the first test, the strip bank is hitting the groom’s nose more than he wants. He adjusts the position slightly, tilts it, and fires again. Once it looks right in isolation, he turns the key light back on. If you skip this step and evaluate both lights together, you lose the ability to isolate problems. A nose that’s catching too much rim light is invisible when the key light is also on. Turn things off. Look at one source at a time. I label every light in my studio with masking tape so I can identify them instantly when I’m troubleshooting, and this single-light evaluation process is exactly why that habit matters.
What I’d Add From My Own Shoots
The setup Kelby runs here travels well. I’ve used a nearly identical two-light configuration for corporate headshots in hotel ballrooms, which are notoriously ugly spaces with mixed color temperature ambient light. At 1/125s with a low-power flash doing all the work, the overhead fluorescents become irrelevant. The flash overpowers them completely and the color stays consistent. One thing I’d add to Kelby’s process is a white card reflector on the shadow side if you’re shooting without a second light. A cheap foam core fill can open up those shadows just enough to give you a printable image without the complexity of a second strobe. It doesn’t replace the strip bank, but it gives you a workable alternative when you’re moving fast between locations and can’t break down and rebuild a two-light setup every ten minutes.
The most important thing this tutorial reinforces is that modifier distance controls light quality more than power does. Move the light closer for soft and wrap. Move it back for edge and contrast. Power just sets your exposure. Once that relationship is clear in your head, multi-light setups stop feeling complicated. Watch the full tutorial on YouTube to see Kelby work through the adjustments in real time. It’s a short video with a lot of usable information inside it.
Comments (3)
Great breakdown. The step-by-step approach really helps.
This saved me so much time on my last edit. Wish I'd found this sooner.
Clear and practical. No fluff. Appreciate that.
Leave a Comment