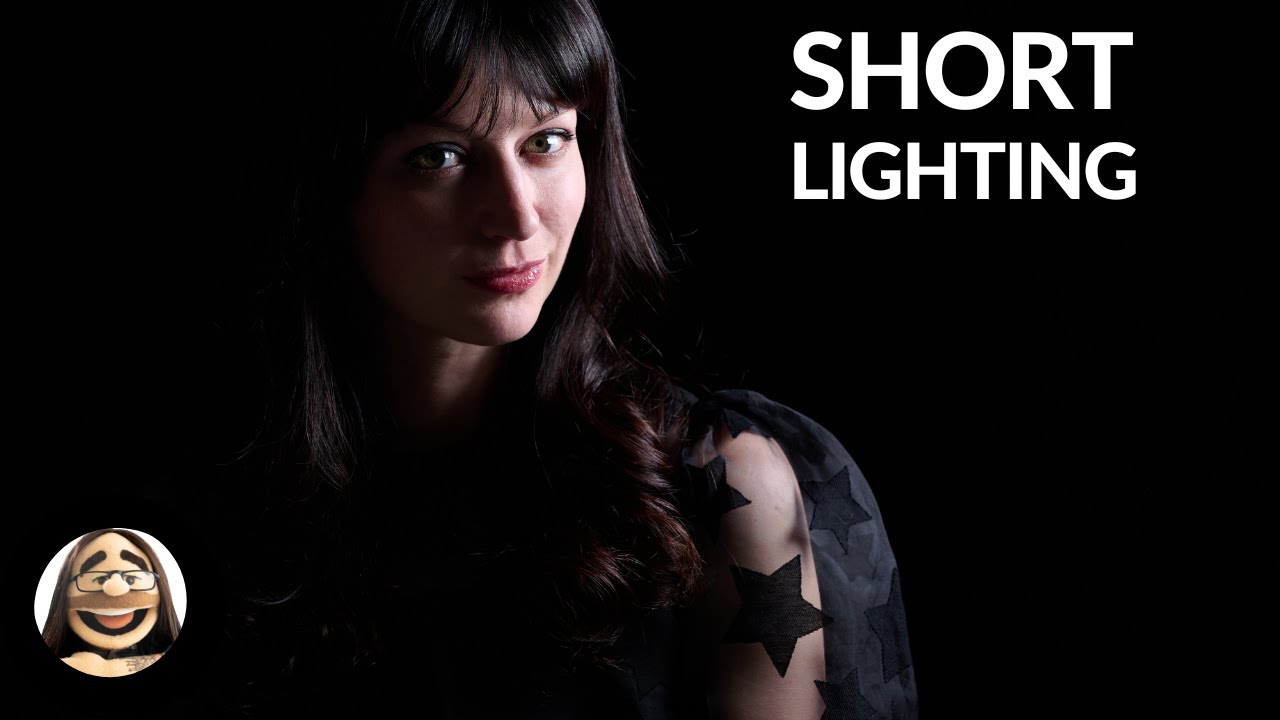
There is a specific problem I run into about four times a year on editorial shoots: a client wants “moody and cinematic” but gives me a flat, white cyclorama and exactly zero set design budget. No texture, no shadow, no depth. What saves me every time is short lighting. Not because it is trendy, not because it slims a face (though it can), but because it manufactures drama out of geometry alone. Position the light correctly relative to where your subject is looking and you get contrast, dimension, and tension without touching a gel or a flag.
I have been refining my own short lighting approach for years, largely through trial and error, but I recently watched a tutorial that articulates the logic of it more cleanly than most. Watch the full tutorial on YouTube from Daniel Norton Photographer. Norton shoots out of New York and has a direct, no-filler teaching style that I respect. He demonstrates short lighting with a model named Cadence in what appears to be a working studio, and the whole thing runs under four minutes. What follows is my expanded walkthrough of what he covers, with some additional context from my own practice.
Step 1: Understand the Core Definition Before You Touch Anything
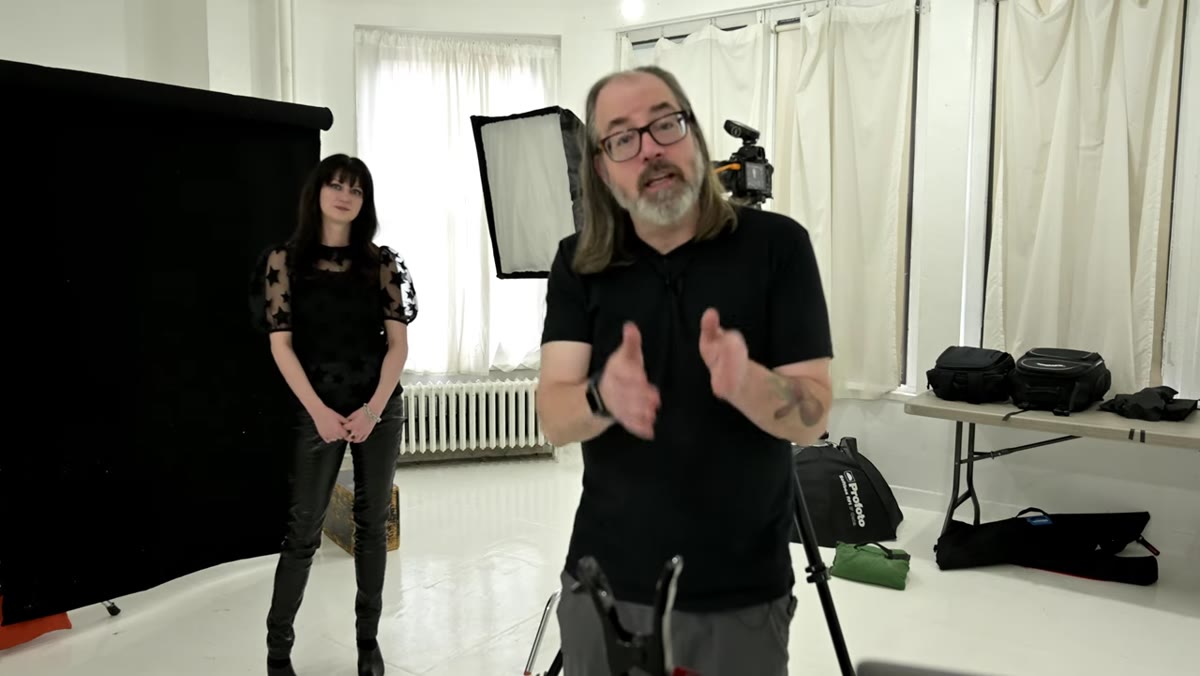 Daniel explaining short lighting with subject facing away from camera
Short lighting means you are lighting the side of the face that is turned away from the camera. That is the entire rule. Your subject cannot be looking straight into the lens for this to work. The moment they face you dead-on, there is no “short side” to light. Think of it this way: the subject turns their face, which creates a near cheek and a far cheek relative to your lens. Short lighting puts the key light on the far cheek, the one that appears narrower in the frame. The near cheek, the broader and closer one, falls into shadow. That shadow relationship is where all the drama lives.
Daniel explaining short lighting with subject facing away from camera
Short lighting means you are lighting the side of the face that is turned away from the camera. That is the entire rule. Your subject cannot be looking straight into the lens for this to work. The moment they face you dead-on, there is no “short side” to light. Think of it this way: the subject turns their face, which creates a near cheek and a far cheek relative to your lens. Short lighting puts the key light on the far cheek, the one that appears narrower in the frame. The near cheek, the broader and closer one, falls into shadow. That shadow relationship is where all the drama lives.
I keep a note in my lighting journal that reads: “short = far side lit.” Three words. When I am setting up fast on a commercial job, that is the only prompt I need.
Step 2: Position Your Subject and Establish Their Eye Line
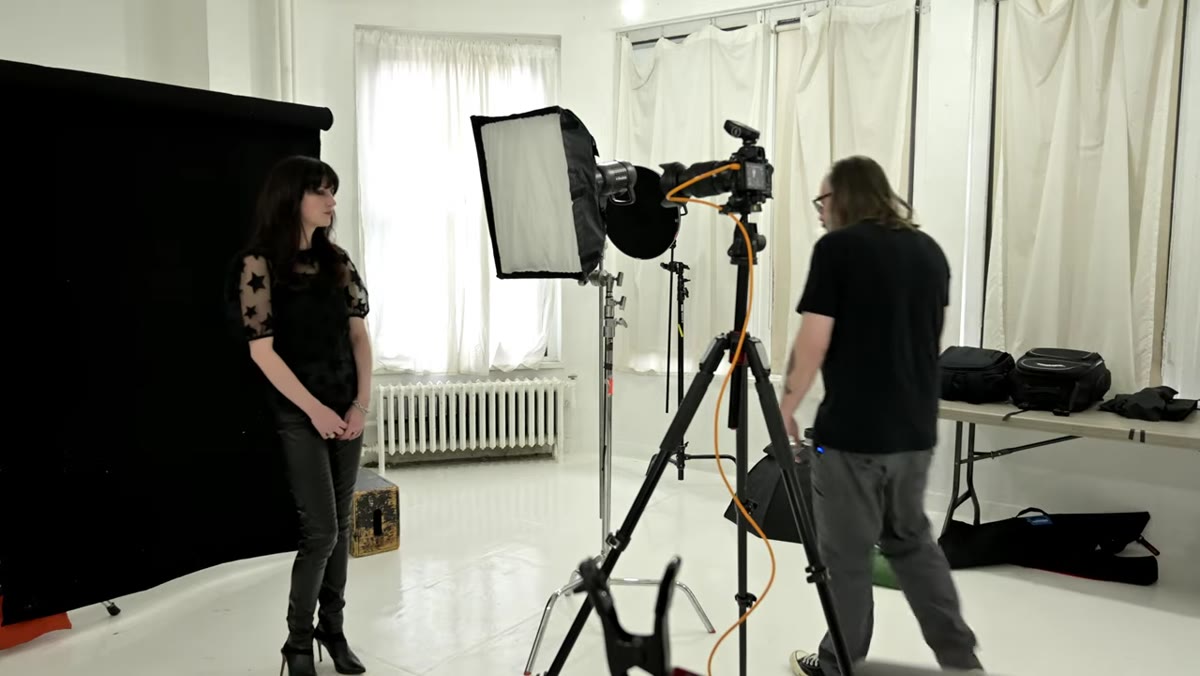 Subject turning her face to the side, away from camera
Before the light goes anywhere, set your subject’s head position. Have them turn their face so they are looking off to one side, not at the lens. The degree of that turn matters and you will fine-tune it later, but start with roughly 30 to 45 degrees off-center. This turn is what creates the geometry short lighting depends on.
Subject turning her face to the side, away from camera
Before the light goes anywhere, set your subject’s head position. Have them turn their face so they are looking off to one side, not at the lens. The degree of that turn matters and you will fine-tune it later, but start with roughly 30 to 45 degrees off-center. This turn is what creates the geometry short lighting depends on.
One practical note: I ask subjects to find a specific point on the wall or background to look at, rather than just “look to your left.” It keeps the eye line consistent across multiple frames and stops them from drifting back toward the camera.
Step 3: Place the Key Light Behind and to the Far Side
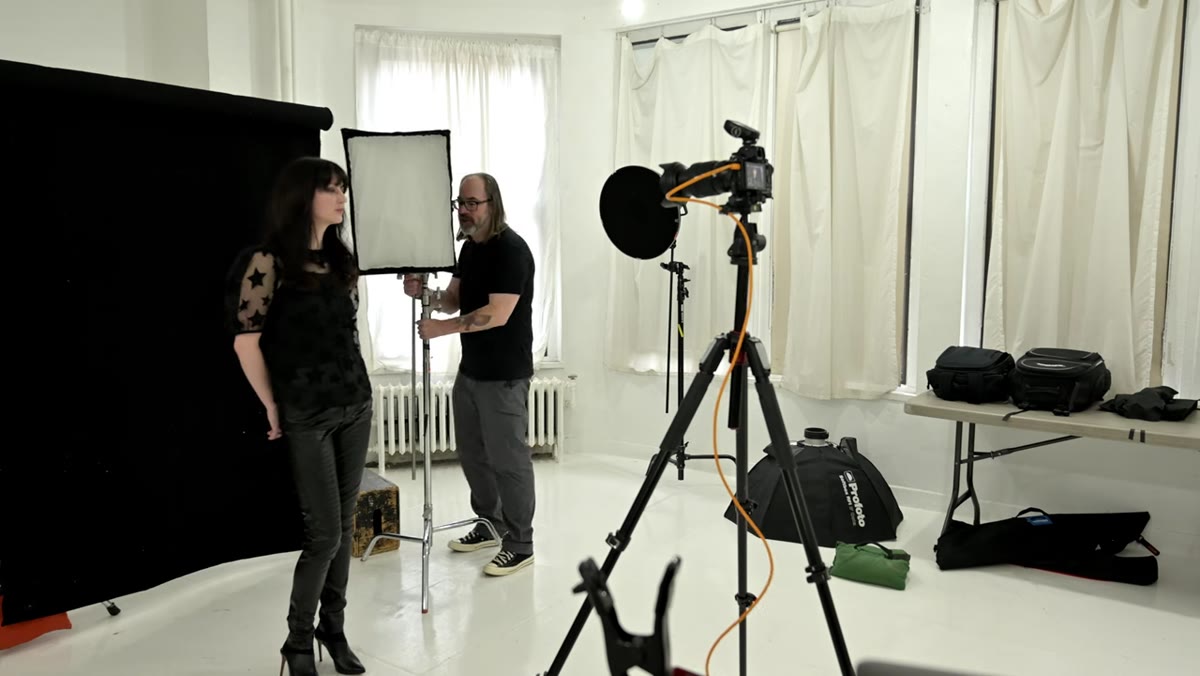 Light being moved to the far side behind the subject
Now bring your key light around to the side the subject is looking toward, and push it slightly behind the plane of the subject’s face. Norton places his light almost behind the model in the demo. For a small softbox, he notes that turning it sideways can help you control exactly how much light spills onto the front of the face. The goal is to have the main illumination hitting the cheek, eye, and temple that are turned away from the camera while letting the near side go darker.
Light being moved to the far side behind the subject
Now bring your key light around to the side the subject is looking toward, and push it slightly behind the plane of the subject’s face. Norton places his light almost behind the model in the demo. For a small softbox, he notes that turning it sideways can help you control exactly how much light spills onto the front of the face. The goal is to have the main illumination hitting the cheek, eye, and temple that are turned away from the camera while letting the near side go darker.
Watch your height carefully. Norton flags this directly: if the light is too high for the subject’s face angle, you lose the subtle front-face fill that keeps this from becoming pure split lighting. I typically start with the light at eye level or just above and adjust from there. The modeling light is your friend here. Use it before you fire a single frame.
Step 4: Check How Much Light Reaches the Front of the Face
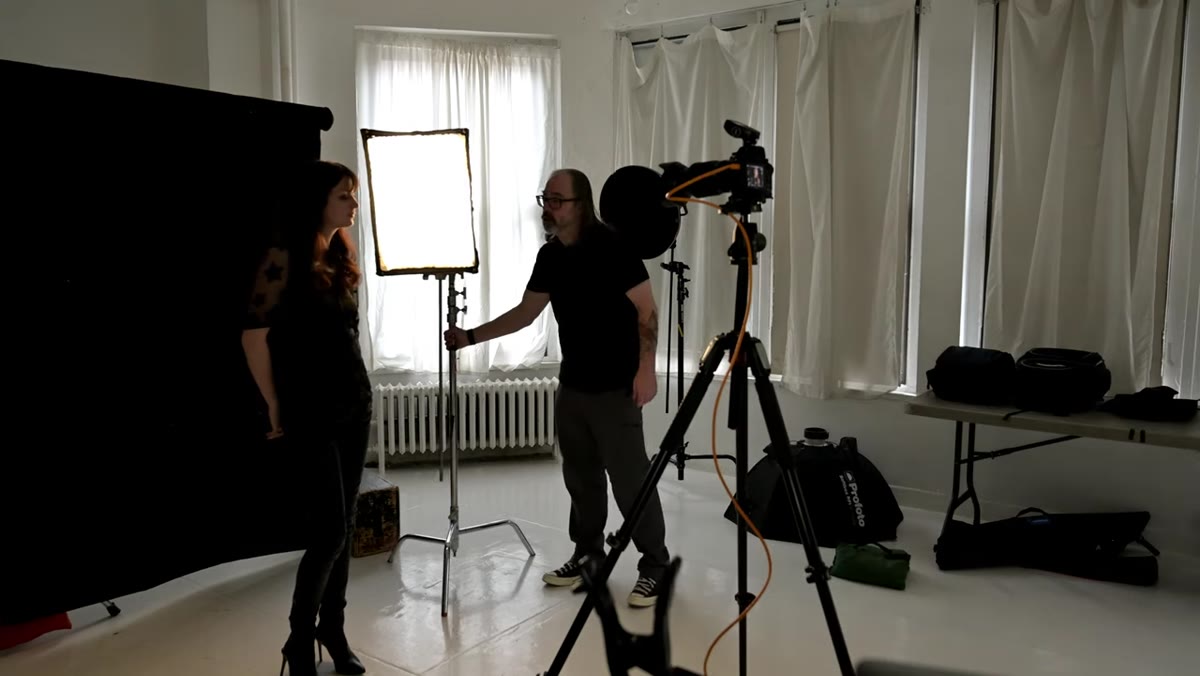 Checking light spill on the front of the face
There is a threshold between short lighting and split lighting, and it is easy to cross it without noticing. Split lighting puts the light directly to the side, cutting the face cleanly in half. Short lighting allows some illumination to wrap around onto the near cheek and nose. That small amount of front-face light is what keeps the image readable and prevents the near eye from disappearing entirely.
Checking light spill on the front of the face
There is a threshold between short lighting and split lighting, and it is easy to cross it without noticing. Split lighting puts the light directly to the side, cutting the face cleanly in half. Short lighting allows some illumination to wrap around onto the near cheek and nose. That small amount of front-face light is what keeps the image readable and prevents the near eye from disappearing entirely.
In practice, I look at the shadow edge on the nose. If that shadow is falling cleanly toward the near cheek with a soft gradation, I am in short lighting territory. If the face is bisected hard down the center, I have gone too far. Move the light slightly more forward to bring light back to the front, or ease the subject’s face turn toward the camera.
Step 5: Dial In Exposure and Choose Your Focus Point
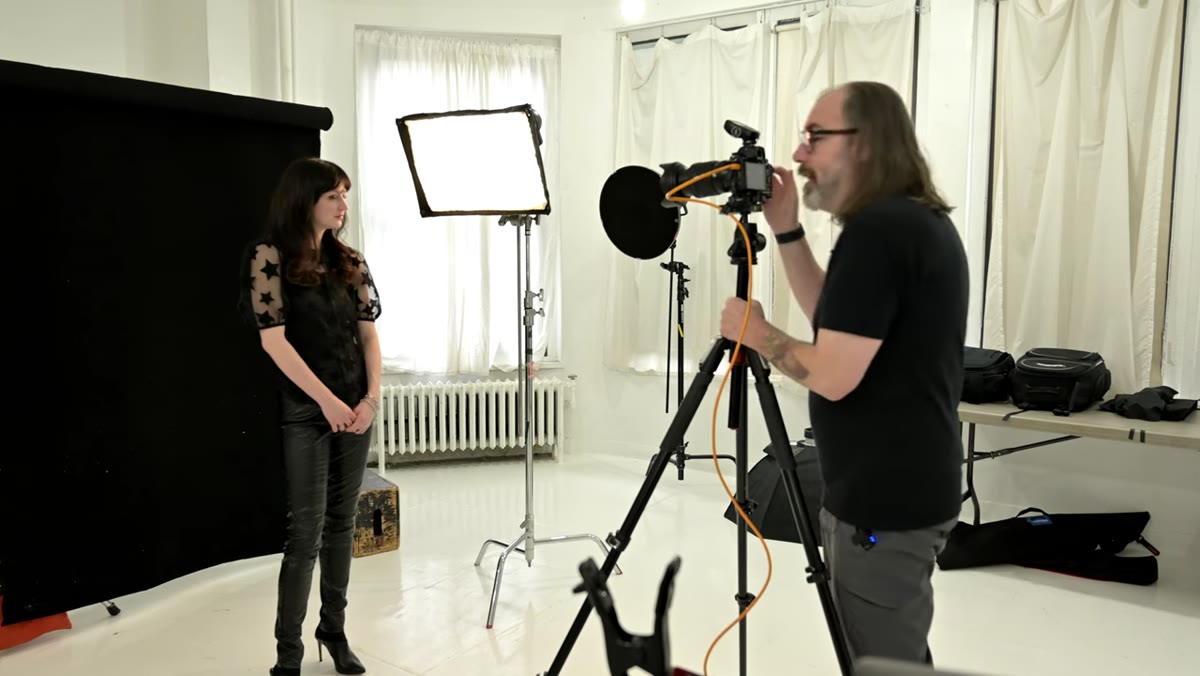 Camera aimed at subject, focusing on near eye
Norton shoots this setup at TTL to get a fast baseline, which is reasonable for a demo. In a controlled studio situation, I prefer manual flash so nothing shifts between frames. Start at your base exposure (for me that is typically ISO 100, f/8, 1/125s in a sealed studio) and adjust flash power from there. One test shot, check the histogram, make one adjustment. Done.
Camera aimed at subject, focusing on near eye
Norton shoots this setup at TTL to get a fast baseline, which is reasonable for a demo. In a controlled studio situation, I prefer manual flash so nothing shifts between frames. Start at your base exposure (for me that is typically ISO 100, f/8, 1/125s in a sealed studio) and adjust flash power from there. One test shot, check the histogram, make one adjustment. Done.
For focus, the decision is straightforward. Lock onto the eye closest to the camera. It is nearer, it is sharper at any given aperture, and it gives the viewer an entry point into the image. The exception Norton mentions is worth keeping: if the near eye is completely unlit and buried in shadow, shift to the far eye. Trying to autofocus on a dark eye socket is a losing battle and not worth the keeper rate you will sacrifice.
Step 6: Decide Intentionally Whether to Fill or Not
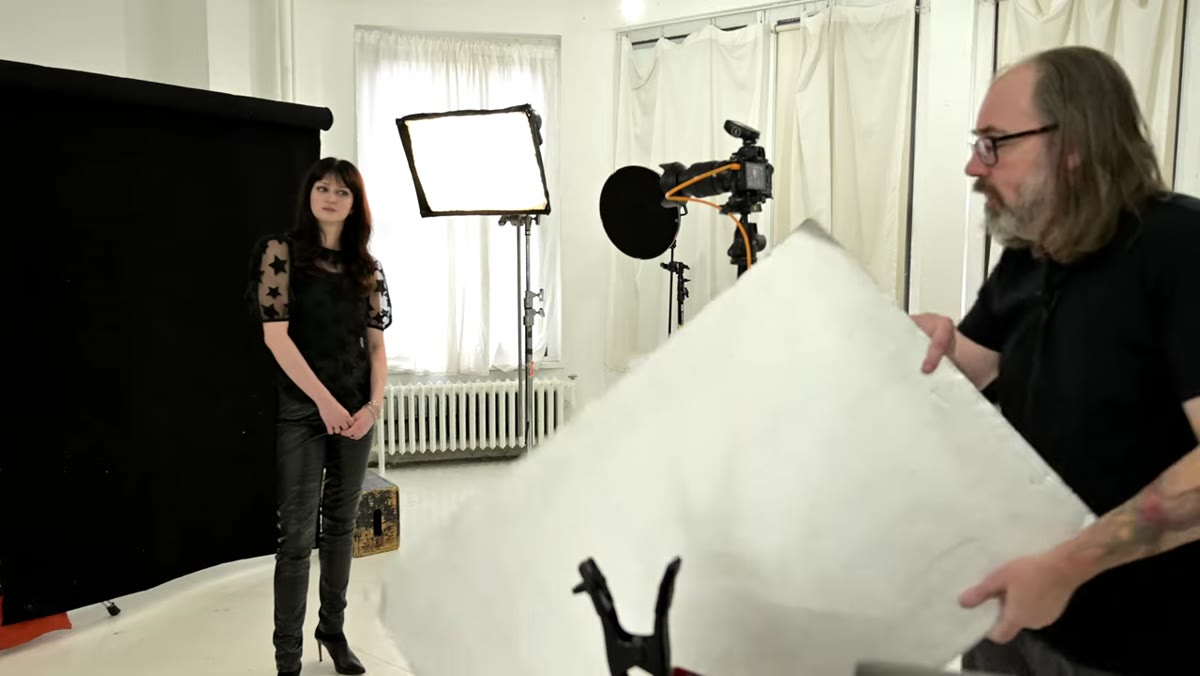 Reflector brought in to demonstrate fill light option
Norton brings in a fill source briefly to show the option, then puts it away because he prefers the drama without it. I agree with that instinct for editorial and fashion work. A fill card or second strobe at two or three stops under the key will reduce the contrast ratio and give you a cleaner, more commercial result. But if you are chasing drama, resist the fill.
Reflector brought in to demonstrate fill light option
Norton brings in a fill source briefly to show the option, then puts it away because he prefers the drama without it. I agree with that instinct for editorial and fashion work. A fill card or second strobe at two or three stops under the key will reduce the contrast ratio and give you a cleaner, more commercial result. But if you are chasing drama, resist the fill.
When I do use fill with short lighting, I keep the ratio at 3:1 or higher. Anything closer and you start flattening the very contrast that makes short lighting worth doing.
From My Own Practice: Add a Hair Light on the Opposite Side
Norton mentions this quickly at the end and it is worth slowing down on. When your subject has dark hair against a dark or medium background, the back of their head dissolves into the frame. A rim light or hair light positioned on the near side of the subject (opposite the key) gives you edge separation that the key light alone cannot provide. I use a small gridded strip box for this positioned just outside the frame at about a 45-degree angle behind the subject. The grid keeps it from spilling onto the background or into the lens. Without it, short lighting on dark-haired subjects often looks unfinished, like something is missing but you cannot name it immediately.
Short lighting is not complicated. It is a spatial relationship: key light on the far side of the face, subject turned away from the camera, shadow falling on the near cheek. That geometry does the work. Everything else is refinement. If you shoot dramatic portraits, editorial, fashion, or even moody corporate headshots, this belongs in your regular rotation.
Watch the full tutorial on YouTube and pay attention to how Norton positions his light relative to the model’s eye line. The spatial logic becomes obvious the moment you see it live, and from that point forward you will start seeing short lighting everywhere.
Comments (2)
Would love to see a follow-up going deeper into this topic.
Excellent tutorial. I'd add that from a business standpoint, this technique is incredibly versatile.
Leave a Comment