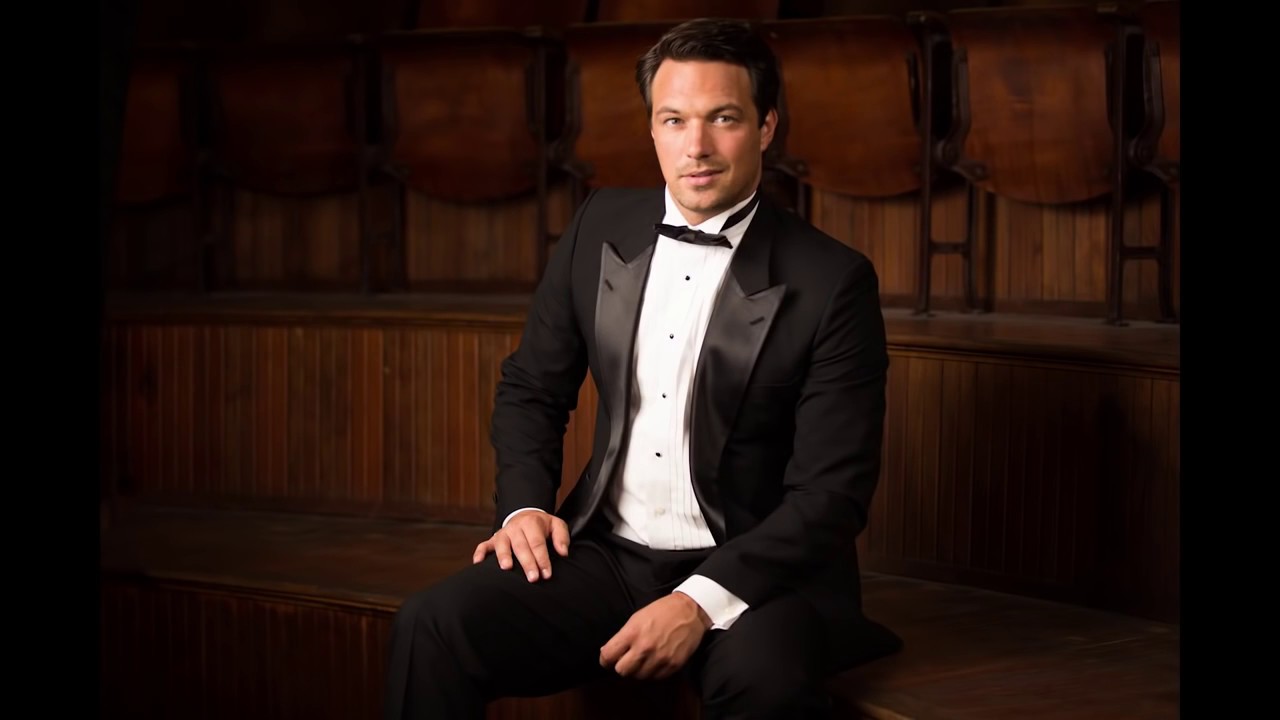
Wedding formals have a reputation for being the part of the day where photographers go through the motions. Lined up, lit flat, done. I’ve been guilty of it myself, especially on location where you’re fighting unfamiliar rooms, low ambient light, and a groom who’d rather be anywhere else. The challenge isn’t the flash, it’s building a setup quickly that still looks intentional. When I came across this KelbyOne tutorial on lighting a groom on location with flash, I recognized a working shooter’s approach immediately. No overcomplicated rigs, no gear you’d need a second shooter just to carry. Watch the full tutorial on YouTube and you’ll see what I mean.
The setup demonstrated uses two lights: a softbox as the key and a strip bank as a kicker. That’s it. What makes it worth writing about isn’t the gear list, it’s the methodology. There’s a specific way this photographer dials in each light independently before combining them, and that single habit has saved me from more botched setups than I can count. I keep a lighting journal where I sketch every setup I use on a shoot, and this two-light configuration has earned its own dedicated page.
The location is a venue with rich wood paneling and low ambient light, which is closer to a real-world editorial environment than most tutorials dare to use. That context matters. Let’s walk through exactly how it comes together.
Step 1: Read the Ambient Light Before You Touch a Flash
 Photographer shooting without flash, dark exposure visible
Before any flash gets switched on, take a test shot with your camera at your intended settings. In this tutorial, the ambient result is nearly black, which is the point. It confirms that the flash will be doing essentially all of the work and that any spill or misplaced modifier won’t be rescued by a bright room. On location, I always do this first. It tells me whether I’m fighting the ambient or building on top of it, and the answer changes everything about how I set my power.
Photographer shooting without flash, dark exposure visible
Before any flash gets switched on, take a test shot with your camera at your intended settings. In this tutorial, the ambient result is nearly black, which is the point. It confirms that the flash will be doing essentially all of the work and that any spill or misplaced modifier won’t be rescued by a bright room. On location, I always do this first. It tells me whether I’m fighting the ambient or building on top of it, and the answer changes everything about how I set my power.
At this venue, the working settings are 1/125s, f/2.8, and ISO 200. That combination keeps the shutter fast enough to kill most ambient light while staying wide enough to pull some warmth from the background without making the depth of field disappear entirely. If your location has more natural light than this one, close down the aperture or raise your shutter speed before touching flash power.
Step 2: Position the Key Light at 45 Degrees
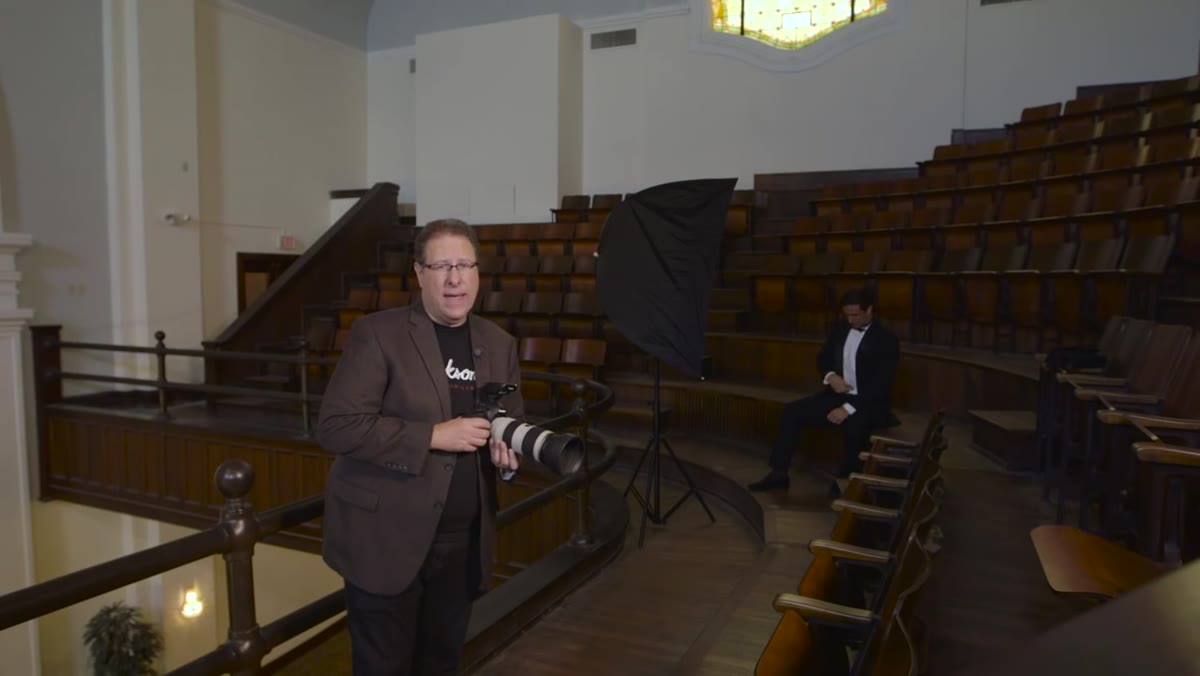
 Softbox positioned at 45-degree angle to seated subject
The main light here is a standard softbox placed at a 45-degree angle to the subject, who is seated. That angle is classical for a reason. It builds dimension by creating shadow on the far side of the face without going so extreme that it becomes dramatic or unflattering. The groom’s jawline reads clearly, the light falls naturally across his features, and the shadow side retains enough detail that you haven’t lost him to darkness.
Softbox positioned at 45-degree angle to seated subject
The main light here is a standard softbox placed at a 45-degree angle to the subject, who is seated. That angle is classical for a reason. It builds dimension by creating shadow on the far side of the face without going so extreme that it becomes dramatic or unflattering. The groom’s jawline reads clearly, the light falls naturally across his features, and the shadow side retains enough detail that you haven’t lost him to darkness.
Power is set to just above 1/16, roughly halfway between 1/16 and 1/8. The modifier is close to the subject, which is what lets you run power this low while still getting a well-exposed face. This is a point worth underlining: the closer a light source is to your subject, the softer and more efficient it becomes. If you’re running flash power high and still struggling with quality of light, the answer is usually to move the modifier closer, not to add another light.
Step 3: Take Initial Shots and Evaluate the Single-Light Result
 First flash frame showing soft light and natural shadow on groom’s face
Once the key light is on, shoot a few frames before touching anything else. This is where you evaluate whether the softbox placement is actually doing what you think it’s doing. Check the shadow side of the face, look at where the catch light is landing in the eyes, and confirm you’re not getting unwanted hot spots on the forehead or collar.
First flash frame showing soft light and natural shadow on groom’s face
Once the key light is on, shoot a few frames before touching anything else. This is where you evaluate whether the softbox placement is actually doing what you think it’s doing. Check the shadow side of the face, look at where the catch light is landing in the eyes, and confirm you’re not getting unwanted hot spots on the forehead or collar.
In the tutorial, these single-light frames already look strong. The light is soft, the shadows are readable, and the subject looks comfortable. Resist the urge to immediately add your second light just because you have one. Sometimes one well-placed modifier is the whole answer, and adding more lights onto a shaky foundation creates twice the problems to diagnose.
Step 4: Add the Strip Bank as a Kicker Behind the Subject
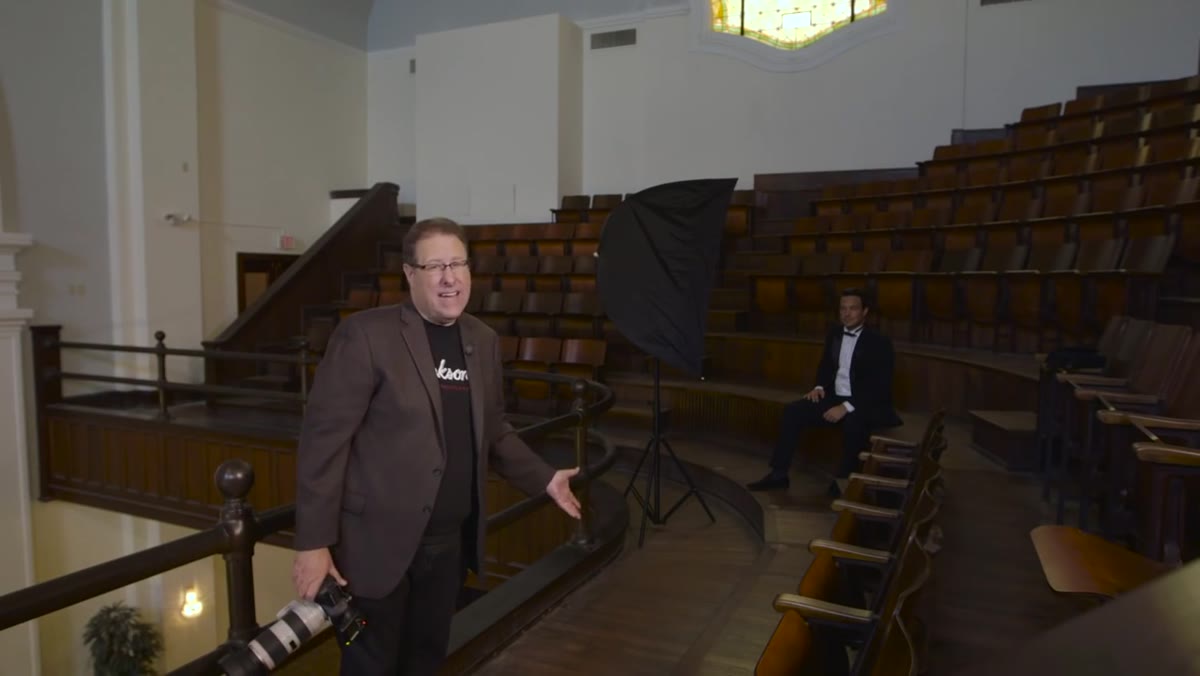
 Apollo strip bank being positioned behind and above the groom
The second light introduced is an Apollo strip bank, positioned behind the subject and angled downward toward the shoulder and hair. This is often called a rim light or kicker, and its job is to separate the subject from the background by adding a hard, directional edge of light to the side facing away from the camera. Without it, a dark subject in front of a dark background flattens out and loses depth.
Apollo strip bank being positioned behind and above the groom
The second light introduced is an Apollo strip bank, positioned behind the subject and angled downward toward the shoulder and hair. This is often called a rim light or kicker, and its job is to separate the subject from the background by adding a hard, directional edge of light to the side facing away from the camera. Without it, a dark subject in front of a dark background flattens out and loses depth.
Strip banks work well for this role specifically because their narrow shape concentrates the light into a defined edge rather than wrapping it broadly. You get definition without spill. Aim it too high or too far forward and it starts lighting the nose from the back, which reads as a mistake rather than a deliberate effect.
Step 5: Test the Back Light in Isolation Before Combining
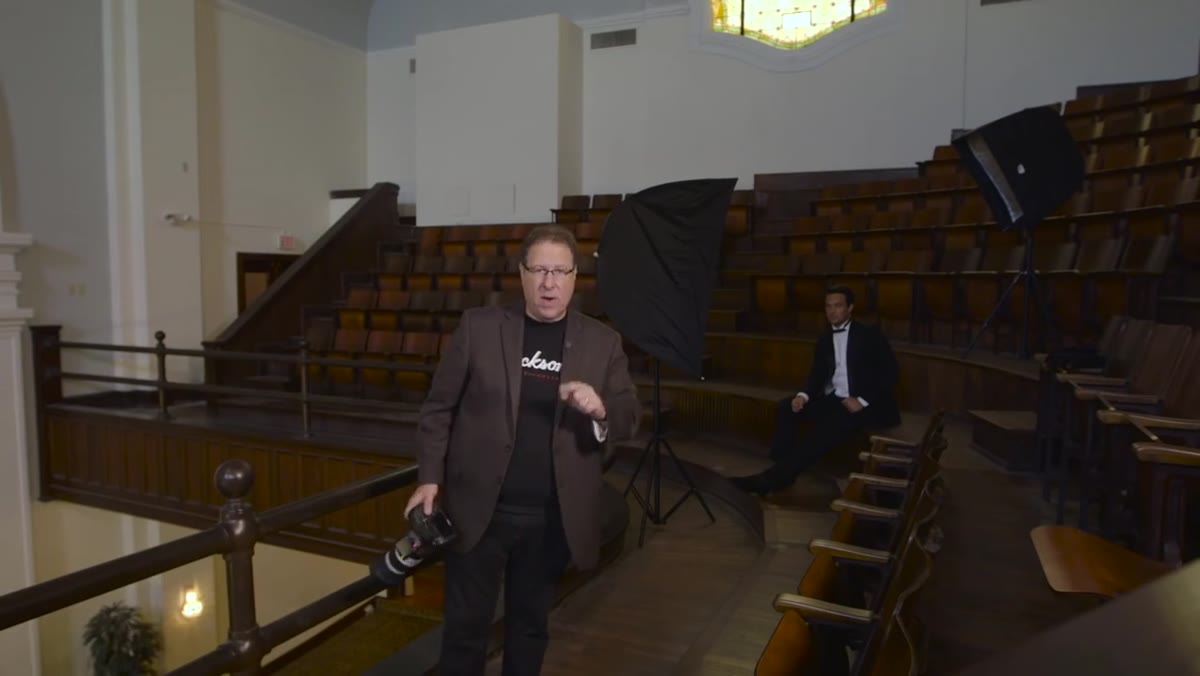 Front light off, only strip bank firing to show back light placement
This is the step that most photographers skip, and skipping it is exactly why multi-light setups go wrong. The key light gets turned off entirely so you can evaluate the strip bank on its own. What does it light? Where does it fall? Is it creeping onto the nose? Is it catching the ear in a way that looks odd?
Front light off, only strip bank firing to show back light placement
This is the step that most photographers skip, and skipping it is exactly why multi-light setups go wrong. The key light gets turned off entirely so you can evaluate the strip bank on its own. What does it light? Where does it fall? Is it creeping onto the nose? Is it catching the ear in a way that looks odd?
In the tutorial, the initial position is hitting the nose slightly more than intended. A small adjustment, tipping the strip bank back and sliding it down, corrects it. That correction would have been invisible once the key light went back on, buried under the brighter main exposure. Looking at each light independently is the only reliable way to know what each one is actually contributing.
Step 6: Combine Both Lights and Confirm the Final Exposure
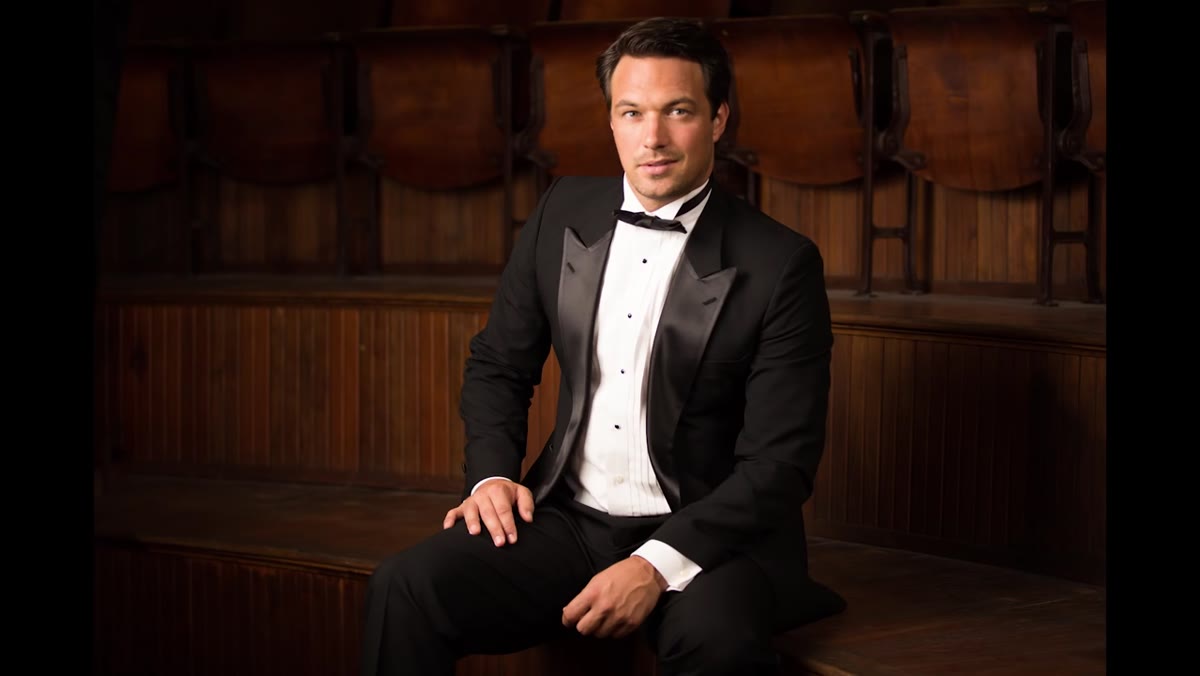
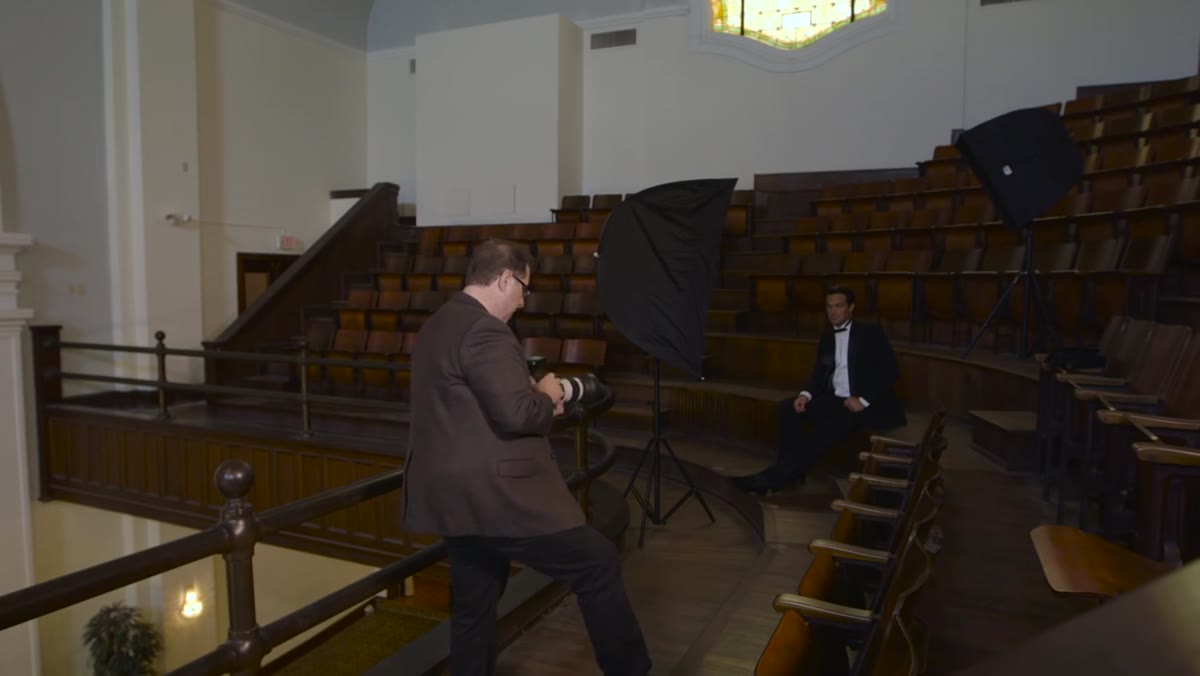 Both lights firing, soft key light blended with hard rim light on groom
With both lights on, the final frame shows the full effect: soft, dimensional light from the front, a clean hard edge from the strip bank behind, and just enough background character from the wood paneling to give the image a sense of place. The two-light combination reads as intentional and polished without looking overproduced.
Both lights firing, soft key light blended with hard rim light on groom
With both lights on, the final frame shows the full effect: soft, dimensional light from the front, a clean hard edge from the strip bank behind, and just enough background character from the wood paneling to give the image a sense of place. The two-light combination reads as intentional and polished without looking overproduced.
Power on the front key light stays at 1/16 through the combined test. If the strip bank was set up correctly in isolation, it should integrate cleanly without forcing you to rebalance the whole setup from scratch.
What I’d Add From My Own Practice
One thing the tutorial doesn’t dwell on but I’d emphasize: mark your strip bank’s position on the floor with a strip of tape once you find the angle that works. I label everything in my studio with masking tape and I bring a roll on location shoots for exactly this reason. If the light gets bumped or a second shooter adjusts it without asking, you can reset it in seconds instead of re-testing from scratch under deadline pressure.
Also, at f/2.8, your depth of field is thin enough that subject movement between frames will shift focus noticeably. If you’re shooting a seated groom in formal wear, lock focus on the near eye and recheck it every few frames rather than trusting continuous autofocus to hold through small shifts.
The single most important idea in this entire setup is the one that costs nothing: test each light alone before you combine them. Multi-light confusion almost always traces back to not knowing what each individual source is doing. Build one light at a time, confirm it works alone, then layer the next one. That habit will clean up your location work faster than any new modifier will.
Watch the full tutorial on YouTube to see the exact positioning and the live comparisons between single-light and two-light results.
Comments
Leave a Comment