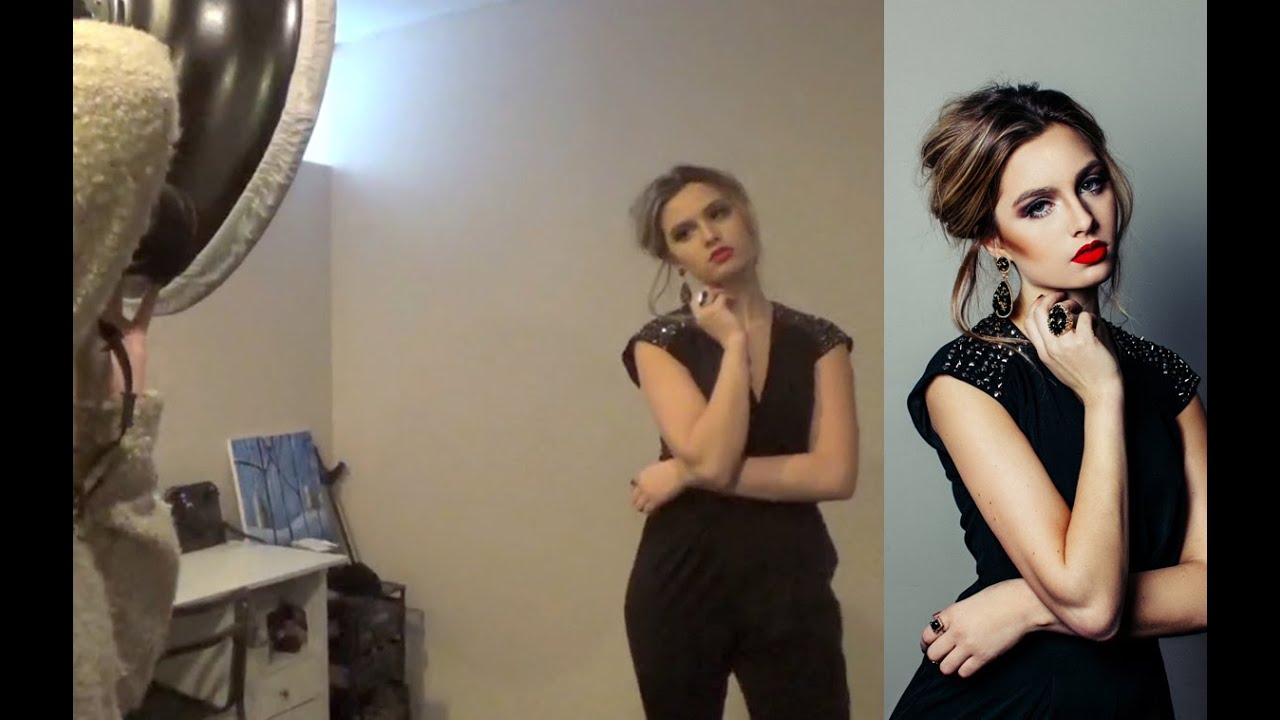
Every time I take on a new modifier, I test it the day it arrives. That is a rule I set for myself years ago after walking into a campaign shoot having never fired the strobe I’d rented. The images were usable. Barely. I’ve never made that mistake again. So when I came across a studio portrait session documented by photographer Jessica Kobeissi, I watched it the way I watch most tutorials from working photographers: looking for the decision-making, not just the gear list. What she captured in this video is something most lighting breakdowns skip entirely. The messy, iterative process of dialing in a single light source until it actually flatters a face.
Watch the full tutorial on YouTube
In this Jessica Kobeissi tutorial, she shoots with a Mola Demi beauty dish mounted on a Paul C. Buff Einstein 640 monolight, using a Canon 5D Mark IV with a 50mm f/1.2 lens. The session is framed as a learning experience, which is precisely what makes it worth studying. She is not presenting polished, pre-planned results. She is troubleshooting in real time, and if you pay attention to why she moves the light rather than just where she moves it, you’ll take something genuinely useful out of this.
Step 1: Establish Your Test Shot Baseline
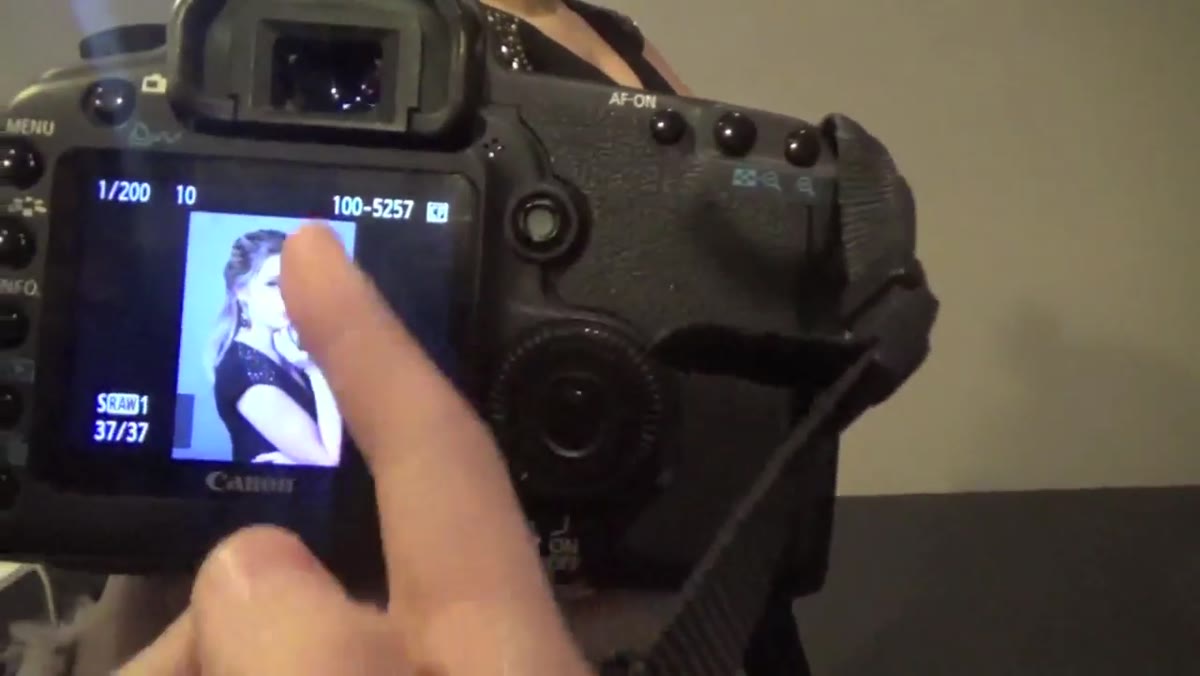
 Camera settings displayed: f/8, 1/200s, ISO 320
Before chasing a look, get a technically clean image first. Kobeissi opens with an aperture of f/8, a shutter speed of 1/200s, and ISO 320. These are conservative, controlled settings for a single strobe in a studio environment. The 1/200s shutter keeps you at or near sync speed for most studio monolights, which prevents banding and ensures the flash exposure is the dominant light source. Starting at f/8 gives you enough depth of field to evaluate the light’s shape on the face clearly before you start opening up.
Camera settings displayed: f/8, 1/200s, ISO 320
Before chasing a look, get a technically clean image first. Kobeissi opens with an aperture of f/8, a shutter speed of 1/200s, and ISO 320. These are conservative, controlled settings for a single strobe in a studio environment. The 1/200s shutter keeps you at or near sync speed for most studio monolights, which prevents banding and ensures the flash exposure is the dominant light source. Starting at f/8 gives you enough depth of field to evaluate the light’s shape on the face clearly before you start opening up.
Do not skip this step to chase mood immediately. Test shots are diagnostic. They tell you where the light is actually landing versus where you assumed it would land.
Step 2: Set the Beauty Dish Height Above the Subject’s Head
 Beauty dish positioned above model’s head, modifier angled down
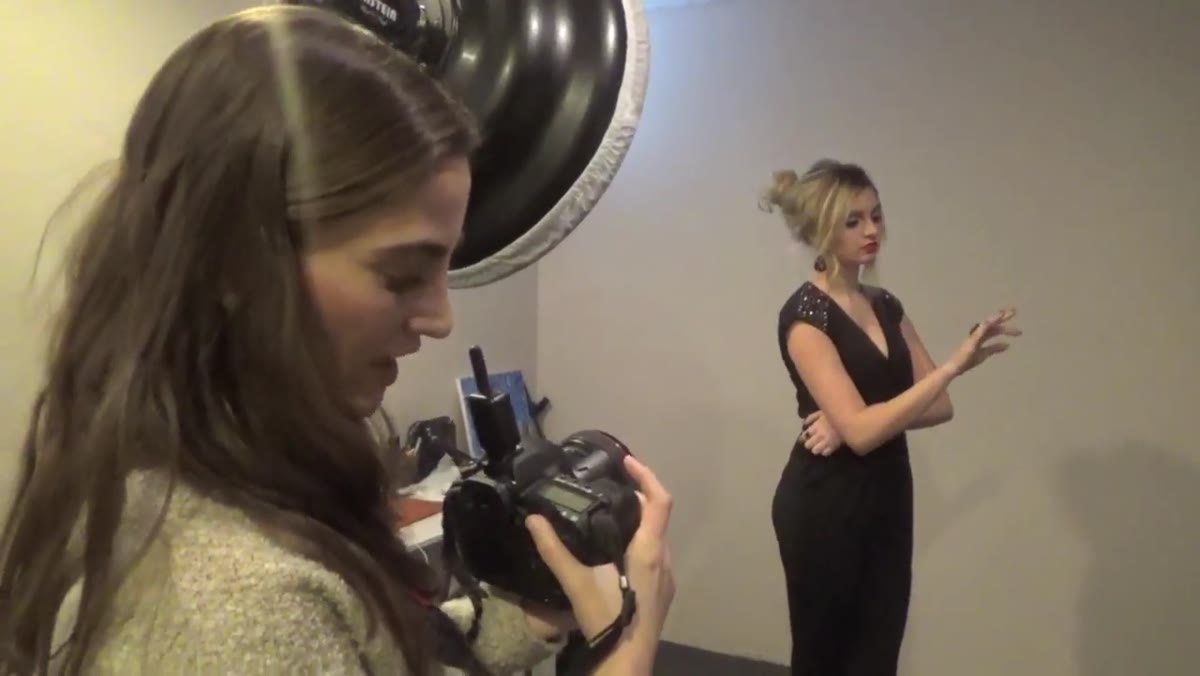
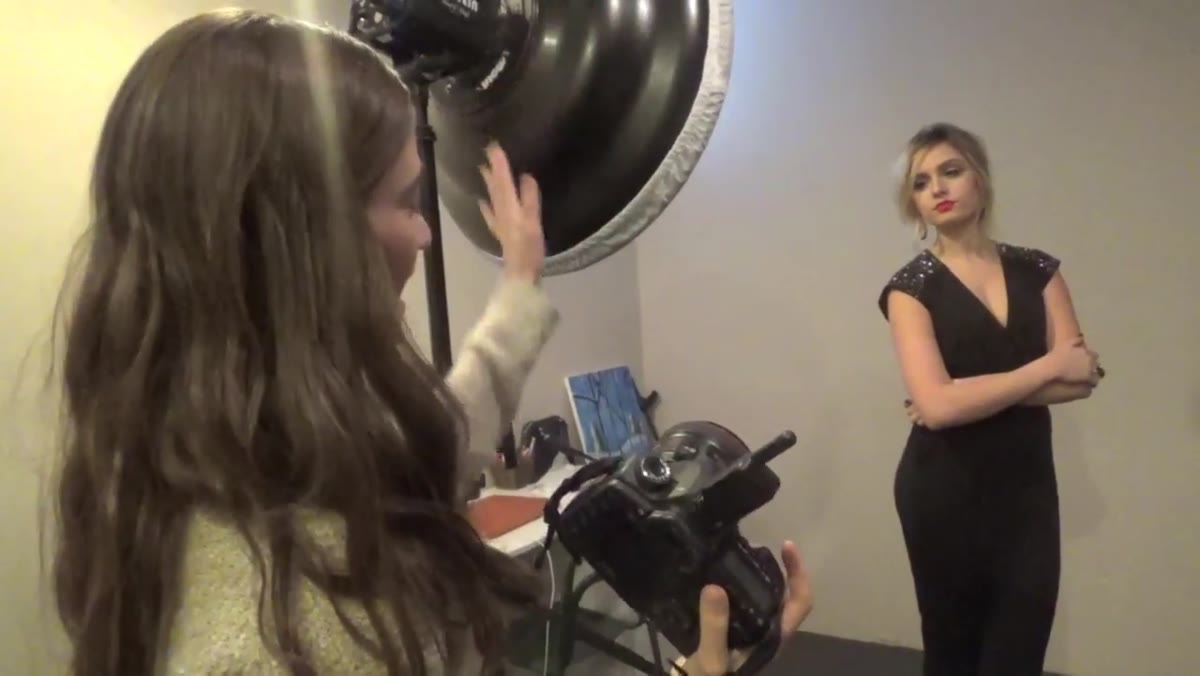
Kobeissi’s first meaningful adjustment is vertical. She had the beauty dish positioned lower initially and found the shadow fall was unflattering, creating harsh transitions across the face. Raising the dish so it sits above the model’s head and angles downward corrects this immediately. The dish now casts shadows that follow the natural planes of the face rather than fighting them.
Beauty dish positioned above model’s head, modifier angled down
Kobeissi’s first meaningful adjustment is vertical. She had the beauty dish positioned lower initially and found the shadow fall was unflattering, creating harsh transitions across the face. Raising the dish so it sits above the model’s head and angles downward corrects this immediately. The dish now casts shadows that follow the natural planes of the face rather than fighting them.
This is the detail that separates a beauty dish from a softbox in practice. A beauty dish produces a focused, somewhat specular light that rewards precise placement. Too low and it wraps around the jaw and creates an uplit quality. Too high and you lose the catchlights. The sweet spot is typically 30 to 45 degrees above eye level, angled down toward the nose. Kobeissi finds this by looking at the shadow under the nose. When that shadow points cleanly downward at a slight angle, you’re close.
Step 3: Use an Angled Light Position to Create Dimension
 Beauty dish positioned to the side, shadow visible on far cheek
A beauty dish placed directly in front of the subject produces even, flat illumination across both sides of the face. Kobeissi tries this and immediately notices the result feels too uniform. Her preference is to angle the dish to one side so a subtle shadow falls on the far cheek. This creates dimension without crossing into dramatic chiaroscuro territory. For beauty and portrait work, that small asymmetry is often the difference between a photograph that reads as alive and one that reads as a passport photo.
Beauty dish positioned to the side, shadow visible on far cheek
A beauty dish placed directly in front of the subject produces even, flat illumination across both sides of the face. Kobeissi tries this and immediately notices the result feels too uniform. Her preference is to angle the dish to one side so a subtle shadow falls on the far cheek. This creates dimension without crossing into dramatic chiaroscuro territory. For beauty and portrait work, that small asymmetry is often the difference between a photograph that reads as alive and one that reads as a passport photo.
The practical approach: position the dish at roughly a 30 to 45 degree angle to the subject’s face, not directly in front. Have the model turn slightly toward the light so the far cheek catches just enough shadow to define the bone structure. Watch the bridge of the nose. If the nose shadow falls onto the cheek, the light is too far to the side. Pull it back toward center until the shadow stays on the nose itself.
Step 4: Adjust Aperture to Compensate for Strobe Power
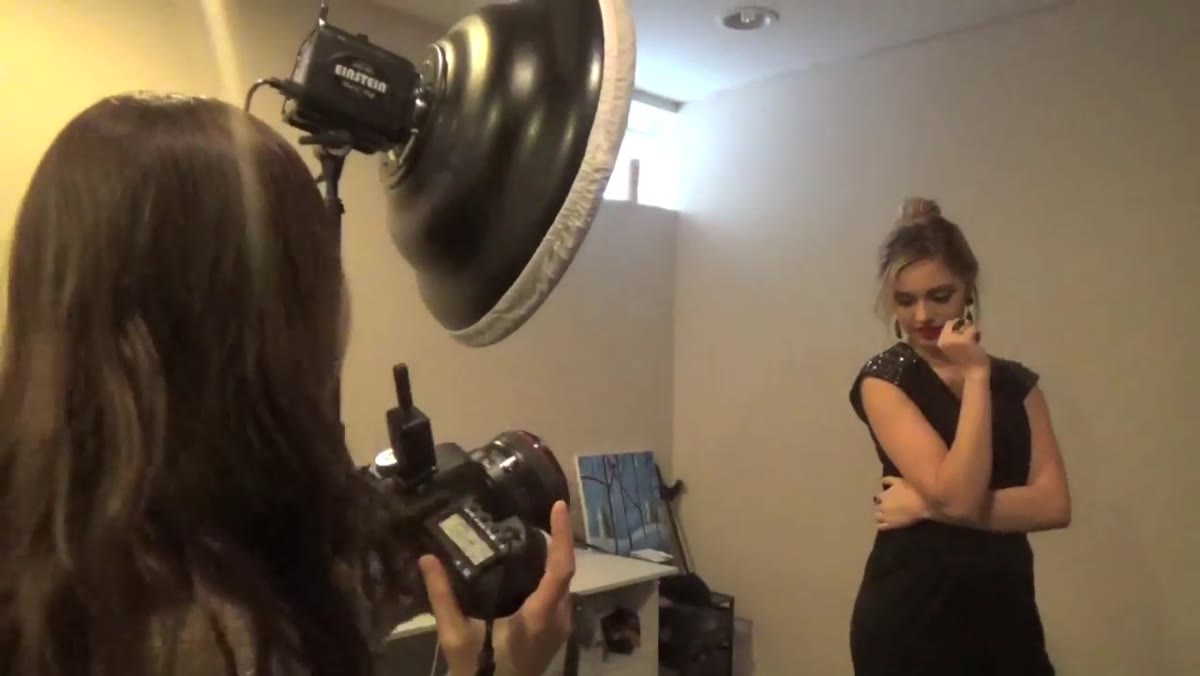 F-stop adjusted from f/9 to f/5, images become brighter
Kobeissi is running the Einstein at a lower power setting, around -5.2 on the unit’s internal scale, which produces a relatively dim output. At f/9, the resulting images are underexposed. Rather than pushing strobe power up, she drops her aperture to f/5, which brightens the exposure and also softens the depth of field slightly. For portrait work, this is often the right direction anyway.
F-stop adjusted from f/9 to f/5, images become brighter
Kobeissi is running the Einstein at a lower power setting, around -5.2 on the unit’s internal scale, which produces a relatively dim output. At f/9, the resulting images are underexposed. Rather than pushing strobe power up, she drops her aperture to f/5, which brightens the exposure and also softens the depth of field slightly. For portrait work, this is often the right direction anyway.
The important concept here is reciprocity between strobe power and aperture. Your shutter speed controls ambient light bleed; your aperture controls flash exposure. When images are dark and your strobe is near its lower limit, open your aperture before reaching for the power dial. Cranking strobe power introduces more heat and slower recycle times. Aperture is the faster, cleaner adjustment.
Step 5: Shoot Angles and Directions Separately
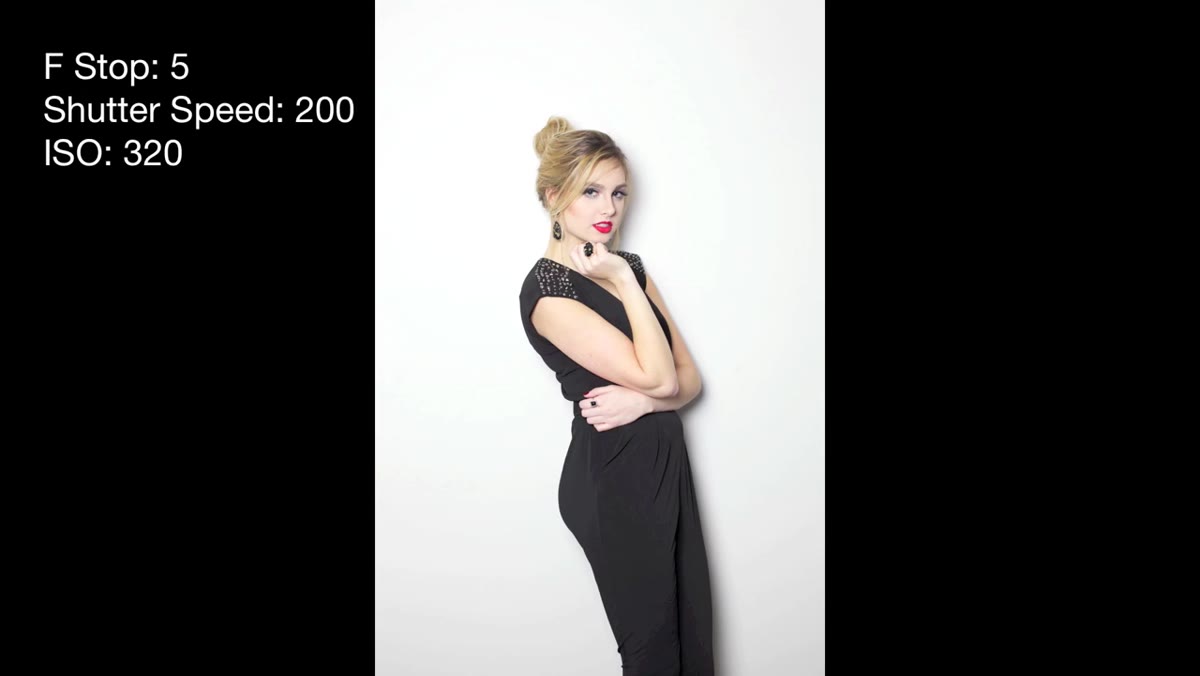 Photographer shooting at a slight angle while dish faces model directly
One of the quieter lessons in this tutorial is that the camera angle and the light angle are independent variables. Kobeissi demonstrates shooting from a slight angle while the beauty dish remains pointed directly at the subject. This gives the image a natural, slightly candid geometry while maintaining the clean frontal light on the skin.
Photographer shooting at a slight angle while dish faces model directly
One of the quieter lessons in this tutorial is that the camera angle and the light angle are independent variables. Kobeissi demonstrates shooting from a slight angle while the beauty dish remains pointed directly at the subject. This gives the image a natural, slightly candid geometry while maintaining the clean frontal light on the skin.
Most beginners assume the camera and the light have to move together. They don’t. Experiment with keeping the light static and walking the camera around the subject. The light will behave differently from each position, and some of those combinations produce results you wouldn’t have predicted from a lighting diagram alone.
What I’d Add From My Own Studio Work
Kobeissi’s process here is honest and effective, but there’s one layer I always add when working with a beauty dish for the first time in a new space: I sketch the setup in my lighting journal immediately after the shoot, not before. Diagrams made in advance are aspirational. Diagrams made after a shoot record what actually worked. I note the dish height in centimeters, the distance from subject to light, and the f-stop that produced the exposure I liked. The next time I pick up that modifier, I have a starting point that isn’t guesswork.
I’d also recommend checking your color temperature before the first test shot rather than after. I learned this the hard way on an editorial job where I had mixed my strobe with an overhead tungsten fill I forgot to turn off. The images had a split-tone cast I couldn’t correct cleanly in post. Now I tape a color temperature note to the light stand alongside the power setting. Masking tape, Sharpie, done.
The single most useful thing this tutorial demonstrates is that moving the light is faster and more effective than adjusting the pose. Kobeissi makes several small repositioning decisions in a short window of time, and each one produces a measurably different image. That instinct, to reach for the light stand before the direction cue, is a working photographer’s reflex worth building early.
Watch the full tutorial on YouTube
Comments
Leave a Comment