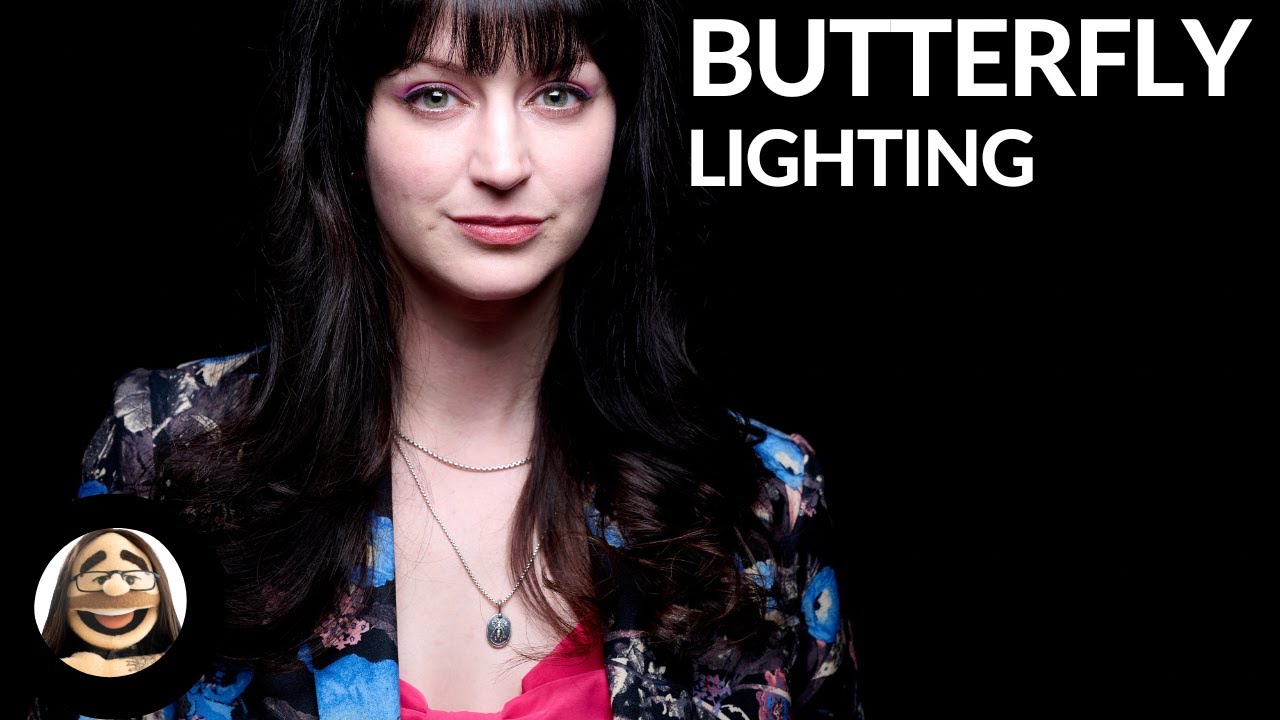
Butterfly lighting is one of those techniques I keep coming back to regardless of what I’m shooting. Fashion, beauty, corporate headshots — it shows up constantly because it flatters almost every face it touches. It defines the jaw, carves out the cheekbones, and throws that clean, symmetrical glow across the skin that makes makeup look like it was applied by a team of professionals even when the budget didn’t allow for one. I label every light position in my studio with masking tape before a shoot, and the “butterfly” strip of tape above my camera axis has worn off and been replaced more times than any other.
When I came across Watch the full tutorial on YouTube from Daniel Norton Photographer, I appreciated how concisely he cuts to what actually matters in a working session. No lengthy theory. Just the light, the subject, and the specific decisions you make in real time. What follows is my breakdown of his method, with the extra detail I’d want if I were reading this before my first beauty shoot.
Step 1: Understand What Actually Defines the Pattern
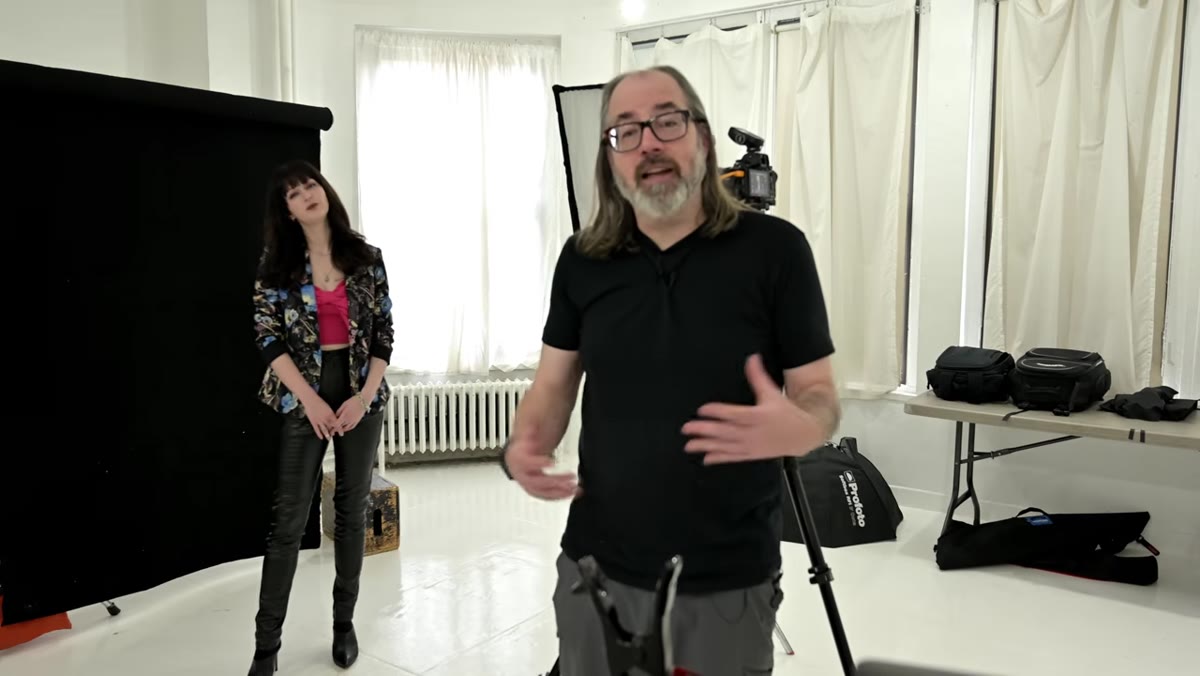 Daniel explains the centered light position creating butterfly shadow
Butterfly lighting gets its name from a specific shadow. When a light is centered directly on the face and angled slightly downward, it casts a small, symmetrical shadow beneath the nose and above the lip that, if you look at it straight on, resembles a butterfly in flight. That shadow is the diagnostic. If you don’t see it, you don’t have butterfly lighting. The centered position is the defining characteristic, not just the angle or the modifier.
Daniel explains the centered light position creating butterfly shadow
Butterfly lighting gets its name from a specific shadow. When a light is centered directly on the face and angled slightly downward, it casts a small, symmetrical shadow beneath the nose and above the lip that, if you look at it straight on, resembles a butterfly in flight. That shadow is the diagnostic. If you don’t see it, you don’t have butterfly lighting. The centered position is the defining characteristic, not just the angle or the modifier.
This matters practically because it means the light must follow the subject’s gaze, not the camera. The light lives on their axis, not yours.
Step 2: Choose a Light You Can Boom Over the Camera
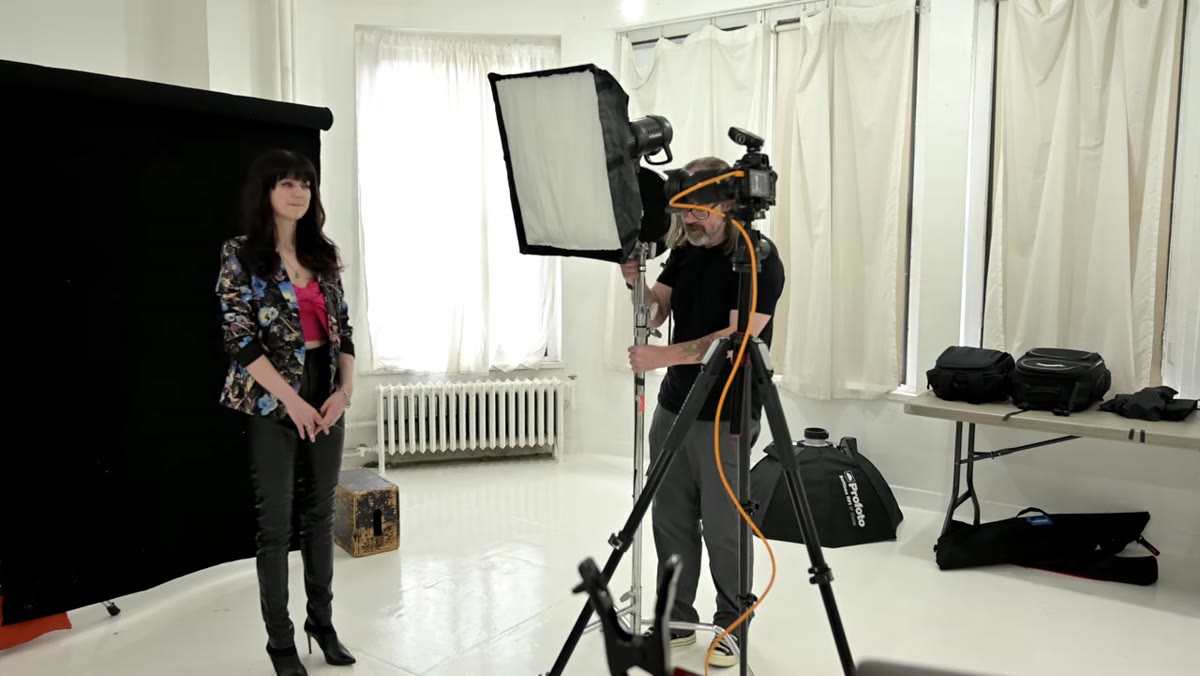 Profoto strobe on C-stand positioned above and behind the camera
Daniel uses a Profoto strobe mounted on a C-stand with a boom arm. That configuration is the standard approach because it lets you position the light directly above the lens without the stand appearing in the frame. Any strobe or monolight will work here, but the boom arm is not optional if you want clean geometry. A straight stand will block your shot or force you off-axis.
Profoto strobe on C-stand positioned above and behind the camera
Daniel uses a Profoto strobe mounted on a C-stand with a boom arm. That configuration is the standard approach because it lets you position the light directly above the lens without the stand appearing in the frame. Any strobe or monolight will work here, but the boom arm is not optional if you want clean geometry. A straight stand will block your shot or force you off-axis.
If you’re working in a smaller space, a shorter boom arm is fine. The priority is getting the light source centered on the face and high enough to clear your camera. I keep a dedicated boom arm attached to my heaviest C-stand for exactly this setup. The stand gets sandbags. Always.
Step 3: Position the Light Directly Above the Camera-to-Subject Axis
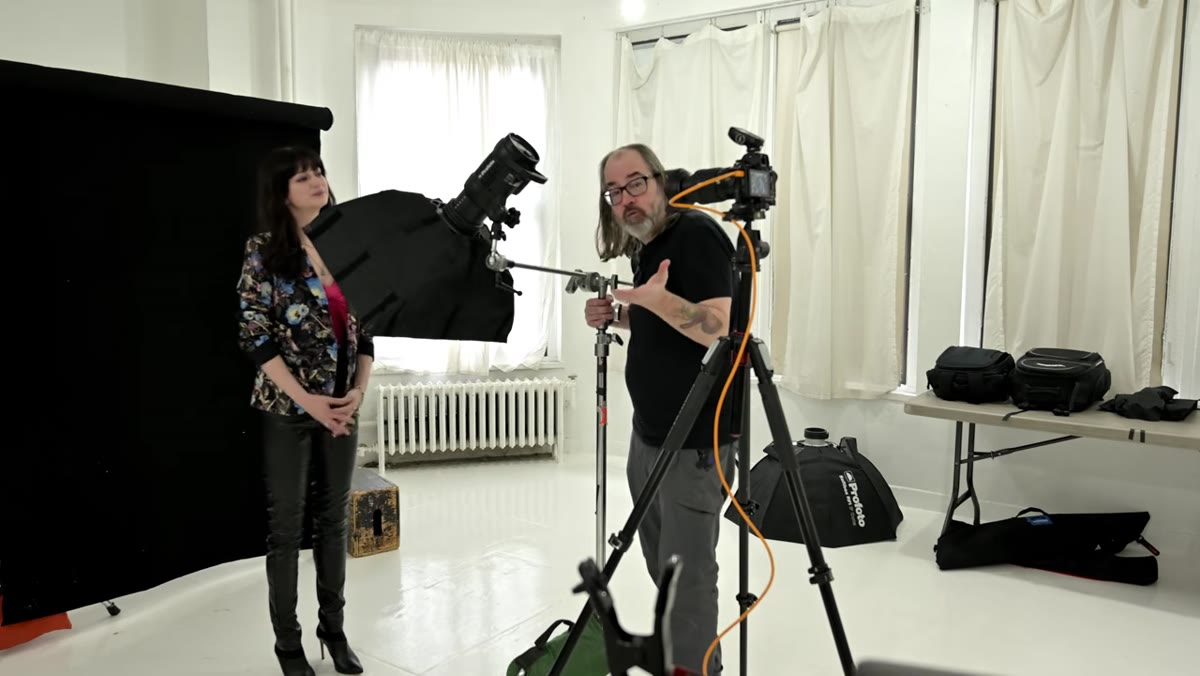 Light placed overhead and centered behind the camera position
The light goes over the camera, centered on the subject’s nose as they look directly into the lens. Not centered on the camera body. Not centered on the frame. Centered on the face. Daniel makes this distinction explicitly and it’s one that trips up photographers who are thinking about the image plane rather than the subject’s geometry.
Light placed overhead and centered behind the camera position
The light goes over the camera, centered on the subject’s nose as they look directly into the lens. Not centered on the camera body. Not centered on the frame. Centered on the face. Daniel makes this distinction explicitly and it’s one that trips up photographers who are thinking about the image plane rather than the subject’s geometry.
Start with the strobe roughly a foot behind the camera’s front element and extend it out over the lens. You’re looking for a position where the light is coming from the same direction the lens is pointing, just from slightly above that line.
Step 4: Set Your Height to Clear the Frame
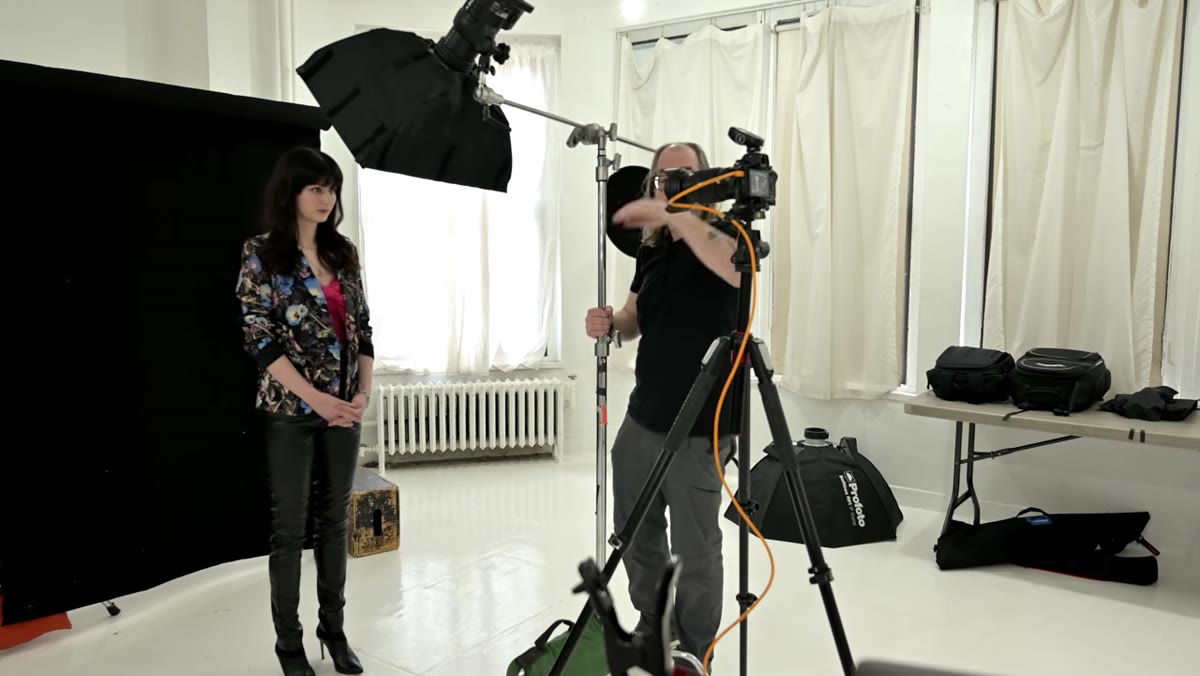 Camera viewfinder check to confirm light modifier is out of frame
Raise the light until the modifier just disappears from the top of your frame. Daniel checks this directly through the viewfinder, which is the right move. The goal is to get the modifier as low as possible, meaning as close to the subject as possible, while staying out of shot. Closeness is softness. The closer a light source is to a subject, the softer and more flattering the light quality becomes.
Camera viewfinder check to confirm light modifier is out of frame
Raise the light until the modifier just disappears from the top of your frame. Daniel checks this directly through the viewfinder, which is the right move. The goal is to get the modifier as low as possible, meaning as close to the subject as possible, while staying out of shot. Closeness is softness. The closer a light source is to a subject, the softer and more flattering the light quality becomes.
For most modifiers and most face sizes, you’ll find that sweet spot somewhere between one and three feet in front of the subject horizontally, depending on how far the boom extends your light. Check the frame, lower the light until you see it, then raise it just past that point.
Step 5: Angle the Head Down Toward the Face
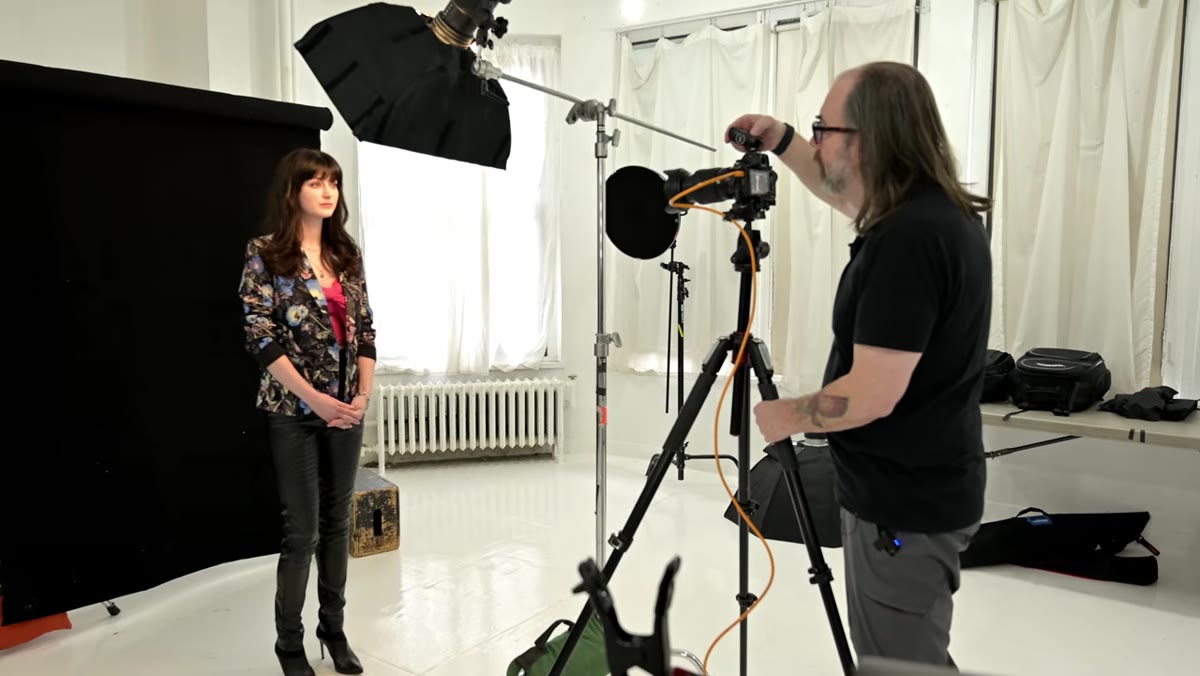 Strobe head tilted downward toward subject’s face at slight angle
Once the light is at height, tilt the head of the strobe down toward the subject’s face. The angle you choose directly controls the depth of the shadow under the nose. A steeper pitch creates a more dramatic, defined shadow and adds contrast. A shallower angle produces a flatter, more even result. Neither is wrong, but they serve different creative intentions.
Strobe head tilted downward toward subject’s face at slight angle
Once the light is at height, tilt the head of the strobe down toward the subject’s face. The angle you choose directly controls the depth of the shadow under the nose. A steeper pitch creates a more dramatic, defined shadow and adds contrast. A shallower angle produces a flatter, more even result. Neither is wrong, but they serve different creative intentions.
For a clean beauty look with visible makeup detail, I typically keep the angle moderate, maybe 30 to 45 degrees from horizontal. Fire a test shot and look at the shadow under the nose. That shadow tells you everything you need to know about whether the angle is working.
Step 6: Evaluate the Light on the Face Before Committing
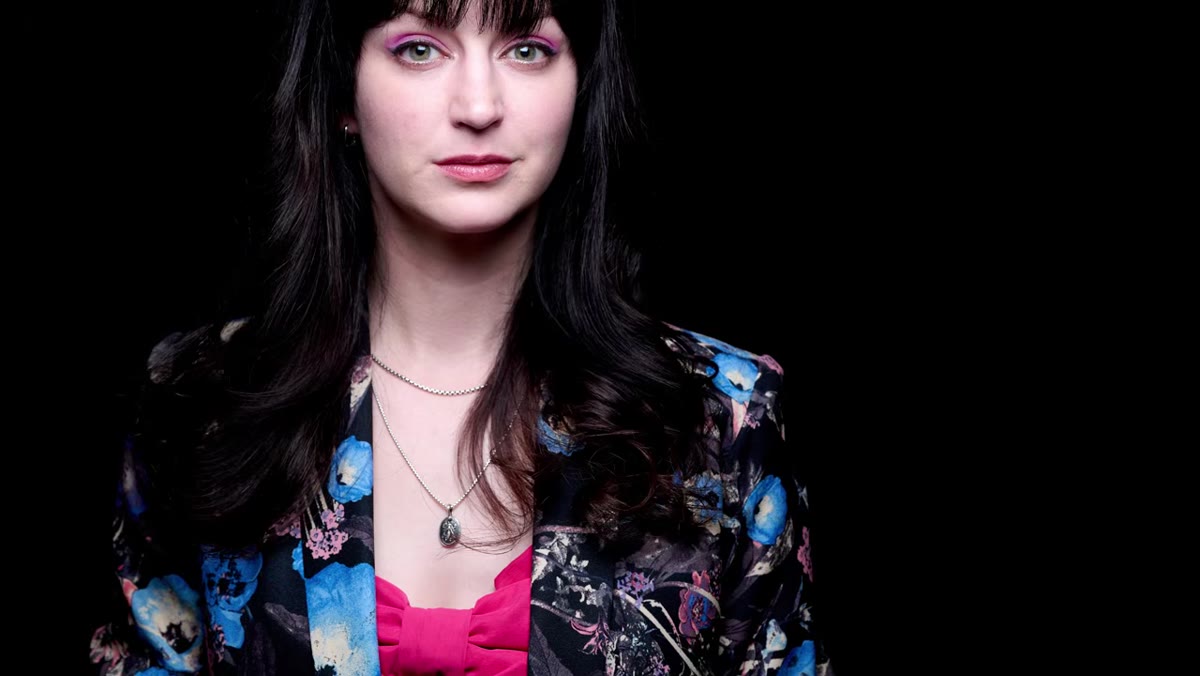 Test shot result showing butterfly shadow under subject’s nose
Take a test shot and read the face, not the histogram. You’re looking for the butterfly shadow, even cheek illumination, and definition along the jawline. If the eye sockets are going too dark, the light is too far forward and too steep. If the face looks flat with no shadow structure at all, the light is too far back or too shallow in angle. Both are adjustable in under thirty seconds.
Test shot result showing butterfly shadow under subject’s nose
Take a test shot and read the face, not the histogram. You’re looking for the butterfly shadow, even cheek illumination, and definition along the jawline. If the eye sockets are going too dark, the light is too far forward and too steep. If the face looks flat with no shadow structure at all, the light is too far back or too shallow in angle. Both are adjustable in under thirty seconds.
Daniel uses the modeling light during setup to preview the shadow placement before committing to a strobe pop. That’s a habit worth building. It saves test frames and gives you a faster feedback loop with your subject in the chair.
Step 7: Add Fill Deliberately, Not by Default
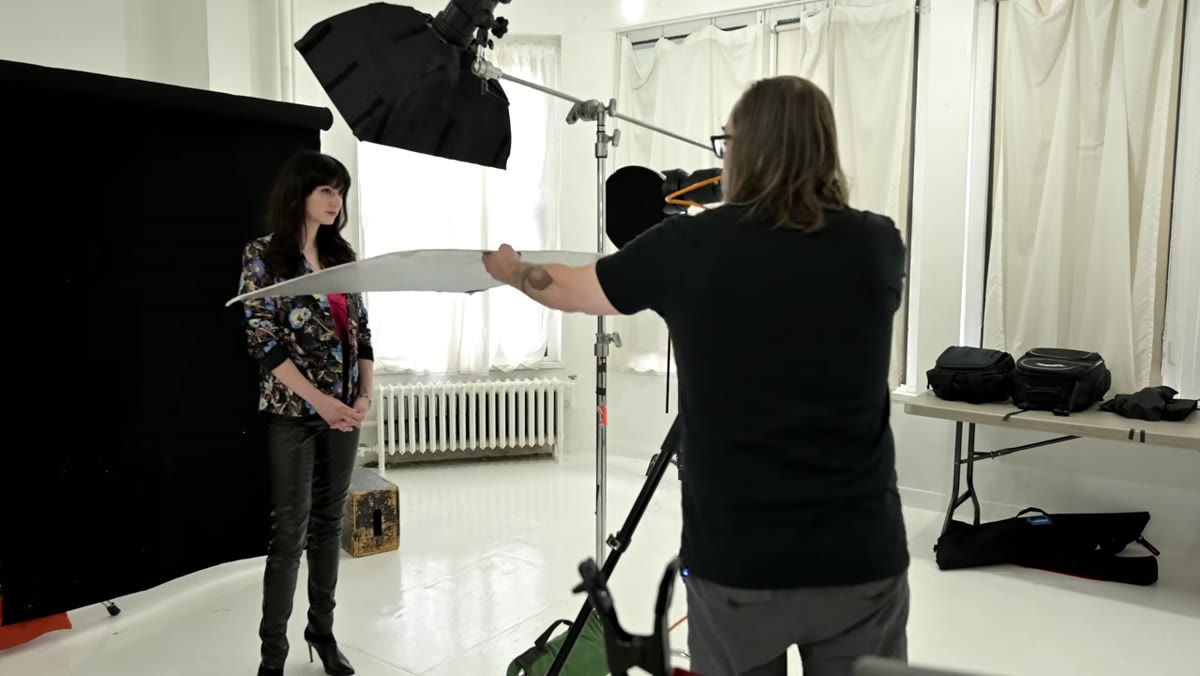 Reflector positioned below subject’s face to bounce fill light upward
Butterfly lighting works as a single-light setup. Before you reach for fill, decide if you actually need it. The shadows this pattern creates are part of its character. That said, when a client needs a cleaner, more approachable result, a simple reflector bounced up from below the subject’s chin is the most natural fill option because it mimics the upward bounce of ambient light.
Reflector positioned below subject’s face to bounce fill light upward
Butterfly lighting works as a single-light setup. Before you reach for fill, decide if you actually need it. The shadows this pattern creates are part of its character. That said, when a client needs a cleaner, more approachable result, a simple reflector bounced up from below the subject’s chin is the most natural fill option because it mimics the upward bounce of ambient light.
Daniel demonstrates this with a handheld reflector, and it’s worth noting how modest the adjustment is. You’re not eliminating the shadow. You’re lifting the floor of it so the darkest areas retain detail without going completely black. Use a white reflector for subtle fill, silver if you need more kick.
One Thing I’d Add From My Own Practice
The modifier you choose changes everything about this setup. Daniel uses a Profoto modifier in the tutorial, and I’ve run this same setup with a 7-inch reflector dish, a beauty dish, and a large octobox. Each one gives you a fundamentally different quality of light even though the position is identical. The beauty dish, specifically, was designed for this exact pattern. The slight shadow it produces is crisp without being harsh, and it wraps just enough to handle the transition from lit to shadow on the cheekbones gracefully. If you’re doing beauty or high-end headshot work and you don’t own a beauty dish, this setup is exactly why you should add one to your kit. I test every new modifier the day it arrives, and the first setup I always run is butterfly. It tells me more about how a modifier actually performs than any spec sheet.
The single most important thing Daniel gets right in this tutorial is that the light follows the subject’s gaze, not the camera position. Once that clicks, butterfly lighting becomes repeatable in any studio, on any face, with almost any strobe you own. Everything else is refinement.
Watch the full tutorial on YouTube to see Daniel demonstrate the setup live with his subject Cadence, including the before-and-after comparison of the reflector fill.
Comments
Leave a Comment