There’s a specific kind of frustration I know well. You’re on location, you’ve set the softbox, taken your first frame, and everything is lit. The ground. The background. The subject’s shoes. The fence nobody asked for. The light is doing its job technically, but the image looks like a police procedural, not a portrait. For years, I adjusted power output trying to solve a problem that was never about power. It was about aim. In this Watch the full tutorial on YouTube from The Slanted Lens, JP Morgan breaks down a technique called feathering, and if you’ve never deliberately practiced it, watching those two comparison shots side by side is genuinely humbling.
Feathering is not a new concept, but it’s one of those techniques that gets glossed over in gear-heavy tutorials because it requires no additional purchases. No grid, no extra modifier. Just an understanding of how light actually exits a softbox and the willingness to point that exit somewhere more deliberate. I keep a lighting journal where I sketch every setup from every shoot, and feathering is now annotated in almost every diagram I draw. It changes the entire character of an image without changing the image’s exposure.
The principle underneath the technique is worth internalizing before you touch the stand. A softbox doesn’t produce a tight beam. It produces a wide, cone-shaped spread of light. The center of that spread is the hardest, most intense zone. The edges are softer and more gradual. Feathering means rotating the modifier so your subject is lit by the outer edge of that spread rather than the hot center. The result is softer light, a more natural falloff, and a scene where unimportant elements fade rather than compete.
Step 1: Take Your Default Shot First
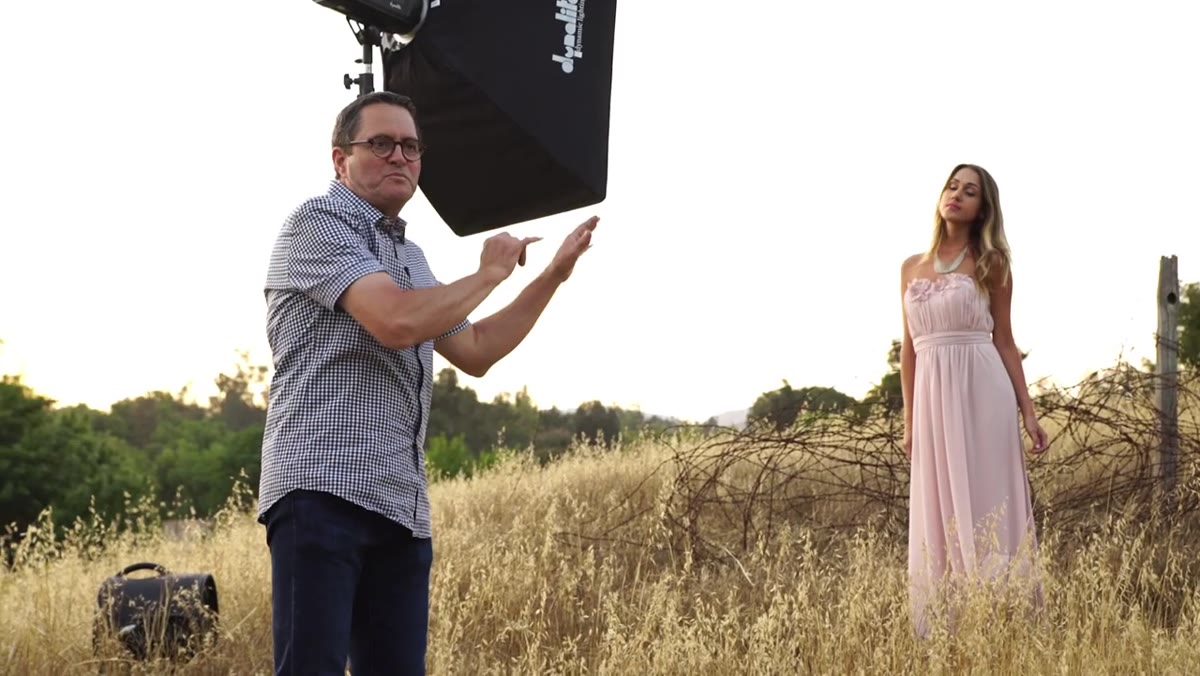 Softbox aimed directly at subject, lighting everything evenly
Before you adjust anything, fire a frame with the softbox aimed directly at your subject the way most photographers set it up instinctively. This is your control image, and you need it. Without it, you cannot see the problem clearly, and you cannot measure whether your feathering actually improved anything. In my studio I always make this frame and pull it up on the tethered monitor before touching the stand. What you’re looking for: lit ground, lit background, no sense of depth or separation between your subject and the space around them.
Softbox aimed directly at subject, lighting everything evenly
Before you adjust anything, fire a frame with the softbox aimed directly at your subject the way most photographers set it up instinctively. This is your control image, and you need it. Without it, you cannot see the problem clearly, and you cannot measure whether your feathering actually improved anything. In my studio I always make this frame and pull it up on the tethered monitor before touching the stand. What you’re looking for: lit ground, lit background, no sense of depth or separation between your subject and the space around them.
This frame will likely look competent but lifeless. That’s the diagnostic. If everything is equally lit, nothing reads as important.
Step 2: Rotate the Softbox Toward the Camera
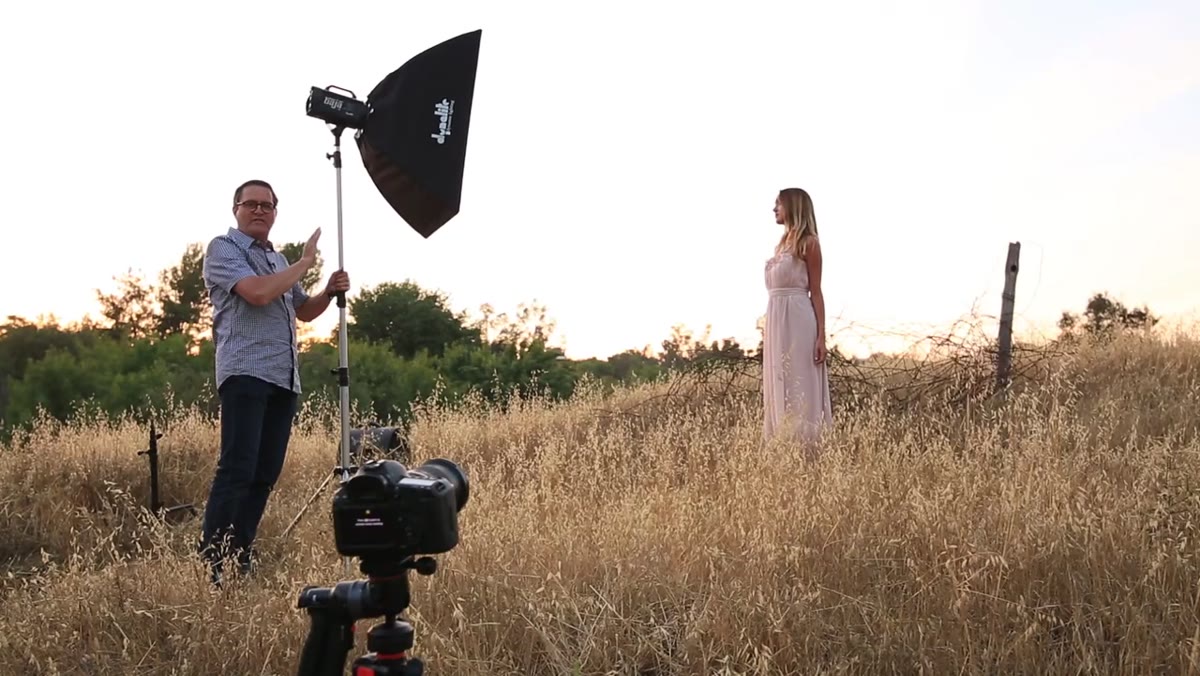 Softbox being rotated horizontally toward camera position
The first feathering move is horizontal. Without changing the height or power of your light, rotate the entire softbox so it angles toward the camera rather than pointing straight at the subject. This pulls the outer, softer edge of the light’s spread across the subject while simultaneously removing direct coverage from the background behind them.
Softbox being rotated horizontally toward camera position
The first feathering move is horizontal. Without changing the height or power of your light, rotate the entire softbox so it angles toward the camera rather than pointing straight at the subject. This pulls the outer, softer edge of the light’s spread across the subject while simultaneously removing direct coverage from the background behind them.
In practical terms on location, this means the front face of the softbox is no longer parallel to your subject’s body. It’s turned toward you, the photographer. If you’re working with a 3x4 foot softbox at a standard 45-degree subject angle, you might only need to rotate it an additional 15 to 20 degrees toward camera to see a significant shift. The background will darken. The barbed wire, the cluttered wall, the equipment cases nobody moved in time, all of it starts to lose light.
Step 3: Tilt the Softbox Upward
 Softbox tilting upward to remove light from ground and lower body
Once you’ve made the horizontal rotation, look at where the light is still landing. It’s probably still hitting the ground in front of your subject, and depending on your subject’s position, their lower body may still be catching too much of the spread’s intensity. The second feathering move is vertical: tilt the softbox upward.
Softbox tilting upward to remove light from ground and lower body
Once you’ve made the horizontal rotation, look at where the light is still landing. It’s probably still hitting the ground in front of your subject, and depending on your subject’s position, their lower body may still be catching too much of the spread’s intensity. The second feathering move is vertical: tilt the softbox upward.
This is the adjustment I now make on almost every single portrait session without exception. A slight upward tilt removes the light from the floor and from the lower half of the frame, creating a natural falloff that reads as depth. Your subject’s face and torso remain well-lit while their feet and the ground beneath them fall toward shadow. The image stops looking like a product shot and starts looking like a portrait.
Step 4: Evaluate the Combined Effect on Your Subject’s Exposure
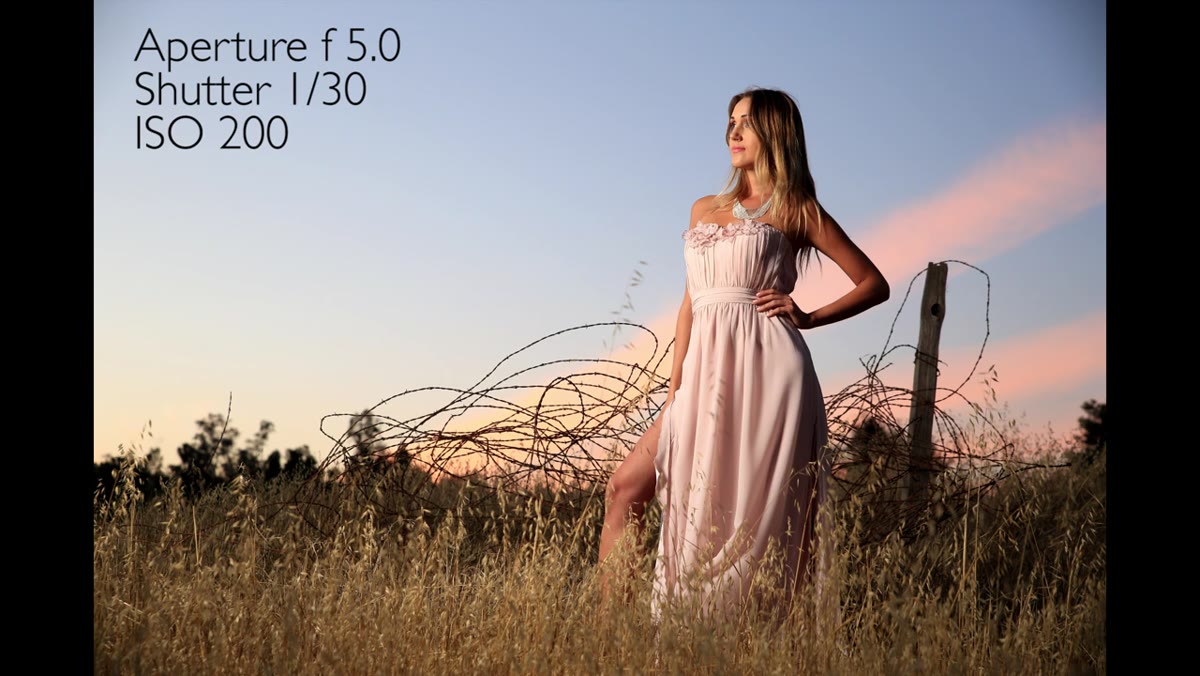
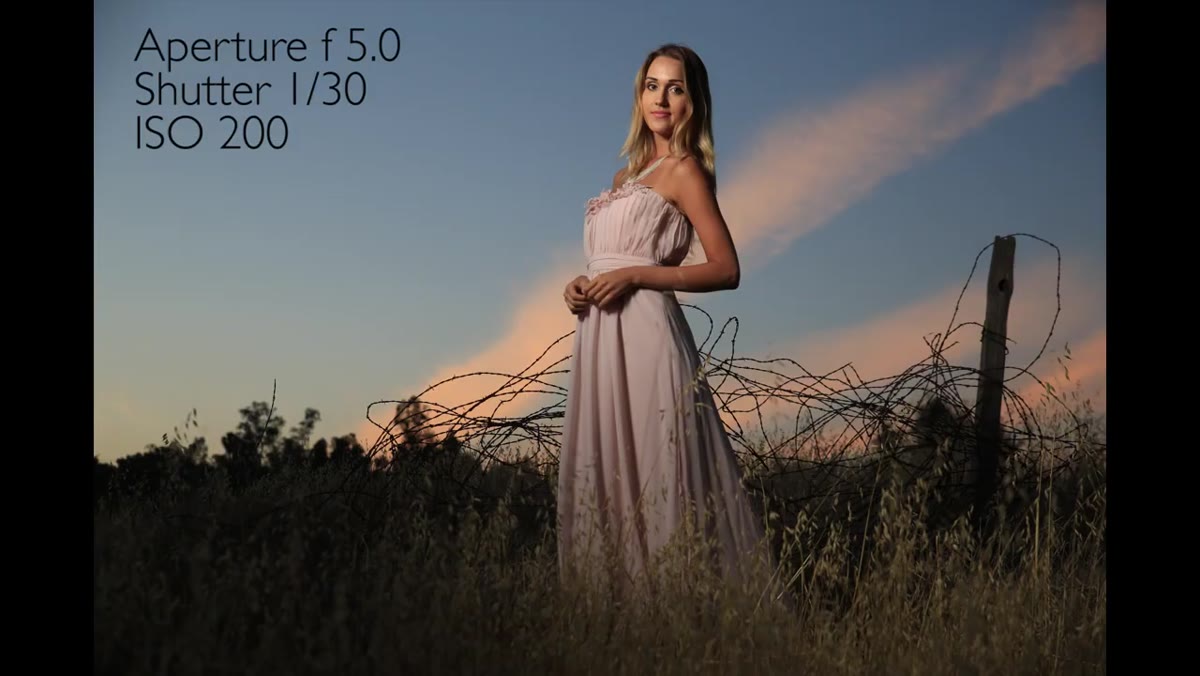 Final feathered result showing natural vignette on subject
After both adjustments, the softbox is now pointing up and toward the camera simultaneously. Fire another frame. What you should see is a pool of light that sits on your subject rather than flooding the scene. The light wraps rather than blasts. Falloff toward the edges of the frame happens naturally without any post-processing vignette applied.
Final feathered result showing natural vignette on subject
After both adjustments, the softbox is now pointing up and toward the camera simultaneously. Fire another frame. What you should see is a pool of light that sits on your subject rather than flooding the scene. The light wraps rather than blasts. Falloff toward the edges of the frame happens naturally without any post-processing vignette applied.
Check your histogram and your subject’s face carefully. Because you’ve moved to the outer edge of the softbox’s coverage, the light on your subject will be slightly softer than your baseline shot. You may need to bump your power output by a third to half a stop to compensate, depending on how aggressively you’ve feathered. This is a quick power adjustment on the pack, not a reason to undo the positioning. The quality of light is worth the half-stop.
Step 5: Flag the Lens When Feathering Toward Camera
 Flag or gobo blocking light from hitting camera lens directly
This step is the one most tutorials skip, and it cost me a soft, low-contrast frame on a fashion shoot years ago before I understood why. When you rotate the softbox toward the camera, you are also rotating it toward your lens. Light from the softbox’s spread can now reach the front element directly, causing flare or washing out your contrast.
Flag or gobo blocking light from hitting camera lens directly
This step is the one most tutorials skip, and it cost me a soft, low-contrast frame on a fashion shoot years ago before I understood why. When you rotate the softbox toward the camera, you are also rotating it toward your lens. Light from the softbox’s spread can now reach the front element directly, causing flare or washing out your contrast.
The fix is a flag, which can be a dedicated piece of black foam core, a V-flat panel, or even a shoot-through arm with a piece of black fabric. Position it between the softbox and your lens so it cuts the direct path of light to the glass without interfering with the light falling on your subject. This is not optional if you care about contrast and color depth in your files.
What I Add to This Technique in the Studio
The tutorial demonstrates feathering on location, and the principles translate directly to studio work. Where I’ve extended the technique is in multi-light setups. When I’m running a key and a fill simultaneously, I feather both independently rather than treating them as a matched pair. The key gets the upward tilt to keep light off the sweep paper below the subject’s knees. The fill gets a subtle rotation toward camera to soften its reach across the background. The two adjustments compound. The resulting image has a sense of dimension that a flat, directly-aimed two-light setup simply cannot produce.
I label every light in my studio with masking tape so I can write the feathering angle directly on the stand arm during a shoot. It takes five seconds and it means I can return to a setup days later without guessing. It’s a low-tech solution, but studio photography is full of those.
Feathering costs nothing. It requires no additional gear. It is a pure understanding of your modifier’s light distribution applied with intention. If you take one thing from this technique, let it be this: always consider which part of your softbox’s spread is doing the work. The center is not always the right answer.
Watch the full tutorial on YouTube to see the before and after comparisons that JP Morgan walks through. The difference between the feathered and unfeathered frames is the clearest visual argument for this technique you’ll find anywhere.
Comments
Leave a Comment