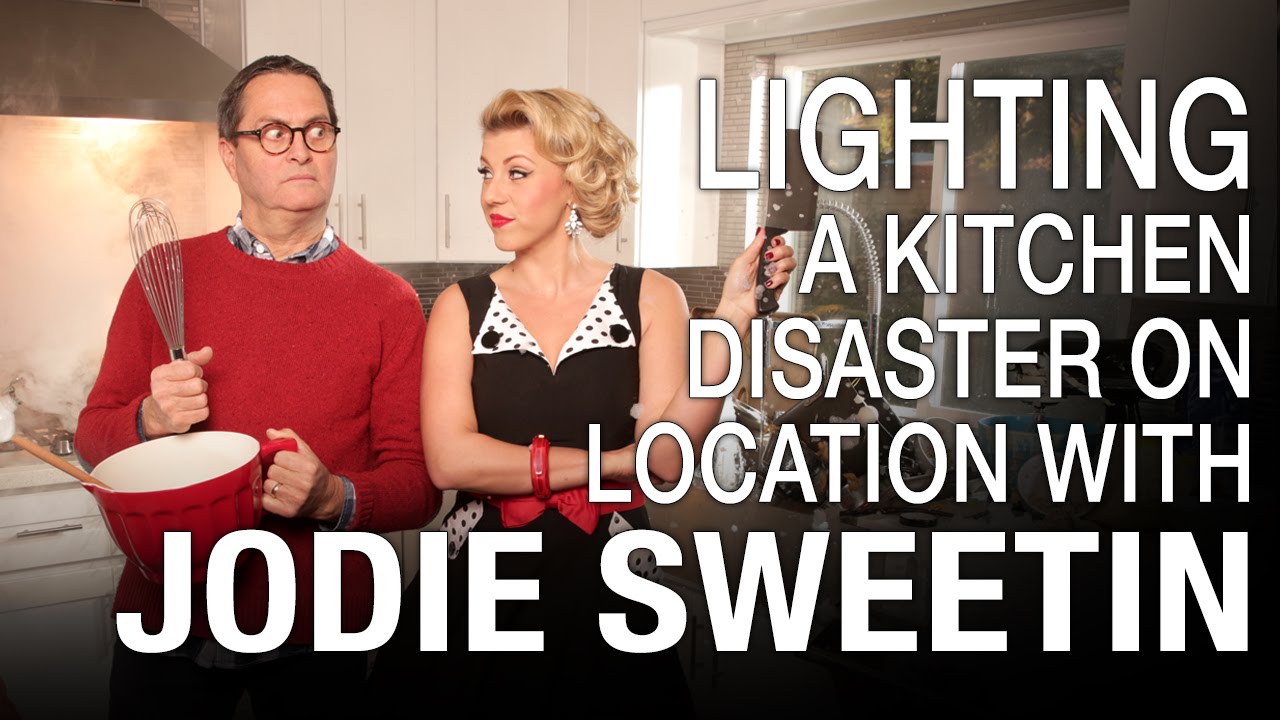
On-location commercial work has a way of humbling you fast. You walk into a space with existing architecture, ambient light you didn’t design, and a client who wants something that looks like it was built in a controlled studio. The gap between those two realities is where most photographers either rise or fall. I’ve been on enough sets to know that the shoots that look the most effortless are usually the ones with the most lights, the most planning, and the most tape holding things together behind the scenes.
In this Watch the full tutorial on YouTube The Slanted Lens tutorial, JP Morgan shoots publicity photos of actress Jodie Sweetin in a fully dressed kitchen set complete with smoke, suds from a dishwasher, and scattered cereal everywhere. The concept is the contrast between a glamorous, composed subject and total domestic chaos in the background. It sounds like a simple editorial gag, but the lighting required to pull it off is anything but simple. What makes this video worth studying is how methodically JP layers each light to serve a different function, none of them redundant, none of them accidental.
I kept coming back to this one because it mirrors a category of problems I run into regularly on commercial jobs: how do you build a coherent lighting environment when the scene itself is deliberately fragmented? This breakdown is my attempt to pull the technique apart so you can apply it to your own location work, whether you’re shooting food, product, or talent in a practical set.
Step 1: Assess the Ambient Exposure First
 JP showing the dark kitchen with ambient light only
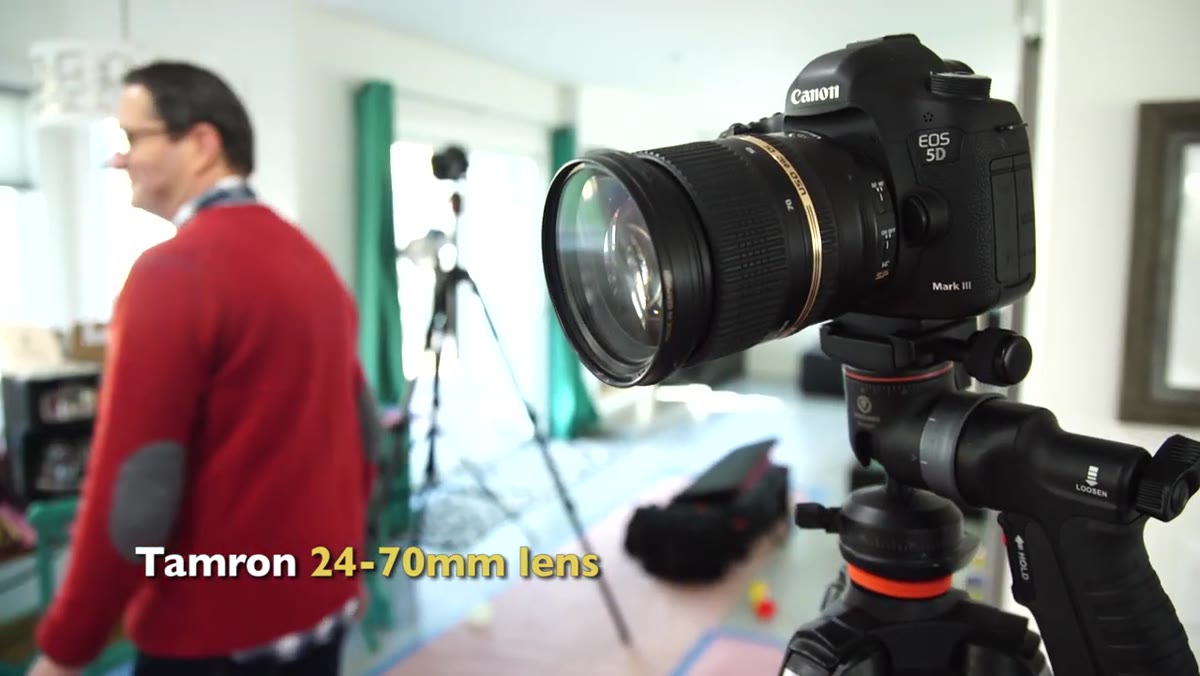
Before any strobe gets switched on, JP shoots the room at his working focal length (roughly 30mm on a 24-70mm zoom) to establish the ambient baseline. The kitchen has overhead practical lights running and a small amount of afternoon daylight coming through a window, but the room reads dark. That darkness is an asset, not a problem. When your ambient is low, you have full control over the quality, direction, and color of every light you add. If you fight existing daylight instead of suppressing it, you spend the rest of the shoot chasing a moving target.
JP showing the dark kitchen with ambient light only
Before any strobe gets switched on, JP shoots the room at his working focal length (roughly 30mm on a 24-70mm zoom) to establish the ambient baseline. The kitchen has overhead practical lights running and a small amount of afternoon daylight coming through a window, but the room reads dark. That darkness is an asset, not a problem. When your ambient is low, you have full control over the quality, direction, and color of every light you add. If you fight existing daylight instead of suppressing it, you spend the rest of the shoot chasing a moving target.
The practical note here: expose for the ambient first, write down or lock that exposure, then start adding strobes one at a time. I do this on every location job and I sketch the ambient reading in my lighting journal before I touch a single modifier. It gives you a reference point to return to if the overall image starts to feel overbuilt.
Step 2: Build the Key Light with a Small Octodome and a Warm Gel
 Small octodome with grid positioned on subject’s face
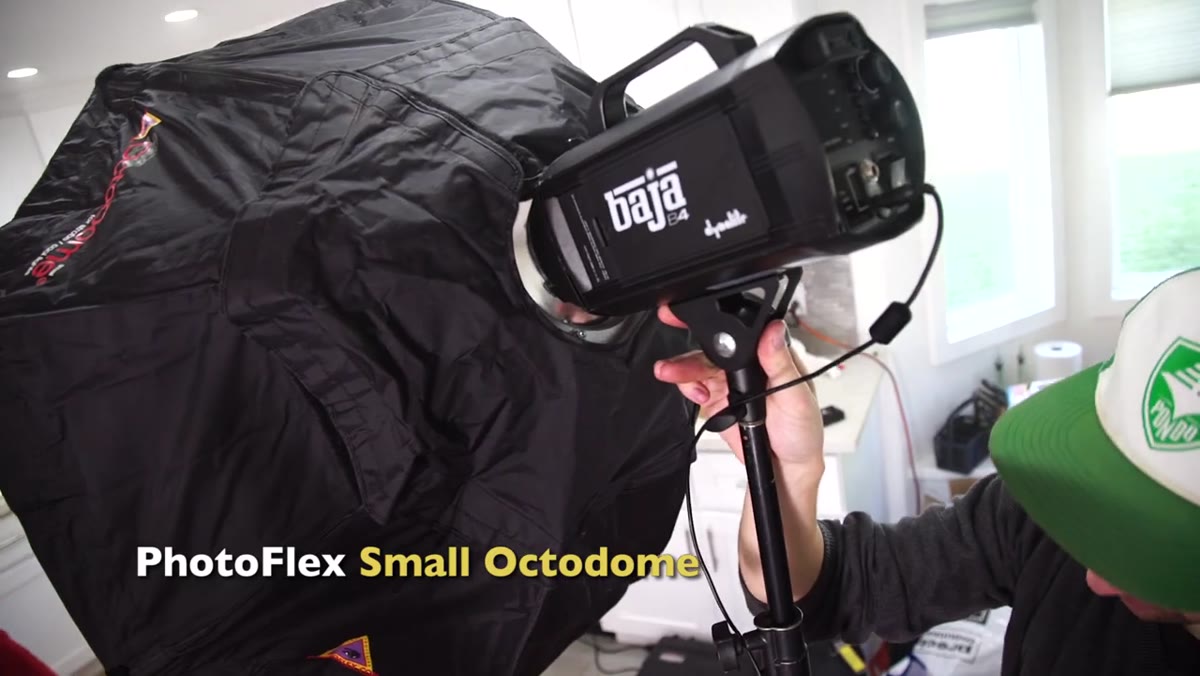
The main light on the subject is a small octodome from Photoflex, fitted with a grid. JP specifically compares the quality of this modifier to a beauty dish, which is accurate: a small oct gives you the wrapping softness of a round source with a slightly punchier center than a large softbox. The grid tightens the spread so light stays on the face and upper body and falls off naturally below the waist. That fall-off is doing compositional work here, keeping the viewer’s eye anchored to the subject rather than spilling down into the messy foreground.
Small octodome with grid positioned on subject’s face
The main light on the subject is a small octodome from Photoflex, fitted with a grid. JP specifically compares the quality of this modifier to a beauty dish, which is accurate: a small oct gives you the wrapping softness of a round source with a slightly punchier center than a large softbox. The grid tightens the spread so light stays on the face and upper body and falls off naturally below the waist. That fall-off is doing compositional work here, keeping the viewer’s eye anchored to the subject rather than spilling down into the messy foreground.
On top of that, JP adds a Rosco NCR-6 gel, a rosy-warm tone, to the key light. The warmth reads as flattering skin tone and separates the subject from the cooler, more neutral background. You can pull the color back in post if a client asks, but getting it in-camera gives the retoucher something real to work with rather than synthetic warmth added digitally. I’ve used a quarter CTO in similar situations and gotten comparable results; the specific gel matters less than the intention behind it.
Step 3: Add Background Separation with a High Backlight
 Baja B4 positioned high, lighting cabinets and background
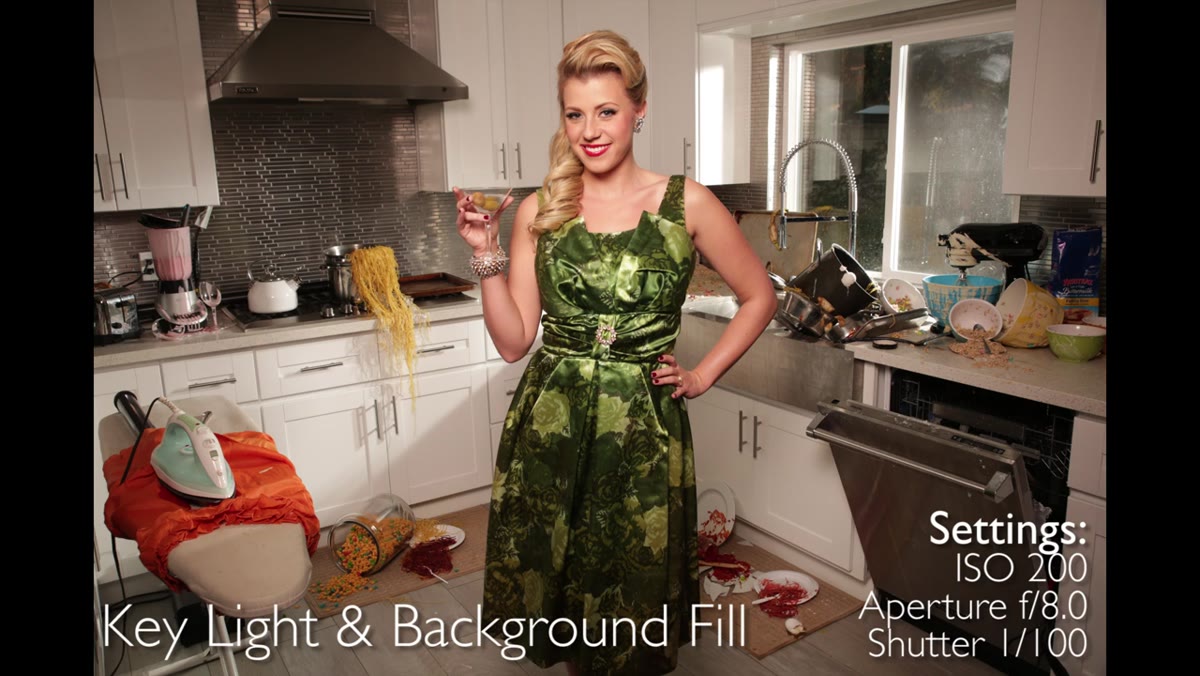
With the subject lit, the background is still flat. JP brings in a Baja B4 strobe positioned high and aimed across the kitchen cabinets. This light does three things at once: it gives texture and dimension to the cabinet faces, it rims the faucet and water sprayer on the right side of the frame, and it catches the edge of the smoke coming out of the pot on camera left. A single well-placed backlight creating multiple rim effects is efficient lighting. On a set with this many elements, you can’t afford a dedicated unit for every prop.
Baja B4 positioned high, lighting cabinets and background
With the subject lit, the background is still flat. JP brings in a Baja B4 strobe positioned high and aimed across the kitchen cabinets. This light does three things at once: it gives texture and dimension to the cabinet faces, it rims the faucet and water sprayer on the right side of the frame, and it catches the edge of the smoke coming out of the pot on camera left. A single well-placed backlight creating multiple rim effects is efficient lighting. On a set with this many elements, you can’t afford a dedicated unit for every prop.
The placement high and slightly behind the set is key. A light at eye level would flatten the cabinets and compete with the key. Elevated and aimed across the surface, it creates the kind of raking light that shows texture and depth. Think of it the way you’d use a grid spot to rake across a textured wall in a studio portrait.
Step 4: Isolate Specific Set Elements with Targeted Grid Spots
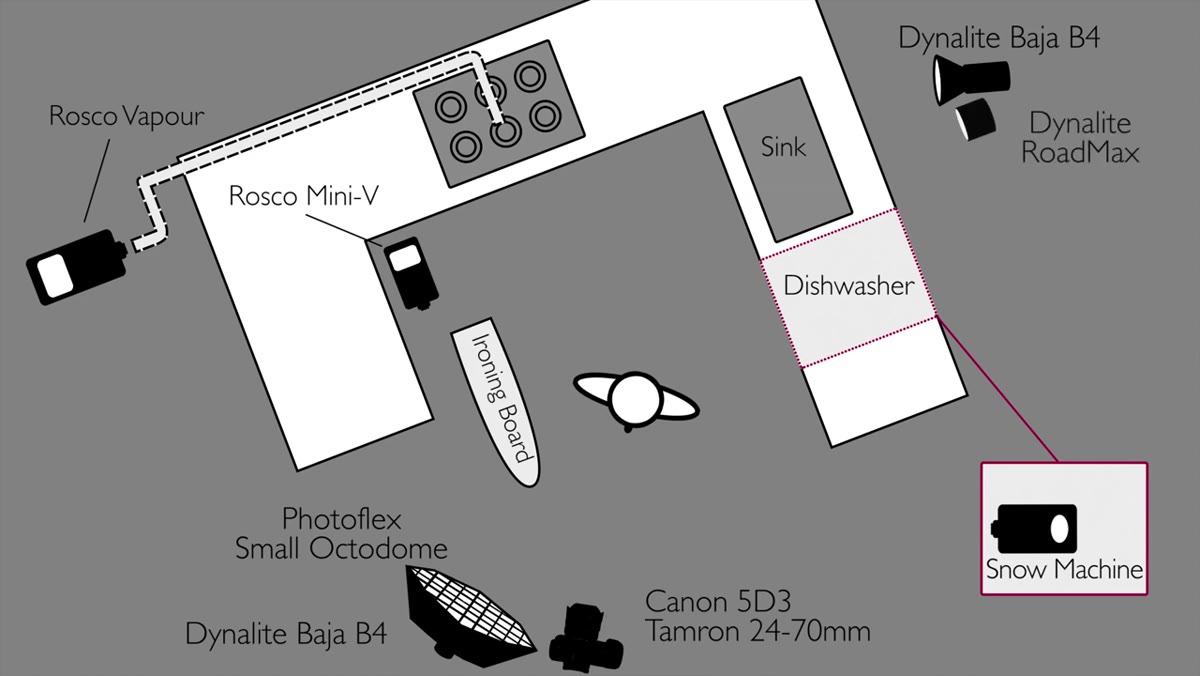 Pack and head with grid aimed at pots and sink area
Below the Baja B4, JP adds a pack-and-head unit with a grid to create a tighter rim specifically on the pots and the water that will be spraying from the sink. These are two separate pools of light serving two separate storytelling functions, and they’re controlled tightly enough that they don’t bleed into each other. A pencil light goes inside the stove hood, aimed at the spaghetti pot, with a full CTO gel to push it into a warm orange. That warmth reads as heat and reinforces the idea that something is burning on the stove.
Pack and head with grid aimed at pots and sink area
Below the Baja B4, JP adds a pack-and-head unit with a grid to create a tighter rim specifically on the pots and the water that will be spraying from the sink. These are two separate pools of light serving two separate storytelling functions, and they’re controlled tightly enough that they don’t bleed into each other. A pencil light goes inside the stove hood, aimed at the spaghetti pot, with a full CTO gel to push it into a warm orange. That warmth reads as heat and reinforces the idea that something is burning on the stove.
The discipline here is specificity. Every modifier in this setup is doing one named job. If you can’t say what a light is for, it probably shouldn’t be there.
Step 5: Light the Practical Effects to Make Them Read on Camera
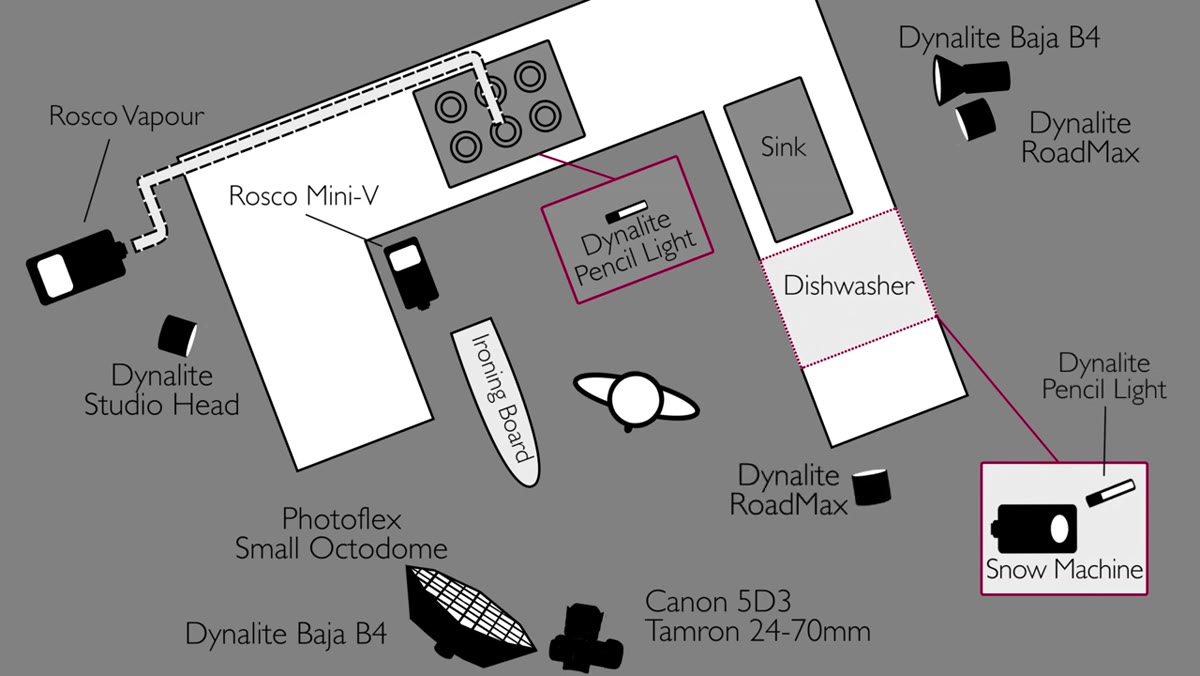 Pencil light inside dishwasher, grid on bowls and mixer
Smoke and suds don’t light themselves. JP places a pencil light inside the dishwasher to give the foam coming out of it a backlit quality that makes it visible and three-dimensional. A grid on the bowls and mixer elsewhere in the kitchen adds the same principle: small, controlled sources that reveal texture in objects that would otherwise go muddy in the mid-tones.
Pencil light inside dishwasher, grid on bowls and mixer
Smoke and suds don’t light themselves. JP places a pencil light inside the dishwasher to give the foam coming out of it a backlit quality that makes it visible and three-dimensional. A grid on the bowls and mixer elsewhere in the kitchen adds the same principle: small, controlled sources that reveal texture in objects that would otherwise go muddy in the mid-tones.
The Rosco smoke machine piped through the pot and the iron uses backlight from the camera-left grid to give the smoke shape and density. Unlit smoke is just gray haze. Back-lit smoke is atmosphere.
What I’d Do Differently on a Commercial Job
I’d add one soft fill card on the camera-right shadow side of the subject, just a white V-flat at about 45 degrees to open up the shadows slightly. JP’s setup lets the fall-off read dark and dramatic, which works for this concept, but on a beauty or fashion client that shadow depth can be a note from the art director. Keeping a fill card handy and flagging it in or out gives you the option without rebuilding the lighting.
I’d also mark every light position on the floor with gaffer tape before the talent walks in. On a set this complex, if anyone bumps a stand, you want to know exactly where it was.
The single most important idea in this tutorial is that location lighting is additive and intentional. You start with darkness, you build up layer by layer, and every source earns its place by doing something specific. Ambient first, key second, background third, effects last.
Watch the full tutorial on YouTube and pay close attention to how JP describes each light before he shows it. He knows what it’s doing before he turns it on. That’s the habit worth stealing.
Comments
Leave a Comment