The Client Who Needed 40 Selects by Noon
Last month I was shooting a corporate headshot day. Twelve subjects, two hours, one assistant who showed up fifteen minutes late. The kind of session where you don’t get to experiment. You need a setup that’s already solved, already dialed, already trustworthy. What I had was trustworthy. What I didn’t have was fast. I burned almost twenty minutes repositioning a second light I’d added the night before because I was second-guessing myself. Those twenty minutes cost me in coverage and cost me in composure.
That’s exactly why I keep coming back to stripped-down, one-light tutorials. Not because I’m a beginner, but because constraints clarify thinking.
Watch the full tutorial on YouTube
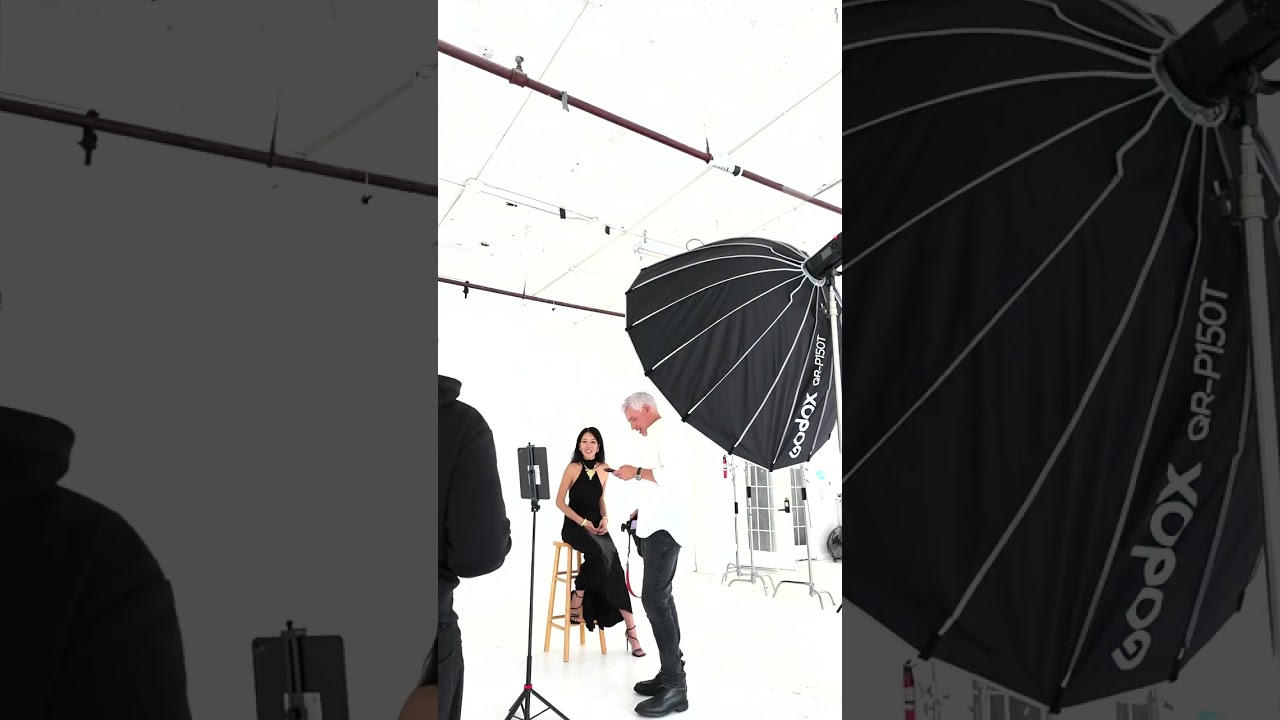
In this Tony and Chelsea Northrup tutorial, shot at FD Studios in Long Island City, Tony runs a one-light portrait setup on a white cyclorama wall with a single Godox AD800 Pro in a parabolic softbox. The video is six minutes of real shooting, played back at 15x speed. No voiceover. No theoretical detour. Just the setup and the work. What you can learn from watching it carefully is worth unpacking.
The Actual Setup, Piece by Piece
The gear list is short by design. One Godox AD800 Pro, a parabolic softbox, a white cyc, a stool. That’s the entire rig. The AD800 Pro puts out 800 watt-seconds of power, which is more than enough to fill a white cyclorama and still control your exposure with precision. The parabolic softbox is doing the real work here: it produces a wrap-around quality of light with a slightly more specular center than a standard rectangular softbox, which means you get soft transitions on the skin but still retain some definition in the catchlights and facial structure.
The light is positioned camera-left, elevated above the subject’s eye line and angled down. This is a classic Rembrandt-adjacent placement, though Tony keeps it modified enough that it doesn’t go full dramatic. Because the cyc is white, it acts as a passive fill source. Light bounces off the white walls and floor and wraps back into the shadow side of the face without you adding a second fixture. The cyc is doing approximately the work a large silver reflector would do, except it’s doing it from multiple directions simultaneously.
The subject, Naomi, is seated on a stool positioned a few feet off the back wall. That gap between subject and wall is deliberate. It prevents the shadow from the main light from falling hard onto the cyclorama behind her, and it gives the background its own exposure latitude. Move her too close and the wall goes gray. Keep that distance and it stays clean white.
Why the Parabolic Modifier Changes the Math
A lot of photographers treat modifier choice as an aesthetic preference. I’d push back on that. Modifier choice is an engineering decision that determines how much you’re fighting the light versus letting it work. A parabolic softbox in a reflective white cyc like this one is a specific pairing that feeds on itself. The parabolic concentrates output toward the center of the beam while still diffusing the edge. That means more usable light per watt-second, which means you can run the AD800 Pro at a lower power setting, which in turn means faster recycle times and a cooler flash tube over a long session.
For a corporate headshot day, or any high-volume session, that recycle time compounds. At full power on a comparable monolight I’ve run sessions where the flash simply couldn’t keep up with a subject who was laughing and moving quickly. Dropping to 60 or 70 percent power with a more efficient modifier eliminates that problem without sacrificing the exposure.
The Stool Is Not an Afterthought
Photographers treat posing furniture as staging. It isn’t. The stool in this setup is a posing anchor. It gives the subject something to do with their body, which immediately reduces tension in the shoulders and neck. When someone is standing with no direction, their energy goes into figuring out what to do with their hands. Put them on a stool and half that problem disappears. They lean, they shift their weight, they cross their legs. The range of natural micro-movements you get is wider, and you get it faster.
Tony positions Naomi close enough to the stool that she can perch on it or lean against it, which gives both options during the shoot. That flexibility is worth noticing.
Where I’d Modify This for Skin Tone Variation
Here’s where I’d depart slightly from this setup. The white cyc works beautifully as a passive fill, but on deeper skin tones I find that the fill ratio it produces, roughly two stops down from the main light depending on ceiling height and wall reflectivity, can flatten the mid-tones in a way that loses dimension. What I’ll do in that situation is flag the camera-left wall with a large black panel to reduce the ambient bounce and let the shadow side breathe. It costs you nothing in terms of setup complexity and gives you back the contrast gradient that makes the skin look three-dimensional rather than even.
This isn’t a criticism of Tony’s approach. It’s a reminder that any setup is a starting point calibrated to a particular subject. I keep a lighting journal where I sketch every setup variation I run so I can reverse-engineer what worked. The white cyc with a flag on the fill side has its own page.
The Setup That Earns Its Keep
The real value of this tutorial isn’t the specific gear. It’s the proof that one well-placed light in a thoughtful space produces results you can sell. Every modifier you add after the first one is a question you’re asking. Sometimes the question is worth asking. Often it isn’t.
If you shoot in a studio regularly, or if you’re preparing for any high-volume session where setup speed directly affects quality, watch this one carefully. The speed at 15x makes the decision-making visible in a way that normal-speed footage doesn’t.
Watch the full tutorial on YouTube and pay attention to where Tony places that softbox relative to the subject’s eye line. That angle is doing more work than it looks like.
Comments (2)
Printing this out and pinning it next to my monitor. That good.
Would love to see a follow-up going deeper into this topic.
Leave a Comment