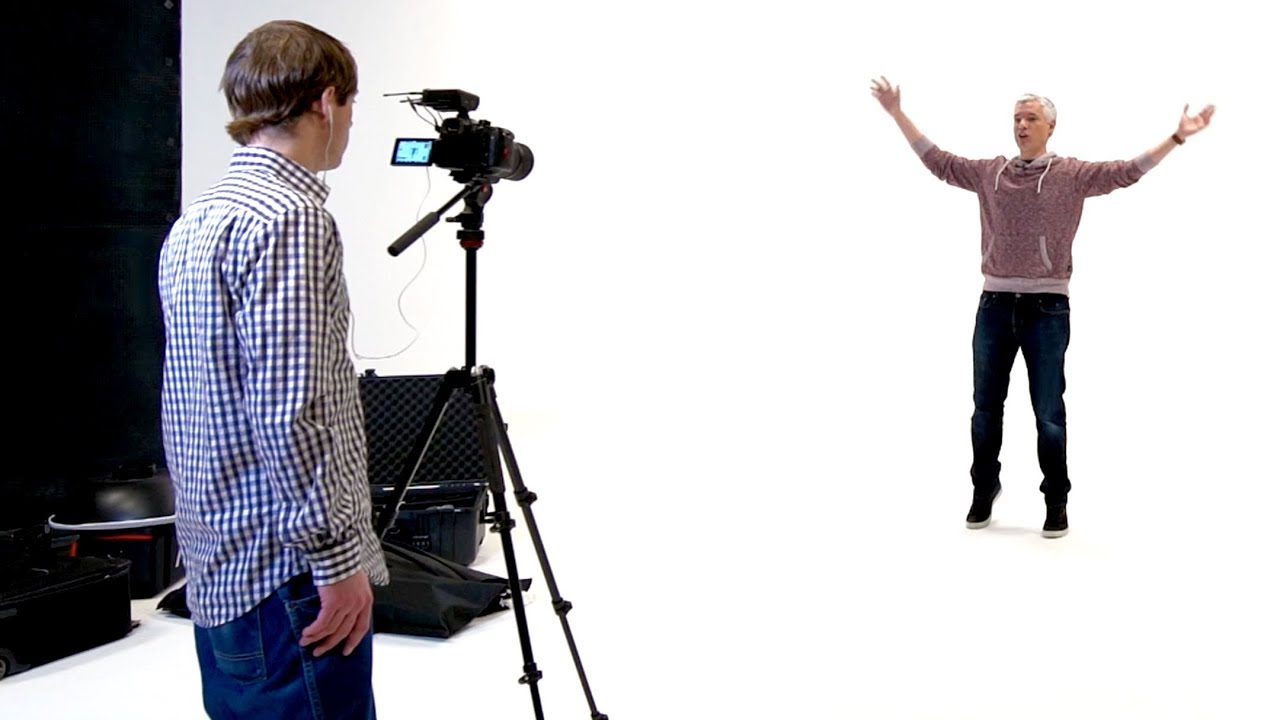
There is a specific kind of panic that hits when you’re forty minutes into a commercial shoot and you can see the edge of your background in the frame. Your talent is ready, your strobes are dialed in, and you’re burning through your shot list. But the white vinyl is doing that thing vinyl always does: it has a faint crease running across the lower third, and no amount of gaffer tape is going to save you. I have been in that exact situation more than once in my career, and it is part of why I started renting cyclorama studios for any job where a truly seamless, edge-free white environment is non-negotiable.
In this Tony and Chelsea Northrup tutorial, Tony walks through a rented cyc studio in detail, covering what a cyclorama actually is, why it behaves differently from any other white background, and what it takes to maintain and light one properly. Watch the full tutorial on YouTube. The video is less about a specific lighting setup and more about understanding the environment itself, which is exactly the kind of foundational knowledge that separates photographers who use cyc studios confidently from those who are guessing their way through a rental.
What I want to do here is pull out the practical logic and give you a step-by-step breakdown you can actually use before you book your first cyc shoot, or before your next one.
Step 1: Understand What a Cyclorama Actually Is
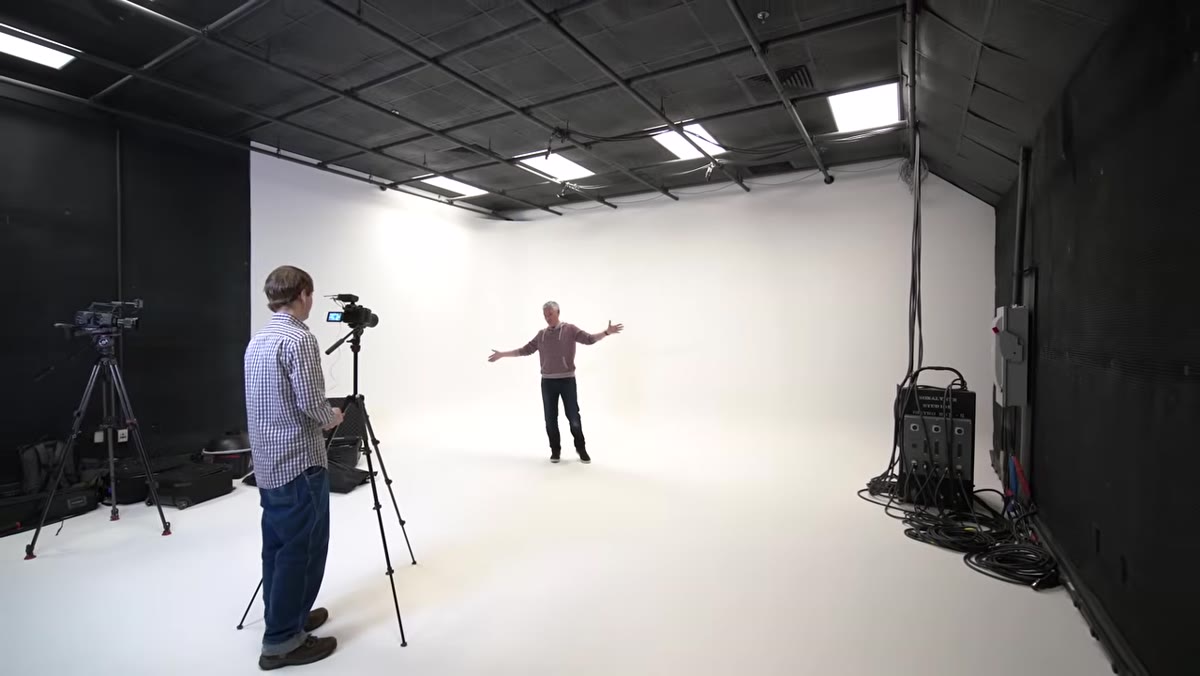 Tony standing inside a large white curved studio space
A cyclorama, or “cyc” as it’s called on set, is a continuous curved surface that eliminates any visible corner or seam between the floor and walls. Unlike a vinyl roll or a paper backdrop, a cyc is a permanent architectural feature, built from curved plaster or concrete and painted white. When you fill the frame with it, there is simply nothing for the eye to land on. No horizon line. No corner. No edge. Your subject appears to exist in a pure white void, which for fashion, beauty, and commercial product work, is worth every dollar of the rental fee.
Tony standing inside a large white curved studio space
A cyclorama, or “cyc” as it’s called on set, is a continuous curved surface that eliminates any visible corner or seam between the floor and walls. Unlike a vinyl roll or a paper backdrop, a cyc is a permanent architectural feature, built from curved plaster or concrete and painted white. When you fill the frame with it, there is simply nothing for the eye to land on. No horizon line. No corner. No edge. Your subject appears to exist in a pure white void, which for fashion, beauty, and commercial product work, is worth every dollar of the rental fee.
The curve at the base is not decorative. It is structurally precise, and getting that curve smooth enough to photograph without shadows pooling in the transition zone requires skilled carpentry. This is not something you can replicate with a DIY backdrop rig at home, which is the first honest thing to understand about a cyc: it is a specialized tool you rent, not build.
Step 2: Recognize Why the Room Around the Cyc Matters
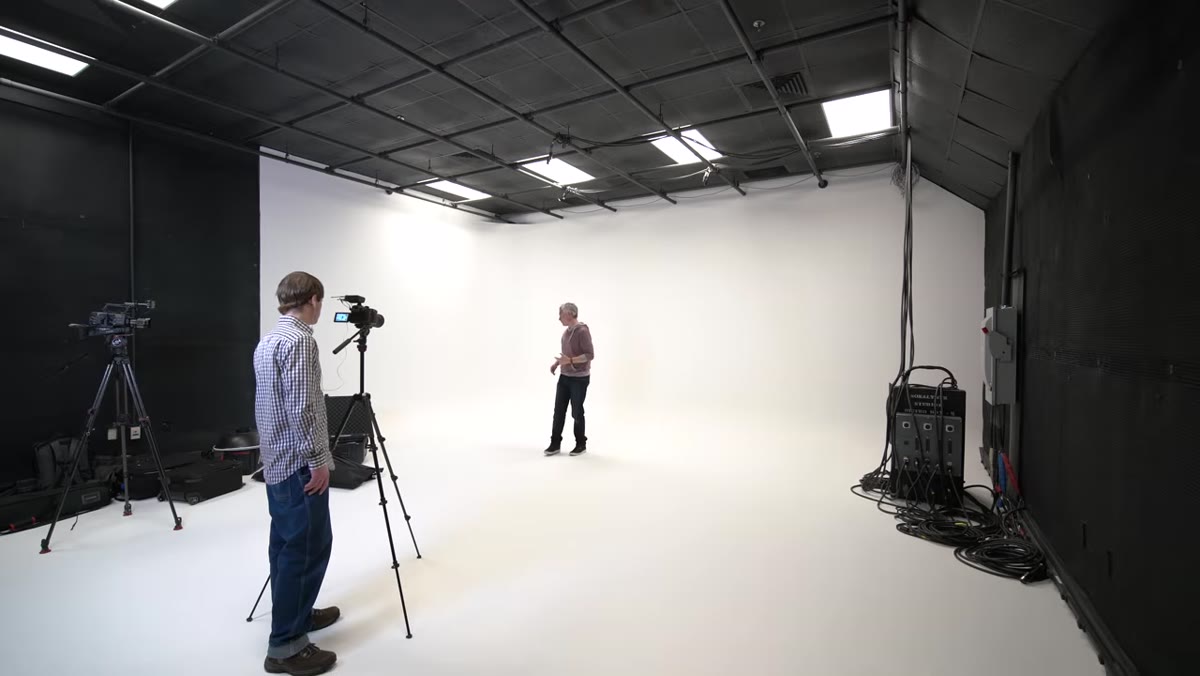 Wide shot showing black-painted walls surrounding the white cyc
Every surface in a professional cyc studio that is not the cyc itself is typically painted matte black. Walls, ceiling, support structures, all of it. I label every light in my studio with masking tape, and the reason I am obsessive about controlling stray light is exactly the same reason cyc studios paint everything black: uncontrolled bounce will contaminate your image in ways that are nearly impossible to fix in post.
Wide shot showing black-painted walls surrounding the white cyc
Every surface in a professional cyc studio that is not the cyc itself is typically painted matte black. Walls, ceiling, support structures, all of it. I label every light in my studio with masking tape, and the reason I am obsessive about controlling stray light is exactly the same reason cyc studios paint everything black: uncontrolled bounce will contaminate your image in ways that are nearly impossible to fix in post.
When everything surrounding the white cyc is black, you can turn off the overhead room lighting entirely and build your exposure from scratch using only your strobes or continuous lights. No ambient spill, no ceiling bounce, no mystery fill from a reflective wall three meters away. You get total control, which on a commercial job means you get repeatability. You can walk away from a setup, come back to it, and hit the same numbers.
Step 3: Plan for Surface Maintenance Before You Shoot
 Close-up of scuff marks and footprints on the white cyc floor
This is the step most photographers skip in their pre-shoot planning, and it shows up immediately in their raw files. The floor of a cyc takes a beating. Scuffs, footprints, scrapes from light stand feet, all of it shows up clearly against white paint under strobe light. Professional studios repaint the floor regularly, sometimes between every single client. At the studio shown in the tutorial, they left a bucket of paint and a roller available mid-session for exactly this reason.
Close-up of scuff marks and footprints on the white cyc floor
This is the step most photographers skip in their pre-shoot planning, and it shows up immediately in their raw files. The floor of a cyc takes a beating. Scuffs, footprints, scrapes from light stand feet, all of it shows up clearly against white paint under strobe light. Professional studios repaint the floor regularly, sometimes between every single client. At the studio shown in the tutorial, they left a bucket of paint and a roller available mid-session for exactly this reason.
Before your talent steps onto the cyc floor, walk it yourself. Note every scuff and mark. If the studio has paint available, roll a fresh coat on the areas you will be shooting over and let it dry before you set up. Budget at least 20 to 30 minutes for this in your schedule. On longer jobs, designate a production assistant to check the floor between set changes. You will spend far less time in retouching if you catch it early.
Step 4: Set Up Your Lighting for Even White Coverage
 Overhead lighting rigs and wall power outlets inside the studio
Lighting a cyc for that clean, blown-out white look is not as simple as pointing a big softbox at the wall. You need to light the cyc itself separately from your subject. A common starting approach is to place two or three lights aimed at the floor and lower wall of the cyc behind your subject, then light your subject independently from the front. This way you control the white level of the background without the spill affecting your subject’s exposure.
Overhead lighting rigs and wall power outlets inside the studio
Lighting a cyc for that clean, blown-out white look is not as simple as pointing a big softbox at the wall. You need to light the cyc itself separately from your subject. A common starting approach is to place two or three lights aimed at the floor and lower wall of the cyc behind your subject, then light your subject independently from the front. This way you control the white level of the background without the spill affecting your subject’s exposure.
Cyc studios anticipate this. They include overhead mounting rails, wall-mounted power strips at multiple heights, and in many cases wheeled power distribution rigs for productions running continuous lights. Before you book, confirm the studio has mounting points where you actually need them. On my first cyc rental, I assumed the ceiling rails ran the full width of the room. They did not, and I ended up improvising with C-stands in positions I would not have chosen.
Step 5: Understand the Green Cyc Option
 Green-painted cyclorama room visible adjacent to white cyc
Many rental studios include a green cyc in addition to the white one. The green surface serves a completely different purpose: chroma key compositing, most often for video work. The continuous curved surface makes pulling a clean key far easier than using a flat green screen, because you eliminate the corner shadows that create inconsistent color values. If your brief involves replacing the background in post, the green cyc is the right room. If you want to shoot a genuine white or high-key environment, use the white cyc and light it to your target value.
Green-painted cyclorama room visible adjacent to white cyc
Many rental studios include a green cyc in addition to the white one. The green surface serves a completely different purpose: chroma key compositing, most often for video work. The continuous curved surface makes pulling a clean key far easier than using a flat green screen, because you eliminate the corner shadows that create inconsistent color values. If your brief involves replacing the background in post, the green cyc is the right room. If you want to shoot a genuine white or high-key environment, use the white cyc and light it to your target value.
What I Do Differently on Cyc Shoots
After years of shooting in cyc studios, the one thing I add to my workflow that the tutorial does not specifically address is a test frame of just the empty lit cyc before talent is ever on set. I shoot it, pull it into my tethering software, and check that my background reads as a clean, unclipped white across the full frame with no gray edges near the corners. If I see gray in the corners, I adjust the background lights before we start. Fixing corner fall-off on an empty set takes five minutes. Fixing it in a raw file when your subject is in frame takes much longer, and sometimes it is not fully fixable.
I keep a lighting journal with sketches from every setup I shoot, and cyc setups have their own section because the variables of room size, ceiling height, and light placement shift more than people expect.
The single most important thing to take away from this tutorial is that a cyclorama is an environment, not just a backdrop. You have to understand the space, plan your surface maintenance, and build your lighting intentionally from the ground up. The freedom a cyc gives you during a shoot is enormous, but it only pays off if you walk in prepared.
Watch the full tutorial on YouTube to see Tony walk through the studio in real time. The visual detail of the space itself is worth watching even if you have shot on a cyc before.
Comments (2)
Printing this out and pinning it next to my monitor. That good.
This is exactly what I needed today. Been struggling with this for weeks.
Leave a Comment