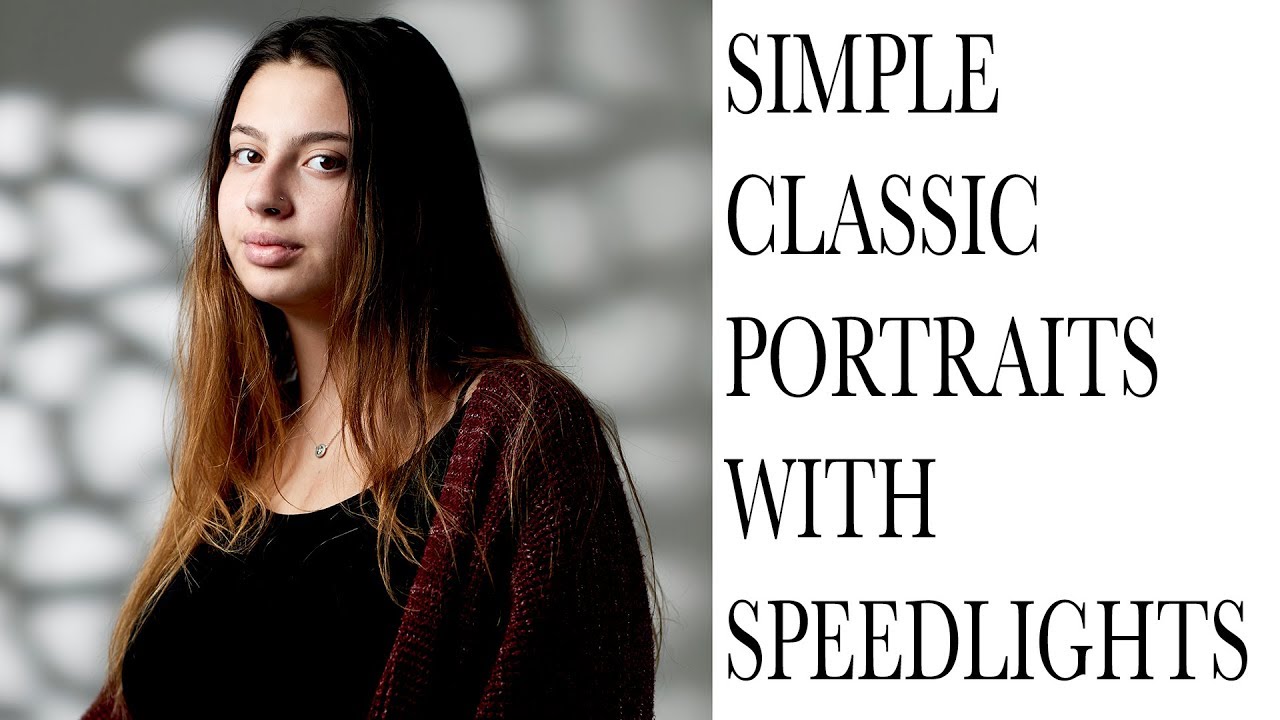
There’s a problem I run into constantly with newer photographers who come through my studio: they think dramatic, polished portraits require a wall of monolights and a dedicated grip crew. I understand where that assumption comes from. But some of my tightest commercial work has come from setups I could pack into a roller bag. That’s exactly why this tutorial from Daniel Norton caught my attention and earned a permanent sketch in my lighting journal.
In this Daniel Norton Photographer tutorial, Norton builds a complete studio portrait setup using just two Profoto A1 speedlights, a small softbox, a cookie for background texture, and a DIY silver reflector. The result is a controlled, sculpted look that reads as intentional and polished. Nothing about the gear is exotic. Everything about the decision-making is precise. That gap between simple tools and sophisticated results is exactly where technique lives.
What strikes me most watching Norton work is how clearly he understands the relationship between modifier size, subject distance, and light quality. He is not chasing soft light for its own sake. He is engineering a specific kind of fall-off, and that distinction matters enormously in real portrait work.
Step 1: Choose Your Modifier for the Right Quality of Light
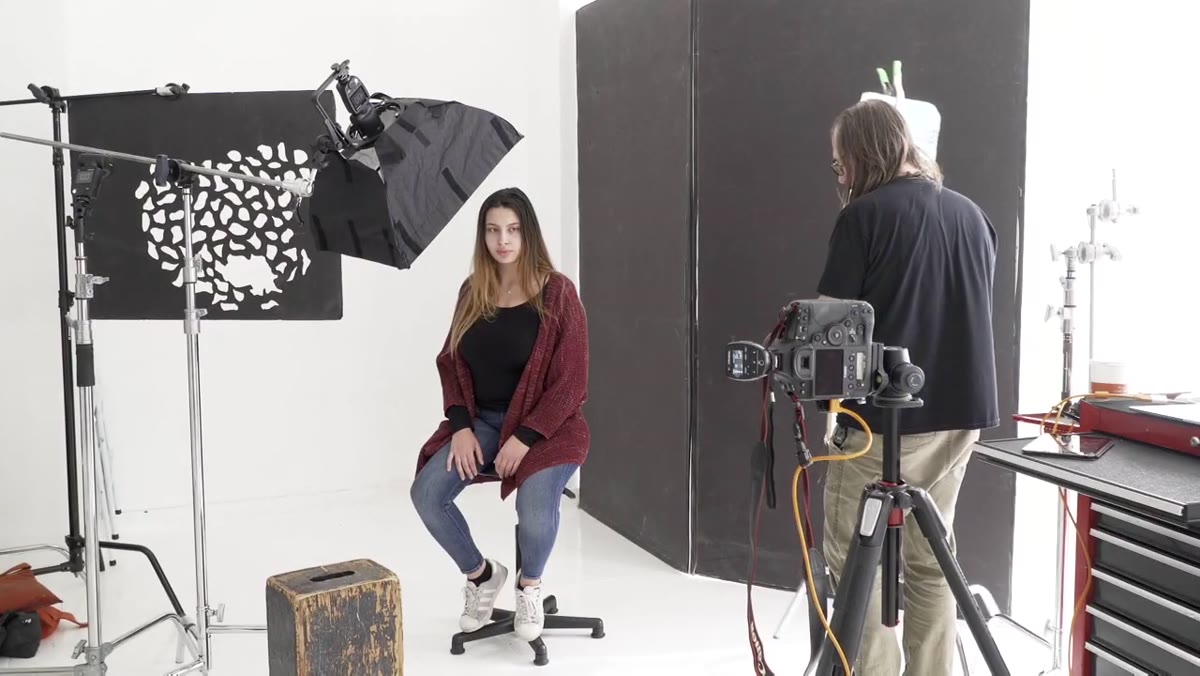
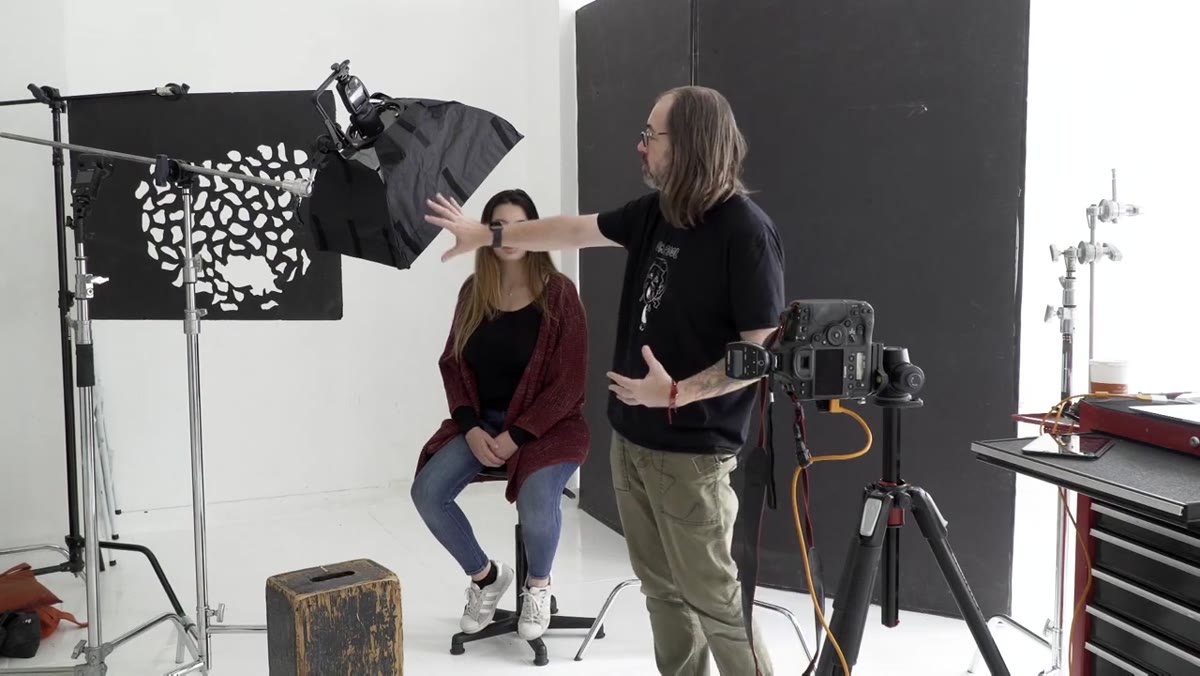 Small softbox positioned close to subject’s face
Norton opens with a small softbox, which he positions close to his subject. He is deliberate about why: a small modifier placed close will produce light that is relatively soft at the point of contact but falls off quickly. The edges of the light drop into shadow fast, which means you get dimension and drama rather than an even, flat wash across the frame. For classic studio portraiture, that fall-off is not a bug. It is the entire point.
Small softbox positioned close to subject’s face
Norton opens with a small softbox, which he positions close to his subject. He is deliberate about why: a small modifier placed close will produce light that is relatively soft at the point of contact but falls off quickly. The edges of the light drop into shadow fast, which means you get dimension and drama rather than an even, flat wash across the frame. For classic studio portraiture, that fall-off is not a bug. It is the entire point.
When I am selecting a modifier for this kind of work, I think of it as choosing between a broad, slow fade and a tight, punchy gradient. A large octa pulled back gives you the former. A small softbox moved in close gives you the latter. Norton is after that punchy quality, and the modifier choice is the first decision that locks in the entire mood of the image.
Step 2: Establish Your Ambient Exposure First
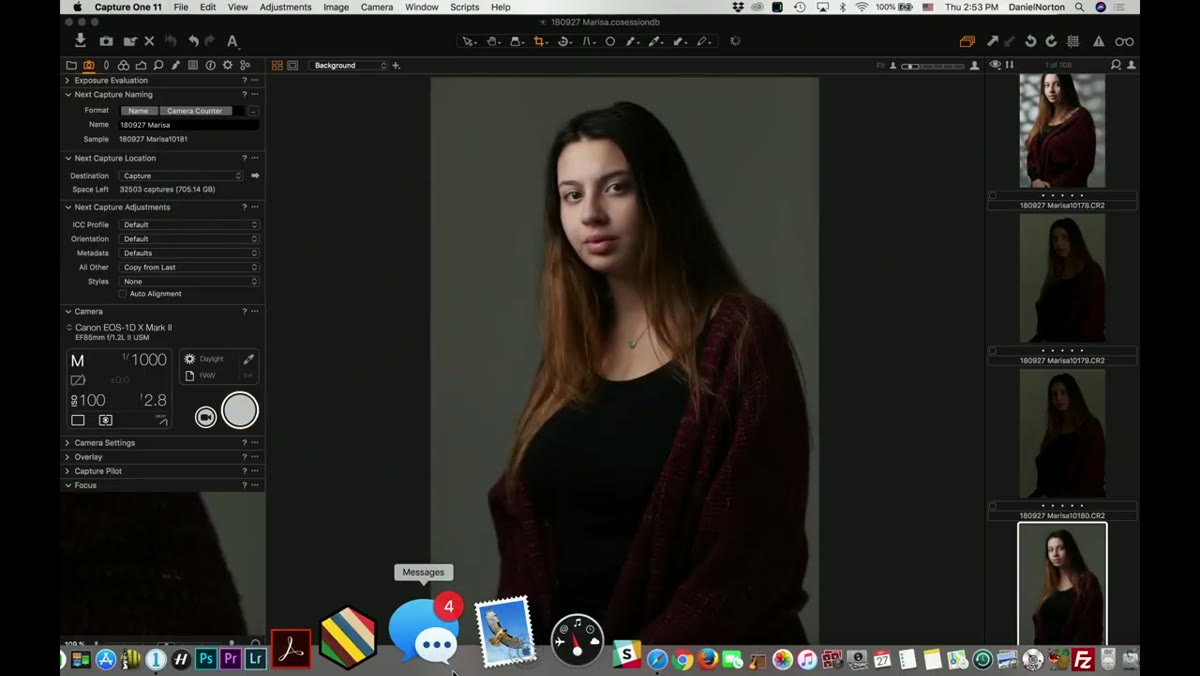
 Camera settings display, lights switched off
Before firing a single flash, Norton shoots a test frame with all lights off. His starting point is 1/1000s at f/2.8. The goal is simple: confirm that the ambient light in the room is not contributing meaningfully to the exposure. If the ambient bleeds into your strobed frames, you lose control of contrast and shadow depth. You want the flash to be doing all the work.
Camera settings display, lights switched off
Before firing a single flash, Norton shoots a test frame with all lights off. His starting point is 1/1000s at f/2.8. The goal is simple: confirm that the ambient light in the room is not contributing meaningfully to the exposure. If the ambient bleeds into your strobed frames, you lose control of contrast and shadow depth. You want the flash to be doing all the work.
I do this on every single studio shoot, and I was not always disciplined about it. Early in my career I ruined a full editorial setup because mixed light sources were warming my shadows in ways I did not catch until post. Now I treat the ambient check as non-negotiable. Shoot a frame with no flash, confirm the histogram is flat and dark, then proceed. It takes thirty seconds and saves hours.
Step 3: Build the Key Light Alone First
 Single softbox lighting subject’s face from one side
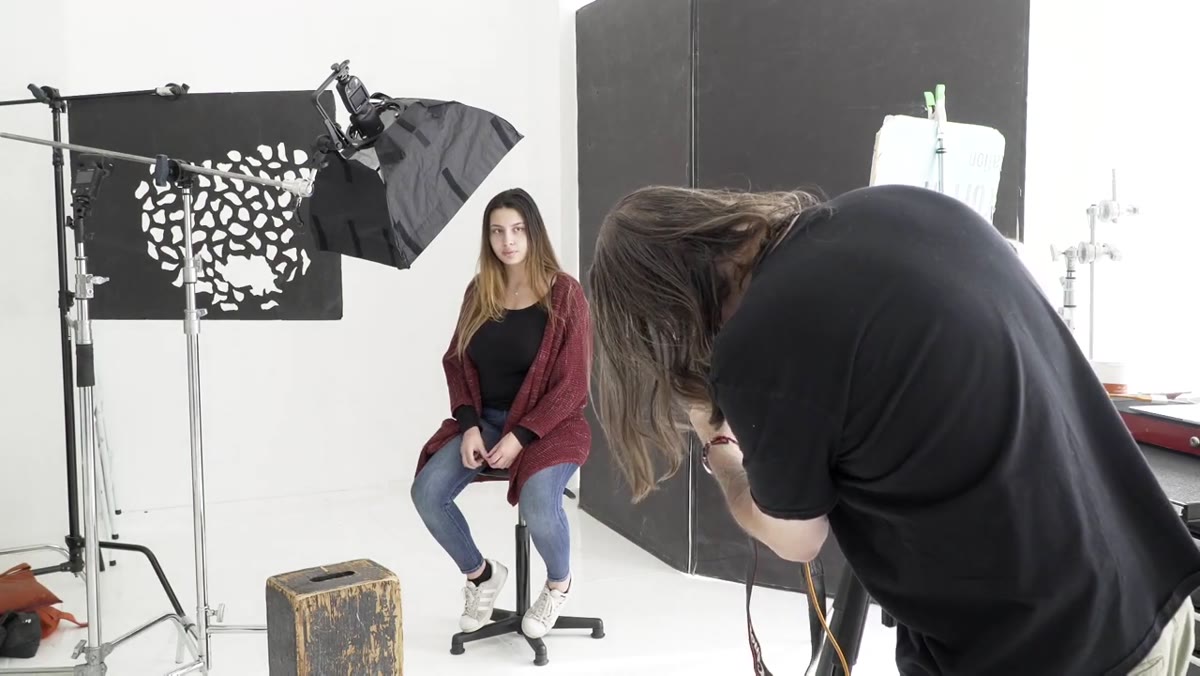
Norton’s key light runs on its own radio group so he can isolate and evaluate it independently before adding anything else. He fires it solo and reads the result: clean sculpting light across the face, strong shadow on the far side, and that deliberate fall-off down the body he designed into the setup with his modifier choice. The bottom of the frame goes dark. That is intentional.
Single softbox lighting subject’s face from one side
Norton’s key light runs on its own radio group so he can isolate and evaluate it independently before adding anything else. He fires it solo and reads the result: clean sculpting light across the face, strong shadow on the far side, and that deliberate fall-off down the body he designed into the setup with his modifier choice. The bottom of the frame goes dark. That is intentional.
The habit of lighting one source at a time is one I preach constantly. Every light you add changes the relationship between all the lights already in the frame. If you switch everything on at once and something is wrong, you have no clean reference point. Build it incrementally. The key light alone should already look interesting before you touch anything else.
Step 4: Add a Cookie for Background Texture
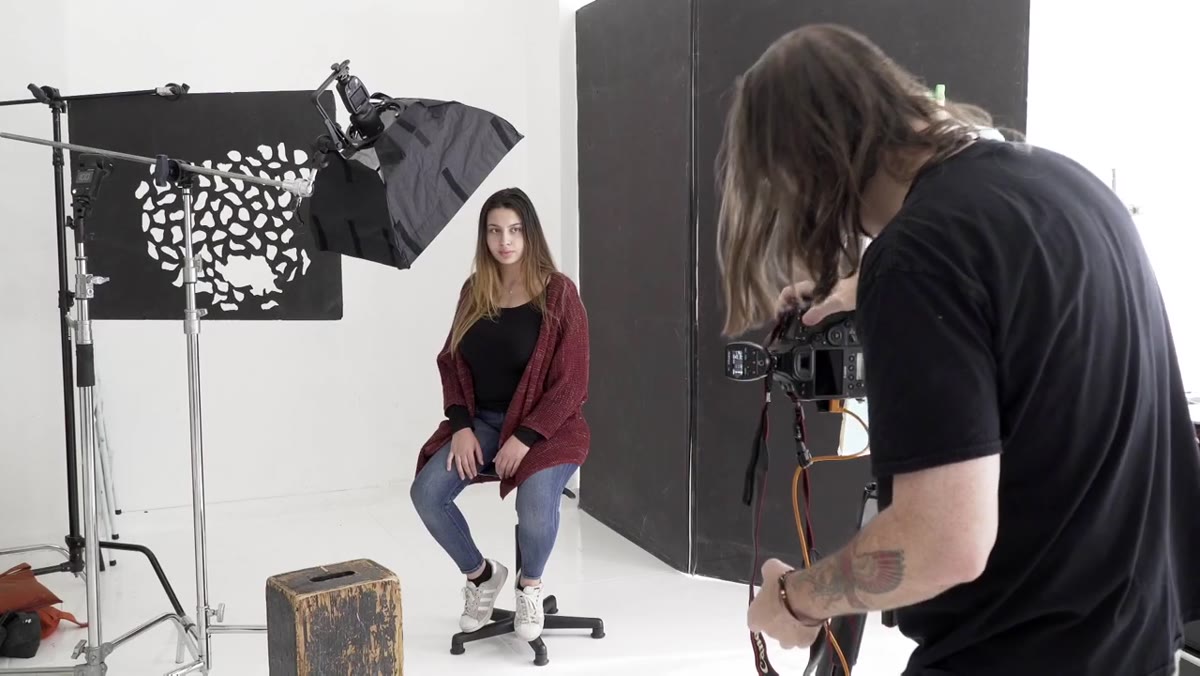 Background pattern from cookie projected on backdrop
The second A1 sits on a separate stand pointed at the background, and it is pushing light through a cookie, which is a flag or gobo cut with an irregular pattern. That pattern breaks up what would otherwise be a flat gray backdrop and throws organic shadow shapes behind the subject. Norton assigns this light to its own group, separate from the key, so he can dial it independently.
Background pattern from cookie projected on backdrop
The second A1 sits on a separate stand pointed at the background, and it is pushing light through a cookie, which is a flag or gobo cut with an irregular pattern. That pattern breaks up what would otherwise be a flat gray backdrop and throws organic shadow shapes behind the subject. Norton assigns this light to its own group, separate from the key, so he can dial it independently.
Cookies are one of those tools that look like a trick until you understand the physics. Any hard light source pushed through a cutout pattern will project that pattern. The distance between the cookie and the background controls how sharp or diffused the pattern reads. Closer to the background means crisper edges. Pulling it back softens and blends them. I have a few cookies in my studio that I cut myself from blackwrap, and they cost me almost nothing.
Step 5: Use a Reflector to Recover Shadow Detail
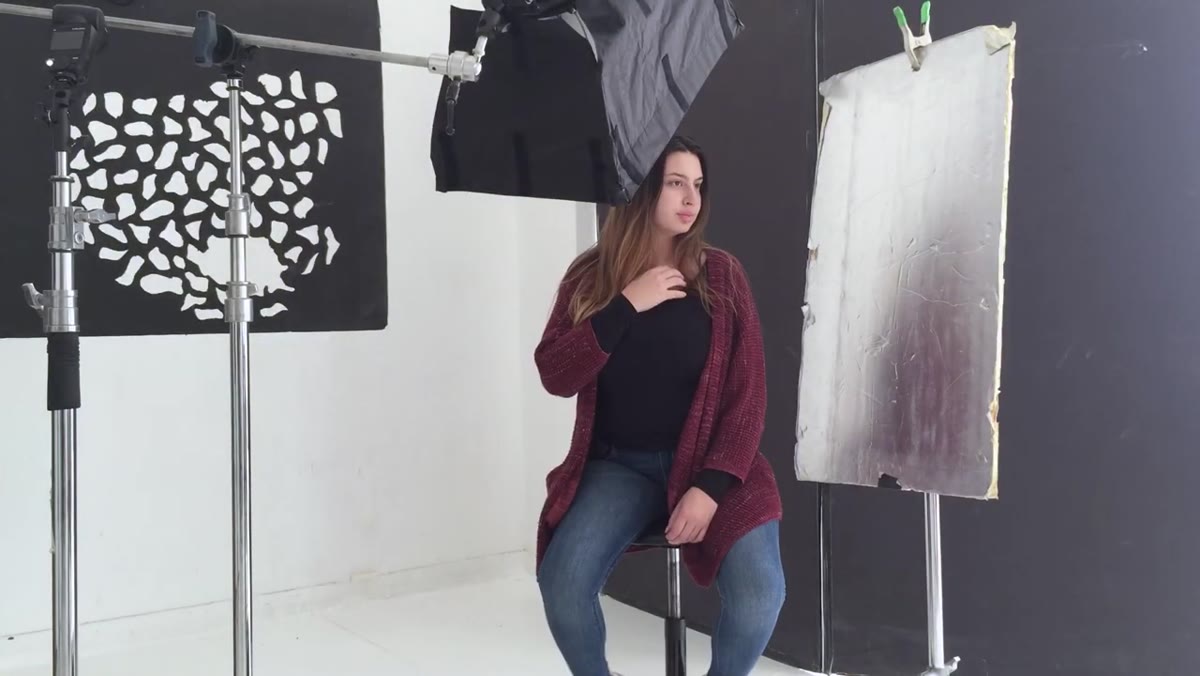
 Silver reflector positioned on subject’s shadow side
With both lights running, Norton notices the shadow side of his subject’s face is losing detail he wants to hold onto. His fix is a silver reflector placed just off-frame to bounce some of the key light back into that shadow. He is explicit that the effect is subtle. It is not intended to flatten the shadow. It is intended to lift it just enough to retain texture and separation in the skin.
Silver reflector positioned on subject’s shadow side
With both lights running, Norton notices the shadow side of his subject’s face is losing detail he wants to hold onto. His fix is a silver reflector placed just off-frame to bounce some of the key light back into that shadow. He is explicit that the effect is subtle. It is not intended to flatten the shadow. It is intended to lift it just enough to retain texture and separation in the skin.
Norton’s reflector is a DIY panel made from insulation board sourced at a hardware store. The surface is a matte silver, which gives a softer bounce than a mirror or foil. I use a nearly identical setup in my own studio. The matte silver quality is forgiving and does not create a harsh secondary catchlight. If you are building a kit on a budget, this is genuinely one of the highest-value additions you can make for under twenty dollars.
Step 6: Shoot at f/2.8 to Separate Subject from Background
 Camera framing showing background softly out of focus
Norton shoots at f/2.8 throughout, and this is a structural choice, not just an aesthetic preference. With the cookie pattern on the background, a wider aperture means that pattern renders as a soft, impressionistic texture rather than a sharp, competing element. The subject stays in clear focus while the background supports without distracting. It is the same reason fashion work so often lives at the wider end of the aperture range.
Camera framing showing background softly out of focus
Norton shoots at f/2.8 throughout, and this is a structural choice, not just an aesthetic preference. With the cookie pattern on the background, a wider aperture means that pattern renders as a soft, impressionistic texture rather than a sharp, competing element. The subject stays in clear focus while the background supports without distracting. It is the same reason fashion work so often lives at the wider end of the aperture range.
The trade-off at f/2.8 is that your focus discipline has to be tight. Norton mentions being careful about his focus plane, especially when the subject shifts position. With a small softbox this close and an 85mm lens at that aperture, a few inches of movement can slide an eye out of the plane. Manual focus or single-point AF with careful placement is essential.
From My Studio: Test the Same Lights Differently Before You Buy Anything New
The throughline of this entire tutorial is something Norton states outright at the top: the same lights can produce completely different looks depending on how you use them. I have a rule in my studio that before I buy any new modifier or light source, I have to exhaust what I can do with what I already own. The small softbox Norton uses here is producing a result that most photographers would assume requires a much larger, more expensive setup.
When I got my first set of A1s, I spent an entire weekend running them through every modifier combination I had. Hard, bare bulb. Dome diffuser. Small softbox at different distances. Pushed through a doorway. That kind of systematic testing is how you build the mental index that lets you walk into a studio and know what a light will do before you fire it.
The single most important idea in this tutorial is that light quality is about modifier size relative to subject distance, not about the output power or brand name of your flash. A small light source close to your subject will always behave like a larger, softer source. Move it back and it hardens. Understand that relationship and you can build almost any look with almost any kit.
Watch the full tutorial on YouTube to see Norton demonstrate each light transition and hear his real-time reasoning as the setup comes together.
Comments (4)
Bookmarked. Coming back to this one for sure.
I keep coming back to this article. It's that useful.
Printing this out and pinning it next to my monitor. That good.
Quality content like this is rare. Keep it up.
Leave a Comment