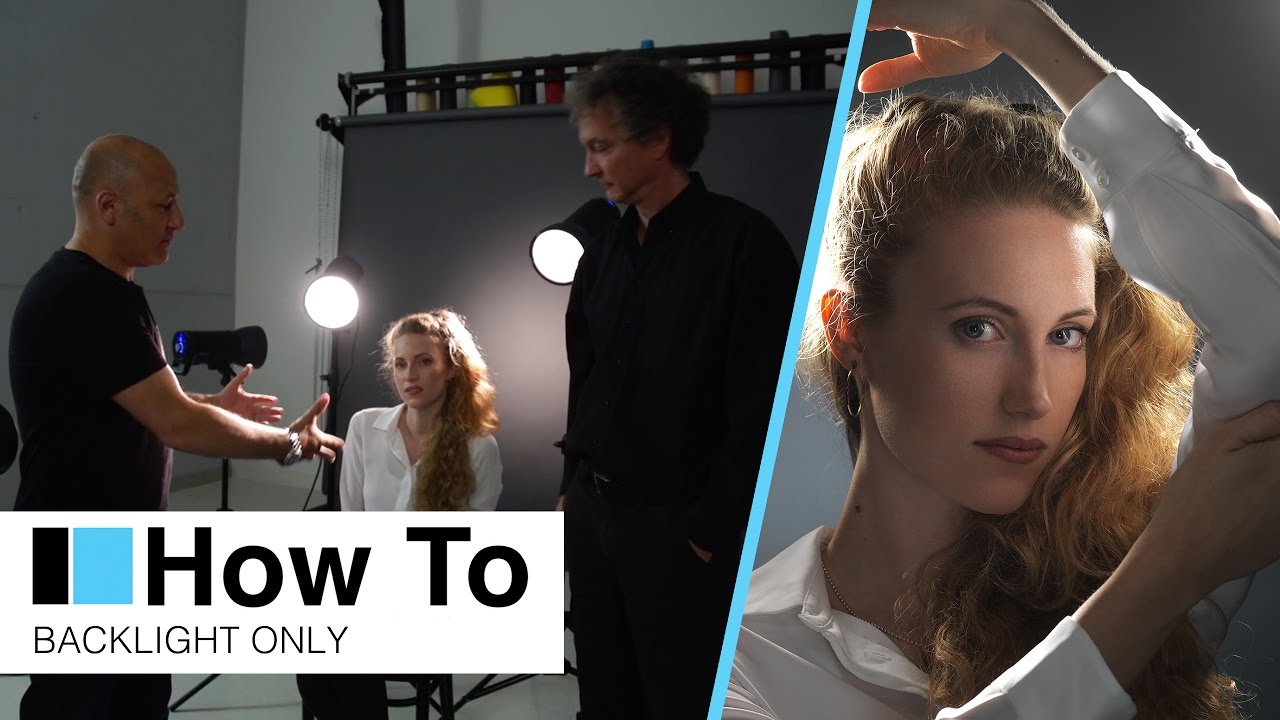
Backlighting is one of those techniques I keep returning to, not because it’s easy, but because nothing else produces that quality of edge light and depth that makes a portrait look genuinely three-dimensional. The problem is that pure backlight is also one of the fastest ways to wreck a shot. You get blown rim light, a crushed, featureless face, and enough lens flare to sink a fashion campaign. I’ve been in that situation more times than I’d like to admit, which is why this Visual Education tutorial featuring broncolor stopped me mid-scroll.
Watch the full tutorial on YouTube
What KL Taylor and his collaborator demonstrate here is a setup I hadn’t seen articulated quite this cleanly before: using the model herself, specifically her clothing, as the primary light modifier. No front light. No softbox aimed at her face. Just two powerful back lights, a white blouse, and a handful of carefully managed variables. The elegance of it is worth studying closely because the logic transfers to almost any backlight situation you’ll find yourself in.
Step 1: Build the Core Concept Before You Place a Single Light
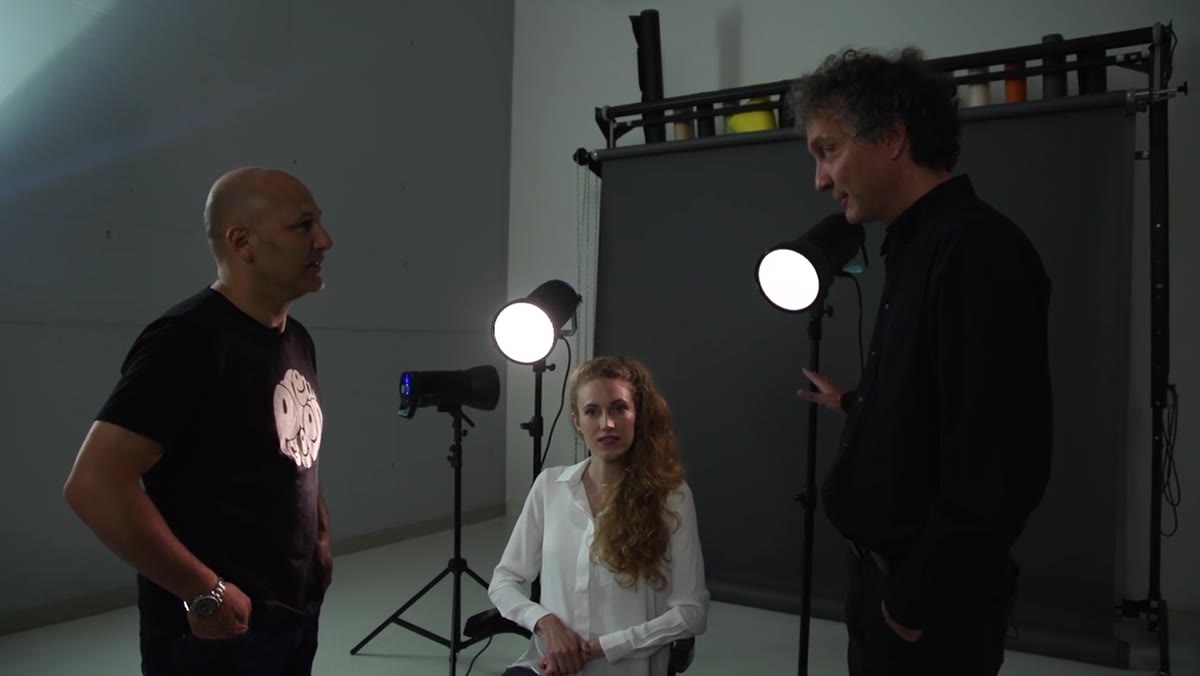 Photographer explaining the backlight-only setup concept
Before anything goes on a stand, understand the central idea here. The model is not just the subject. She is an active part of the lighting system. Her white sleeves, when positioned correctly in front of the key lights, catch the beam and bounce it back toward her face. That reflected light becomes your main light and your fill light simultaneously, depending on arm position. This is not an accident of the setup. It is the setup. If you treat it as an afterthought, the whole thing collapses. Choose your model’s wardrobe before you choose your power settings.
Photographer explaining the backlight-only setup concept
Before anything goes on a stand, understand the central idea here. The model is not just the subject. She is an active part of the lighting system. Her white sleeves, when positioned correctly in front of the key lights, catch the beam and bounce it back toward her face. That reflected light becomes your main light and your fill light simultaneously, depending on arm position. This is not an accident of the setup. It is the setup. If you treat it as an afterthought, the whole thing collapses. Choose your model’s wardrobe before you choose your power settings.
Step 2: Choose and Position Your Backlights with Narrow Honeycomb Grids
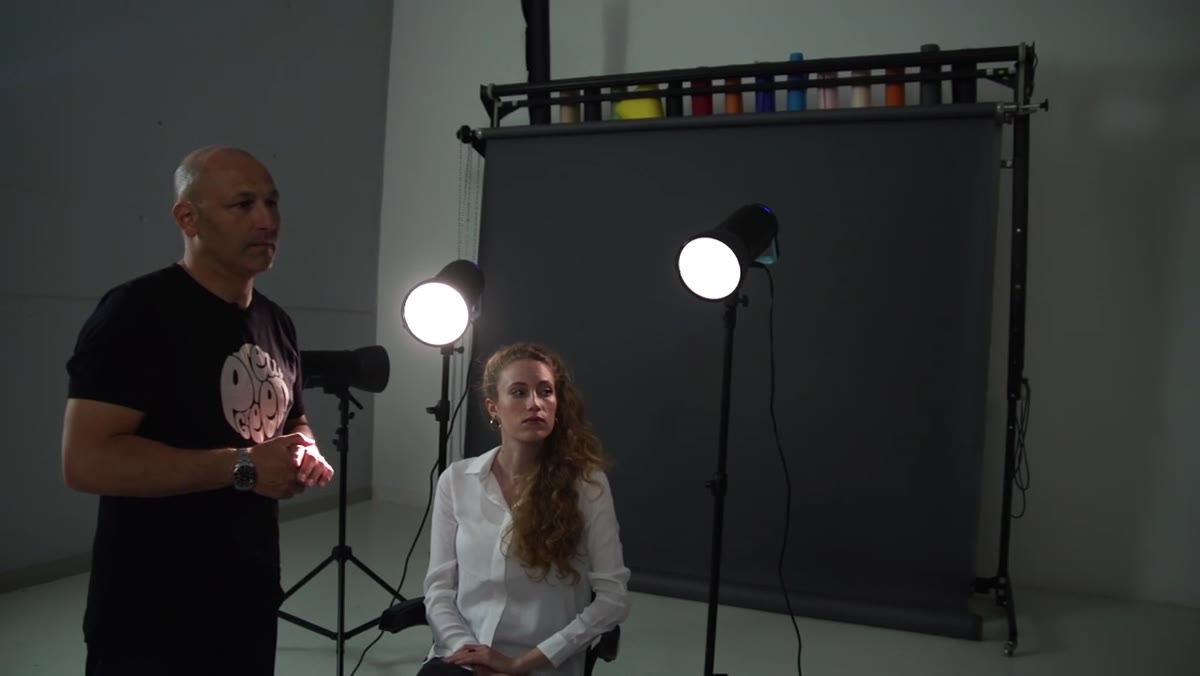
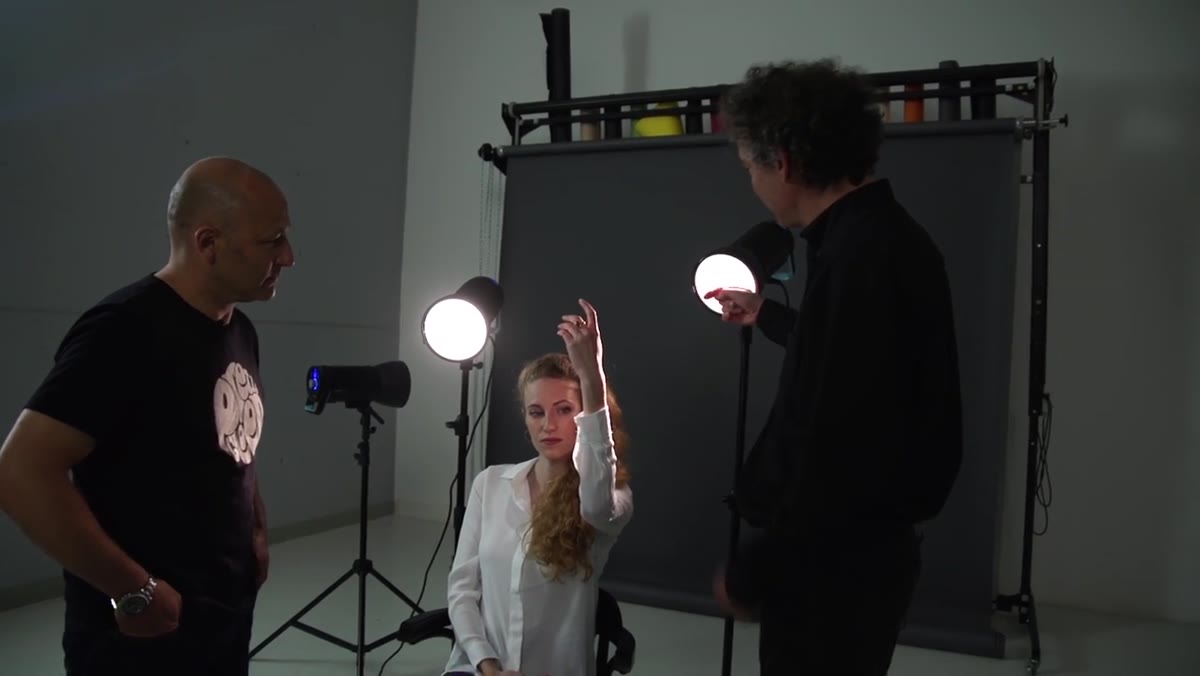 Narrow honeycomb grid visible on backlight, light aimed at model
Two 800-joule units are placed behind the model, each fitted with a narrow honeycomb grid. The grid is doing critical work here. It keeps the beam tight and directional, which means the light hits the white sleeves without spilling all over the face. If you used a standard reflector or a softbox in this position, you’d overpower everything. The tight cone of a narrow grid lets you aim precisely at the clothing and control how much light reaches the skin directly. Both lights run at full power, and the reason is counterintuitive: because the white fabric is the actual working light source, and fabric reflects far less than a silver modifier would, you need the headroom. Target an aperture somewhere in the f/11 to f/16 range for the sharpness this kind of commercial work demands.
Narrow honeycomb grid visible on backlight, light aimed at model
Two 800-joule units are placed behind the model, each fitted with a narrow honeycomb grid. The grid is doing critical work here. It keeps the beam tight and directional, which means the light hits the white sleeves without spilling all over the face. If you used a standard reflector or a softbox in this position, you’d overpower everything. The tight cone of a narrow grid lets you aim precisely at the clothing and control how much light reaches the skin directly. Both lights run at full power, and the reason is counterintuitive: because the white fabric is the actual working light source, and fabric reflects far less than a silver modifier would, you need the headroom. Target an aperture somewhere in the f/11 to f/16 range for the sharpness this kind of commercial work demands.
Step 3: Direct the Model’s Arm Positions to Control Main and Fill Separately
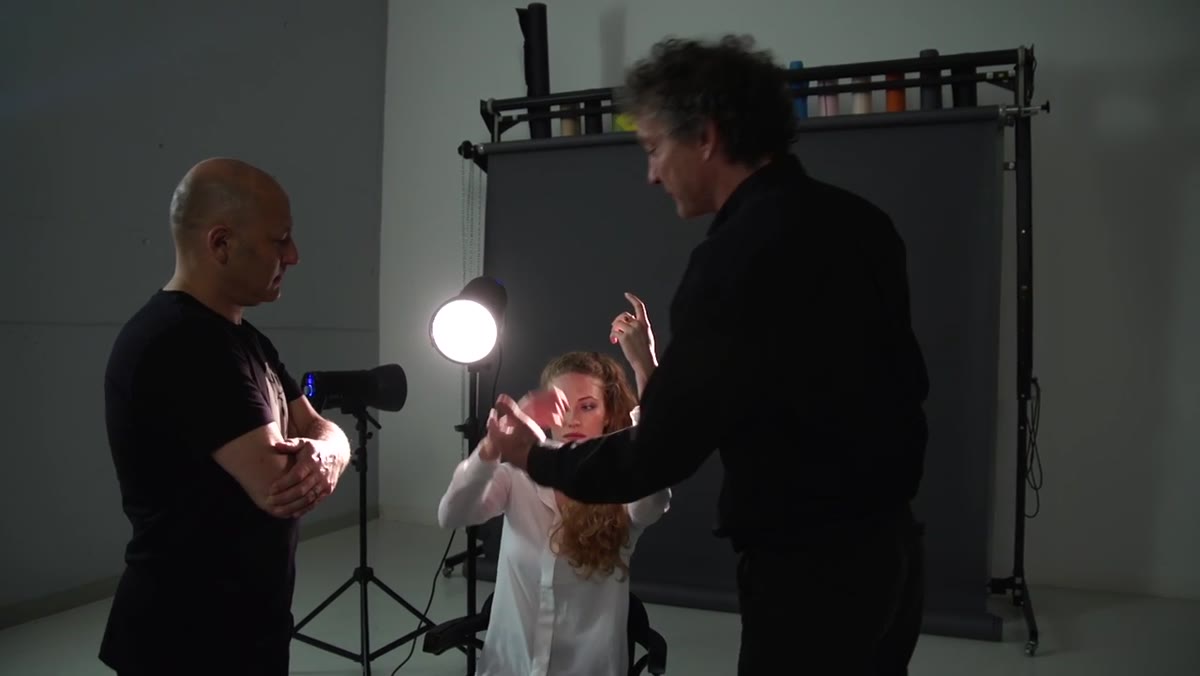 Model raising one arm to direct light toward camera
Here’s where posing and lighting become the same decision. With one arm raised and angled toward the camera, the light bouncing off that sleeve becomes the key light hitting the face. With the opposite arm raised slightly lower or differently angled, that reflected light functions as fill. You can adjust the ratio between key and fill without touching a power dial. Just change the arm. This is the “double role” concept described in the tutorial, and it’s genuinely elegant. It does mean your model needs to hold specific positions for extended periods, so communicate clearly about what you need and give her breaks. Tired arms create inconsistent reflectors.
Model raising one arm to direct light toward camera
Here’s where posing and lighting become the same decision. With one arm raised and angled toward the camera, the light bouncing off that sleeve becomes the key light hitting the face. With the opposite arm raised slightly lower or differently angled, that reflected light functions as fill. You can adjust the ratio between key and fill without touching a power dial. Just change the arm. This is the “double role” concept described in the tutorial, and it’s genuinely elegant. It does mean your model needs to hold specific positions for extended periods, so communicate clearly about what you need and give her breaks. Tired arms create inconsistent reflectors.
Step 4: Place a Small White Reflector Low and Out of Frame
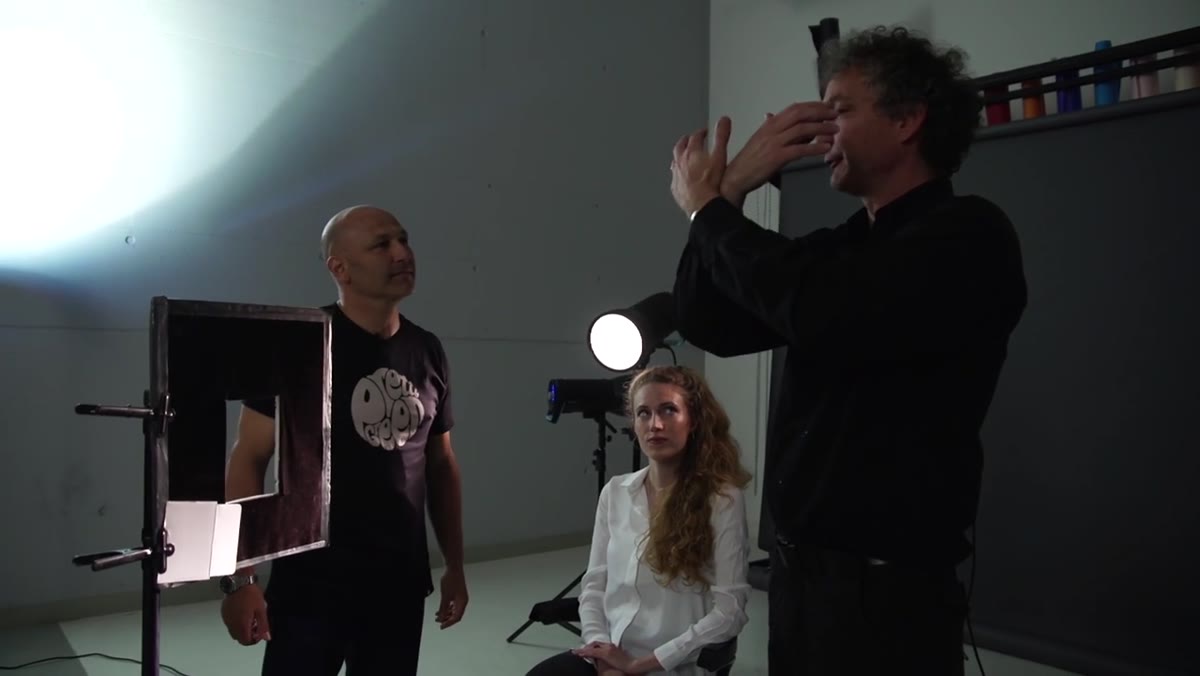 Small white reflector positioned low beneath model
Even with both arms working, there is still a zone of shadow across the lower face and chin that the sleeve bounce won’t fully reach. Rather than introduce a front light, which would destroy the backlit mood entirely, a small white reflector is positioned just below frame, angled up. It adds the thinnest lift to shadow areas, the difference between skin that reads as intentionally dark and dramatic versus skin that simply looks crushed and lost. The distinction matters. Keep it minimal. The reflector should not be visible in frame and should not introduce a catchlight that looks like a separate light source. If you’re seeing a distinct reflection in the eyes from this, pull it back or angle it down.
Small white reflector positioned low beneath model
Even with both arms working, there is still a zone of shadow across the lower face and chin that the sleeve bounce won’t fully reach. Rather than introduce a front light, which would destroy the backlit mood entirely, a small white reflector is positioned just below frame, angled up. It adds the thinnest lift to shadow areas, the difference between skin that reads as intentionally dark and dramatic versus skin that simply looks crushed and lost. The distinction matters. Keep it minimal. The reflector should not be visible in frame and should not introduce a catchlight that looks like a separate light source. If you’re seeing a distinct reflection in the eyes from this, pull it back or angle it down.
Step 5: Light the Background Separately at Low Power
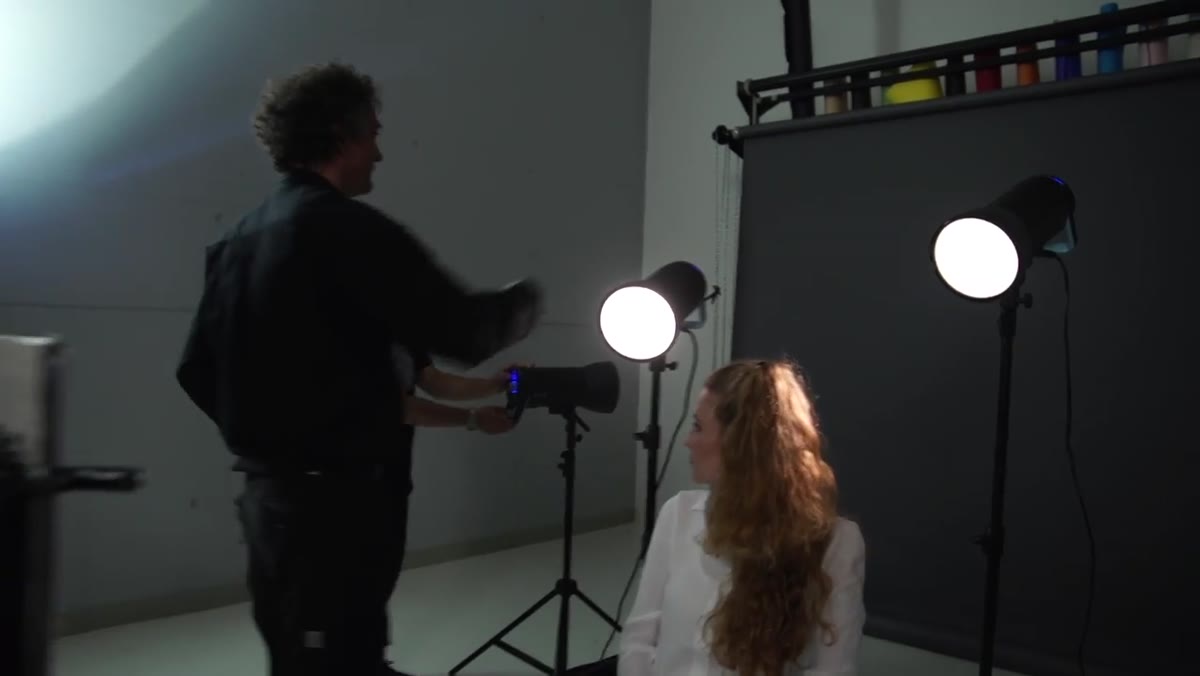 Background light with honeycomb grid on dark backdrop
Without any treatment, the background will go completely black, which can feel oppressive rather than moody. A third unit, also fitted with a honeycomb grid, is aimed at the background at reduced power. The goal is a soft dark-gray graduation, not a bright background that competes with the subject. The grid prevents the background light from spilling onto the model and contaminating the backlight effect. Think of it as giving the image a sense of space without actually illuminating anything. A subtle gradient from near-black at the edges to a slightly lighter value behind the subject is all you need.
Background light with honeycomb grid on dark backdrop
Without any treatment, the background will go completely black, which can feel oppressive rather than moody. A third unit, also fitted with a honeycomb grid, is aimed at the background at reduced power. The goal is a soft dark-gray graduation, not a bright background that competes with the subject. The grid prevents the background light from spilling onto the model and contaminating the backlight effect. Think of it as giving the image a sense of space without actually illuminating anything. A subtle gradient from near-black at the edges to a slightly lighter value behind the subject is all you need.
Step 6: Manage Lens Flare Intentionally with a Black Flag
 Black “window” flag positioned partially in front of lens
With two strong lights aimed directly at the back of your subject and, inevitably, partially at your lens, flare is not a question of if but how much. A black flag, here called a “black window,” is positioned between the lights and the lens. The key word is partially. You are not trying to eliminate flare. You are shaping it. A completely blocked lens reads as artificial in a backlit scenario because in the real world, strong backlight produces some flare. Position the flag so the lights catch the lens edge just slightly. This takes trial and error. Shoot a test frame, check your corners and midtones for how much glow you’re introducing, and adjust the flag’s angle until the flare supports the image rather than dominates it.
Black “window” flag positioned partially in front of lens
With two strong lights aimed directly at the back of your subject and, inevitably, partially at your lens, flare is not a question of if but how much. A black flag, here called a “black window,” is positioned between the lights and the lens. The key word is partially. You are not trying to eliminate flare. You are shaping it. A completely blocked lens reads as artificial in a backlit scenario because in the real world, strong backlight produces some flare. Position the flag so the lights catch the lens edge just slightly. This takes trial and error. Shoot a test frame, check your corners and midtones for how much glow you’re introducing, and adjust the flag’s angle until the flare supports the image rather than dominates it.
What I’d Add from My Own Experience
I keep a lighting journal where I sketch every setup after a shoot. When I first tried a variation of this technique, I made the mistake of using a light-blue top instead of white, thinking it would add a color cast I liked. What I actually got was an underexposed mess, because colored fabric absorbs too much light to function efficiently as a bounce source. Stick to white or near-white. If you want a color tone, introduce it in post or with a very faint gel on the background unit, not through the modifier. Also, if your studio has white walls within a few feet of this setup, flag them off. They will add ambient bounce you didn’t plan for and will soften the whole image more than you want.
The single most important takeaway from this tutorial is that light shapers don’t have to be equipment. Anything with a reflective surface that you can control is a modifier. Once you start thinking that way, your problem-solving on set changes completely. You stop reaching for another light and start asking what’s already in the frame that can do the work.
Watch the full tutorial on YouTube and pay close attention to the arm position adjustments. That’s where the real technique lives.
Comments (1)
This saved me so much time on my last edit. Wish I'd found this sooner.
Leave a Comment