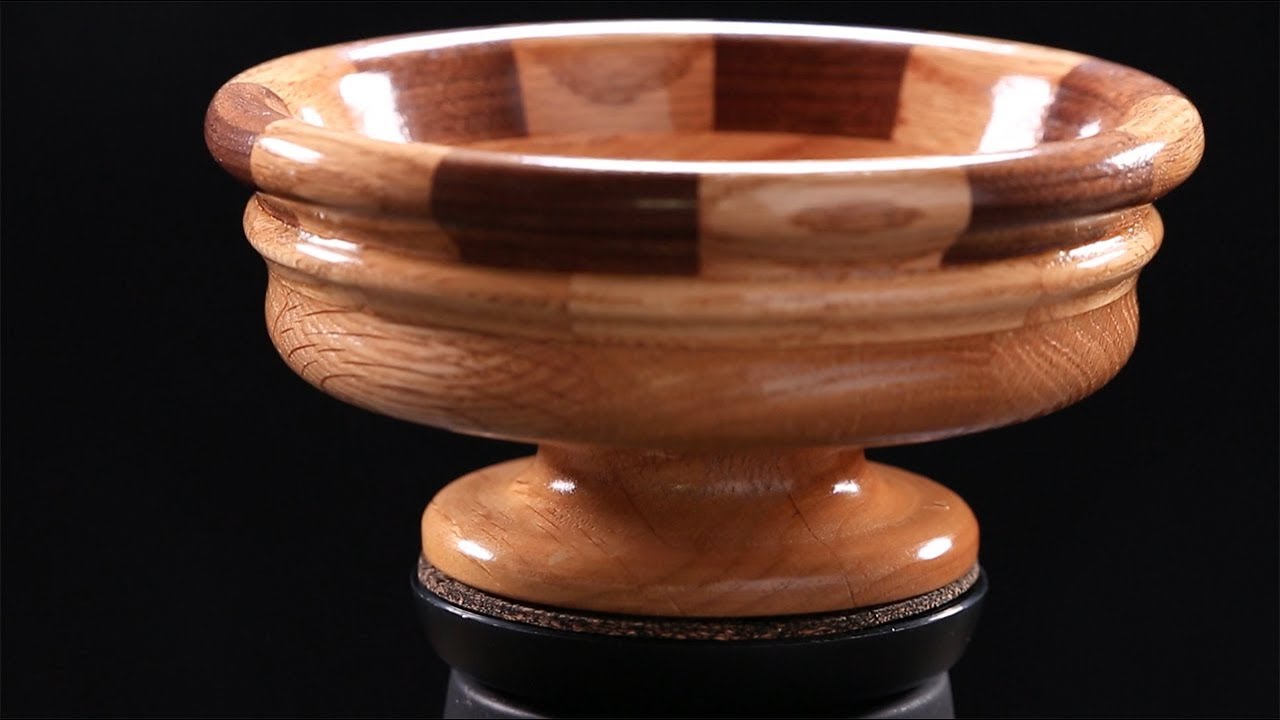
Product shots have a reputation for being straightforward, and that reputation is wrong. I’ve spent more hours than I’d like to admit fighting with a single object on a sweep, chasing specular highlights that blow out the form, or producing rotation video that feels rushed and cheap. The problem is usually not the product. It’s the absence of a clear lighting architecture, one that separates the object from the background, reveals its surface texture, and still leaves the front open enough for the viewer to actually read what they’re looking at. When I came across this The Slanted Lens tutorial by Jay P Morgan, I recognized immediately that he was solving exactly that problem, and solving it efficiently.
Watch the full tutorial on YouTube
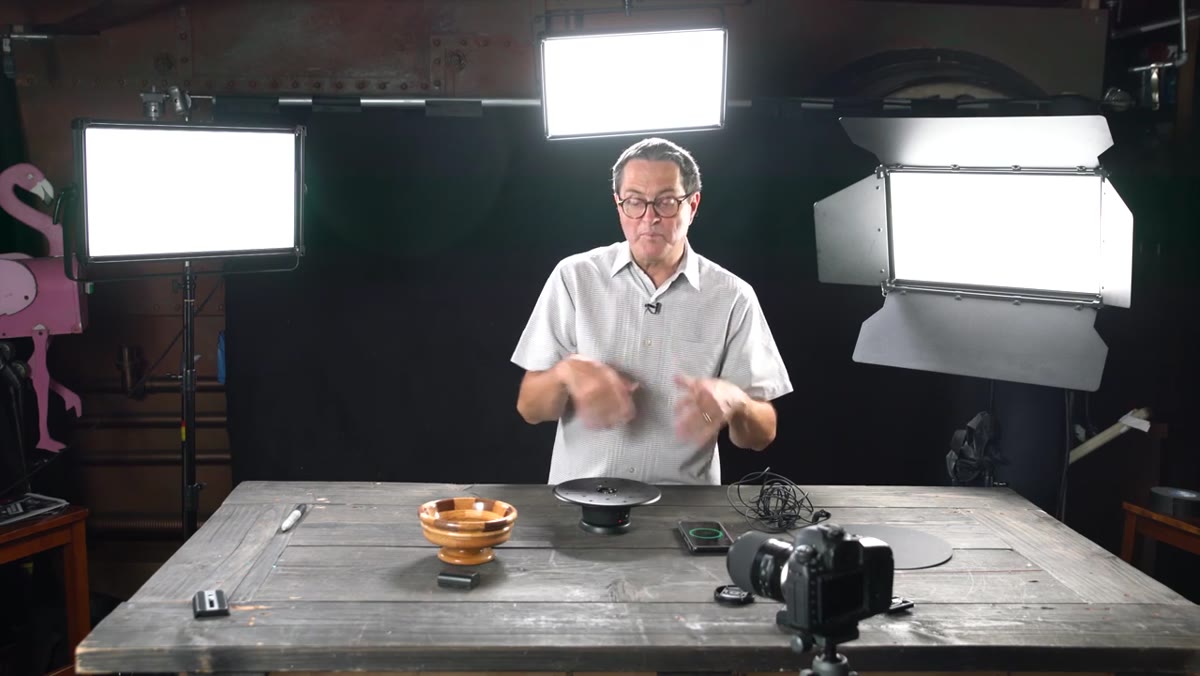
Morgan is shooting a handcrafted wooden bowl for a short documentary piece, which means he needs product stills and rotation video that hold up to scrutiny. The bowl has grain, texture, and depth. Flat light would kill every one of those qualities. What he builds instead is a three-point product lighting setup anchored by a back light, shaped by two side lights, and softened in the front with nothing more than a white reflector card. The Syrp Genie Mini handles the motion. It’s a practical, repeatable system, and I’d argue it translates directly to shoes, bags, glassware, cosmetics, or any object with surface detail worth showing.
Step 1: Orient the Syrp Genie Mini Correctly for Video
 Syrp Genie Mini product table assembled on a flat surface
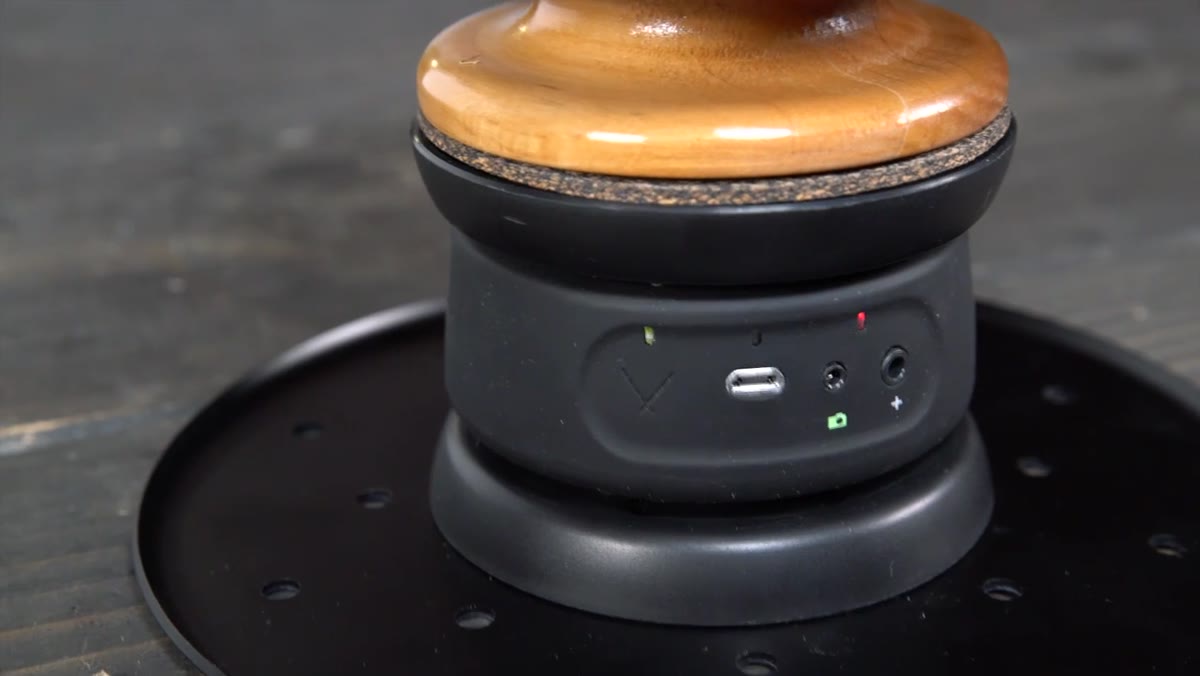
The Genie Mini can be used two ways, and which way you choose depends entirely on whether you’re shooting stills or video. For stills, you connect the unit to your camera via cable, and it fires the shutter at intervals, stepping around the rotation in precise increments. For video, Morgan inverts the unit so the motorized base sits at the top and the plate rotates on top of that. This keeps your power cable stationary at the bottom, so it never tangles as the unit spins. If you wire it the other way for video, the cable wraps itself around the base within a single rotation. It sounds obvious in retrospect, but it’s the kind of detail that costs you a full setup reset on a real shoot.
Syrp Genie Mini product table assembled on a flat surface
The Genie Mini can be used two ways, and which way you choose depends entirely on whether you’re shooting stills or video. For stills, you connect the unit to your camera via cable, and it fires the shutter at intervals, stepping around the rotation in precise increments. For video, Morgan inverts the unit so the motorized base sits at the top and the plate rotates on top of that. This keeps your power cable stationary at the bottom, so it never tangles as the unit spins. If you wire it the other way for video, the cable wraps itself around the base within a single rotation. It sounds obvious in retrospect, but it’s the kind of detail that costs you a full setup reset on a real shoot.
Step 2: Set Your Rotation Duration in the App
 Syrp app open showing 360-degree video rotation settings
Once the unit is oriented correctly, open the Syrp app, select new video, and choose your rotation arc. For a standard product spin, 360 degrees is the setting you want. The Genie Mini will rotate continuously, pause briefly at the end of each pass, reset, and begin again. What Morgan found, and what I think is the most practically useful data point in the whole tutorial, is that the duration of that rotation matters more than you might expect. His first attempt at 45 seconds felt rushed. Bumping it to one minute and 45 seconds produced movement that felt deliberate and gave the camera enough time to read the texture of the wood at every angle. For objects with fine surface detail, slower is almost always better.
Syrp app open showing 360-degree video rotation settings
Once the unit is oriented correctly, open the Syrp app, select new video, and choose your rotation arc. For a standard product spin, 360 degrees is the setting you want. The Genie Mini will rotate continuously, pause briefly at the end of each pass, reset, and begin again. What Morgan found, and what I think is the most practically useful data point in the whole tutorial, is that the duration of that rotation matters more than you might expect. His first attempt at 45 seconds felt rushed. Bumping it to one minute and 45 seconds produced movement that felt deliberate and gave the camera enough time to read the texture of the wood at every angle. For objects with fine surface detail, slower is almost always better.
Step 3: Build the Back Light First
 Single Silk 210 positioned behind and above the wooden bowl
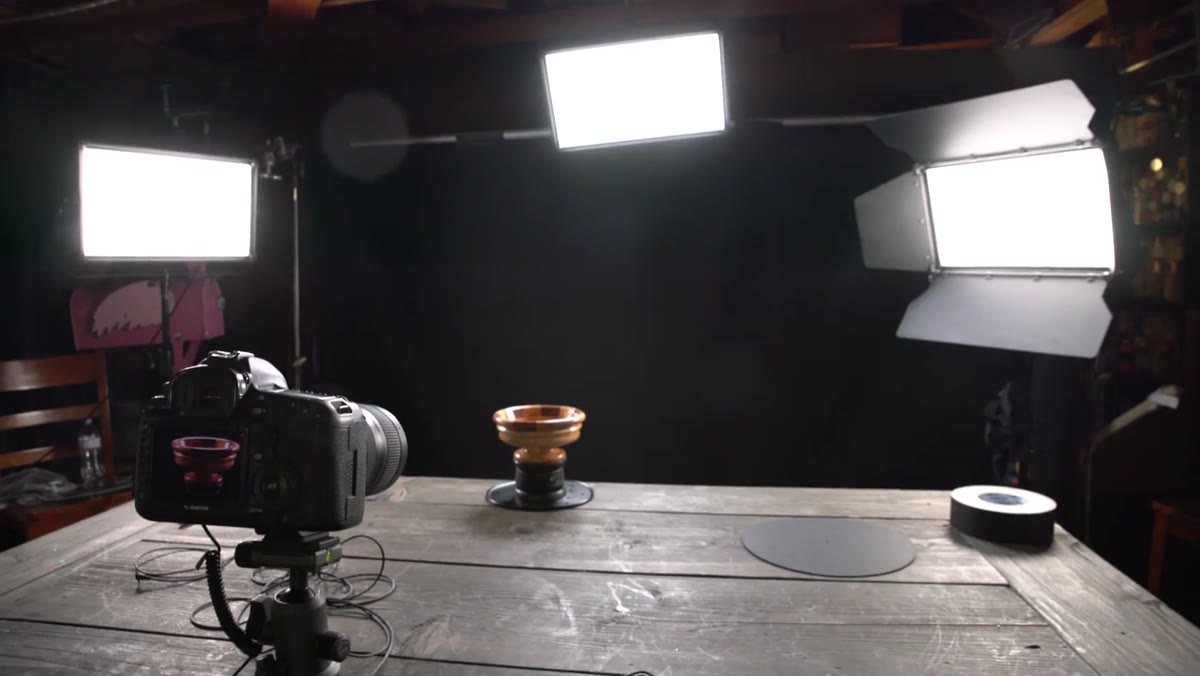
Morgan’s first light is a Silk 210 LED panel positioned above and behind the product. This is a top back light, and it’s the structural foundation of the entire setup. It creates a rim of light along the edge of the bowl that separates the object cleanly from whatever is behind it, giving the product visual weight and three-dimensionality. I use this same approach as my starting point for almost any product with a defined silhouette. The Silk 210 is a soft source, which means the transition from highlight to shadow is gradual, and you’re not fighting hard-edged reflections on curved surfaces. If you’re working with a different light, the principle holds: large, soft, positioned high and behind.
Single Silk 210 positioned behind and above the wooden bowl
Morgan’s first light is a Silk 210 LED panel positioned above and behind the product. This is a top back light, and it’s the structural foundation of the entire setup. It creates a rim of light along the edge of the bowl that separates the object cleanly from whatever is behind it, giving the product visual weight and three-dimensionality. I use this same approach as my starting point for almost any product with a defined silhouette. The Silk 210 is a soft source, which means the transition from highlight to shadow is gradual, and you’re not fighting hard-edged reflections on curved surfaces. If you’re working with a different light, the principle holds: large, soft, positioned high and behind.
Step 4: Add Side Lights to Define Surface Texture
 Second Silk 210 lighting the left side of the bowl
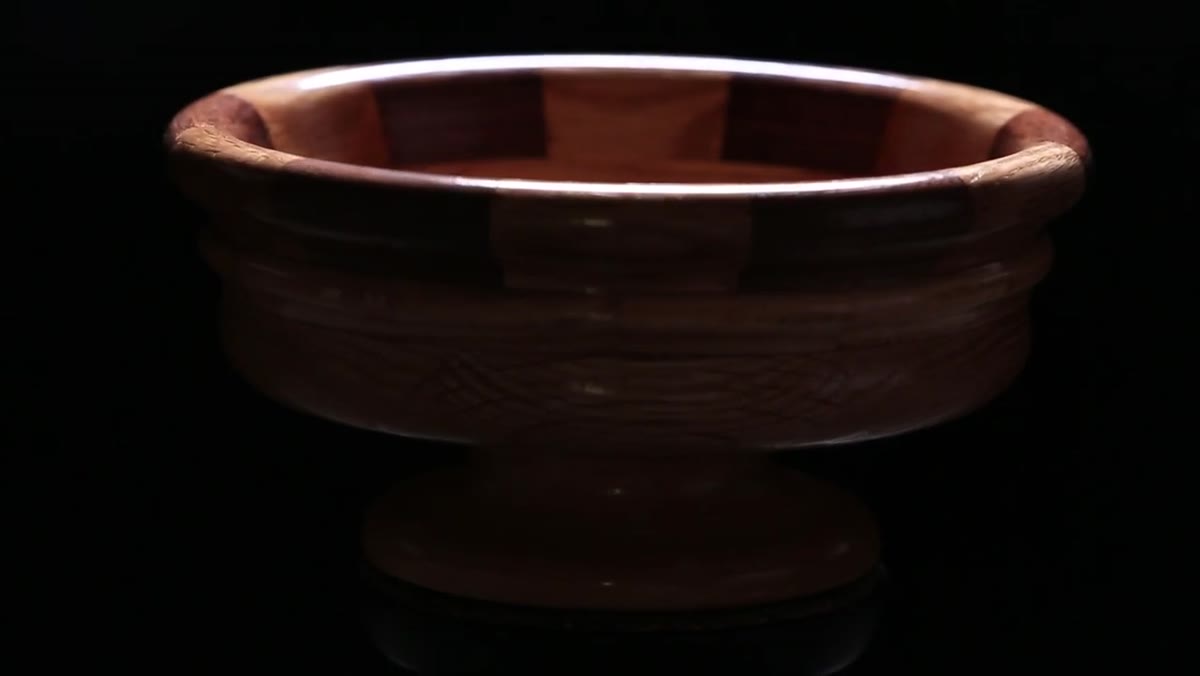
With the back light established, Morgan brings in a Silk 210 from the camera-left side, aimed to rake across the surface of the bowl. Then he adds a matching light from camera right. These two side lights are doing a specific job: they’re catching the grain and tool marks in the wood, the very qualities that make a handcrafted object worth looking at. On a smooth product like a perfume bottle, you’d pull these side lights back or flag them more carefully. On a textured object like this bowl, you want them closer to 90 degrees to the camera axis so the light skims the surface and shadows pool in every groove. Morgan’s barn doors are already attached to the fixtures when he sets them up, and he leaves them open wide. That’s a sensible call when you’re working with soft panels and don’t need to cut the light precisely.
Second Silk 210 lighting the left side of the bowl
With the back light established, Morgan brings in a Silk 210 from the camera-left side, aimed to rake across the surface of the bowl. Then he adds a matching light from camera right. These two side lights are doing a specific job: they’re catching the grain and tool marks in the wood, the very qualities that make a handcrafted object worth looking at. On a smooth product like a perfume bottle, you’d pull these side lights back or flag them more carefully. On a textured object like this bowl, you want them closer to 90 degrees to the camera axis so the light skims the surface and shadows pool in every groove. Morgan’s barn doors are already attached to the fixtures when he sets them up, and he leaves them open wide. That’s a sensible call when you’re working with soft panels and don’t need to cut the light precisely.
Step 5: Slide in a Fill Card to Open the Front
 White fill card positioned in front of the bowl to bounce light
Here’s where the setup clicks into place. With all the light coming from behind and the sides, the front of the bowl is in shadow, and that shadow would read as flat and muddy in video. Morgan’s solution costs nothing: a white fill card positioned just outside the frame at the front of the product, angled to bounce the existing Silk 210 light back into the shadow side. You control the exposure in the front by moving the card closer or farther from the product. No additional light unit, no color temperature mismatch, no extra cable to manage. The reflected light is the same quality and color as the source, so it integrates cleanly. I keep several foam core cards in different sizes in my studio for exactly this reason. They do more quiet work per square inch than almost any modifier I own.
White fill card positioned in front of the bowl to bounce light
Here’s where the setup clicks into place. With all the light coming from behind and the sides, the front of the bowl is in shadow, and that shadow would read as flat and muddy in video. Morgan’s solution costs nothing: a white fill card positioned just outside the frame at the front of the product, angled to bounce the existing Silk 210 light back into the shadow side. You control the exposure in the front by moving the card closer or farther from the product. No additional light unit, no color temperature mismatch, no extra cable to manage. The reflected light is the same quality and color as the source, so it integrates cleanly. I keep several foam core cards in different sizes in my studio for exactly this reason. They do more quiet work per square inch than almost any modifier I own.
Step 6: Evaluate the Full Setup Before You Roll
 Final three-light setup showing bowl lit with rim and open front
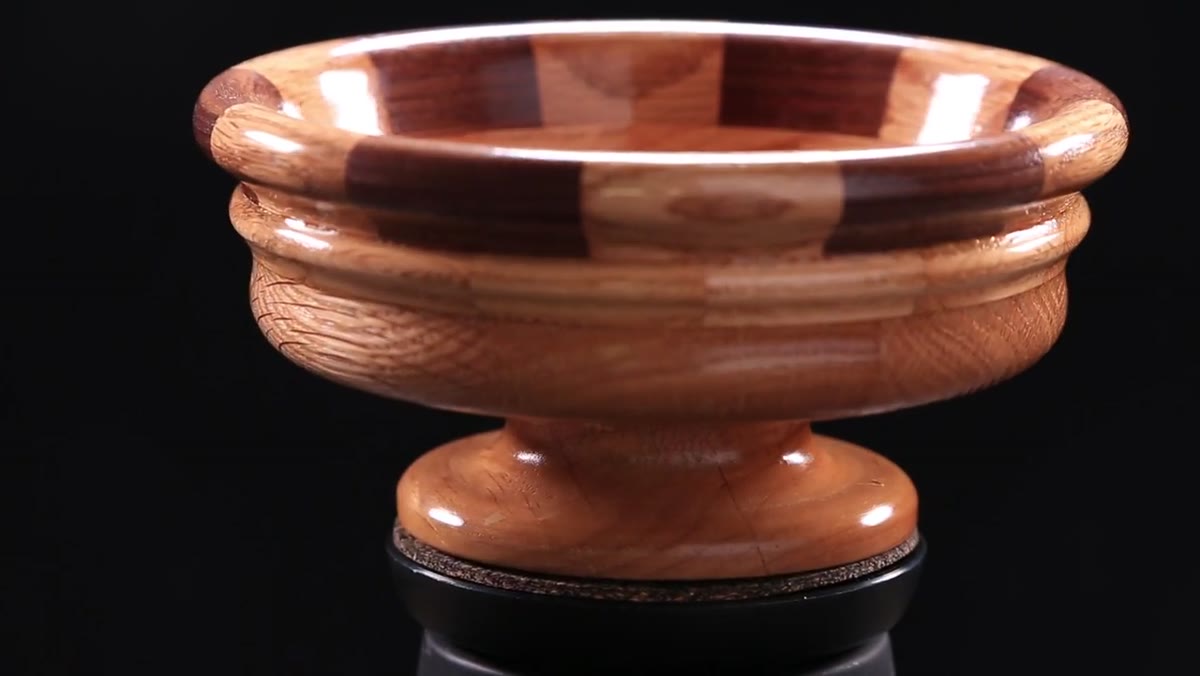
Before starting the rotation, check the whole frame. Morgan’s final look has strong highlights on both the left and right sides, a glowing rim from the back light separating the bowl from the background, and a front that’s open and readable without being blown out. That balance is the target. If the front fill is too aggressive, the object starts to look flat. If it’s not enough, you lose legibility on the camera-facing side. Walk around the setup, check your monitor, and make small card adjustments before you commit to a full pass.
Final three-light setup showing bowl lit with rim and open front
Before starting the rotation, check the whole frame. Morgan’s final look has strong highlights on both the left and right sides, a glowing rim from the back light separating the bowl from the background, and a front that’s open and readable without being blown out. That balance is the target. If the front fill is too aggressive, the object starts to look flat. If it’s not enough, you lose legibility on the camera-facing side. Walk around the setup, check your monitor, and make small card adjustments before you commit to a full pass.
What I’d Add From My Own Experience
Rotation video for products has a timing problem that goes beyond the Genie Mini settings. The edit matters. I’ve started shooting at least three full rotations on every product spin and cutting together only the portions where the surface detail reads most clearly. Some angles on a given object are more flattering than others, and a 360 video doesn’t have to use all 360 degrees in the final cut. Morgan’s setup gives you clean, consistent light throughout the full rotation, which means you have genuine editing options. That consistency comes directly from using soft sources with gradual falloff, not hard strobes or bare LEDs.
The single most important thing this tutorial demonstrates is that great product lighting isn’t about the number of lights. It’s about understanding what each light is doing before you add the next one. Morgan’s back light, two side lights, and a piece of foam core produce a result that is clean, textured, and professional. That’s a recipe worth writing down.
Watch the full tutorial on YouTube
Comments
Leave a Comment