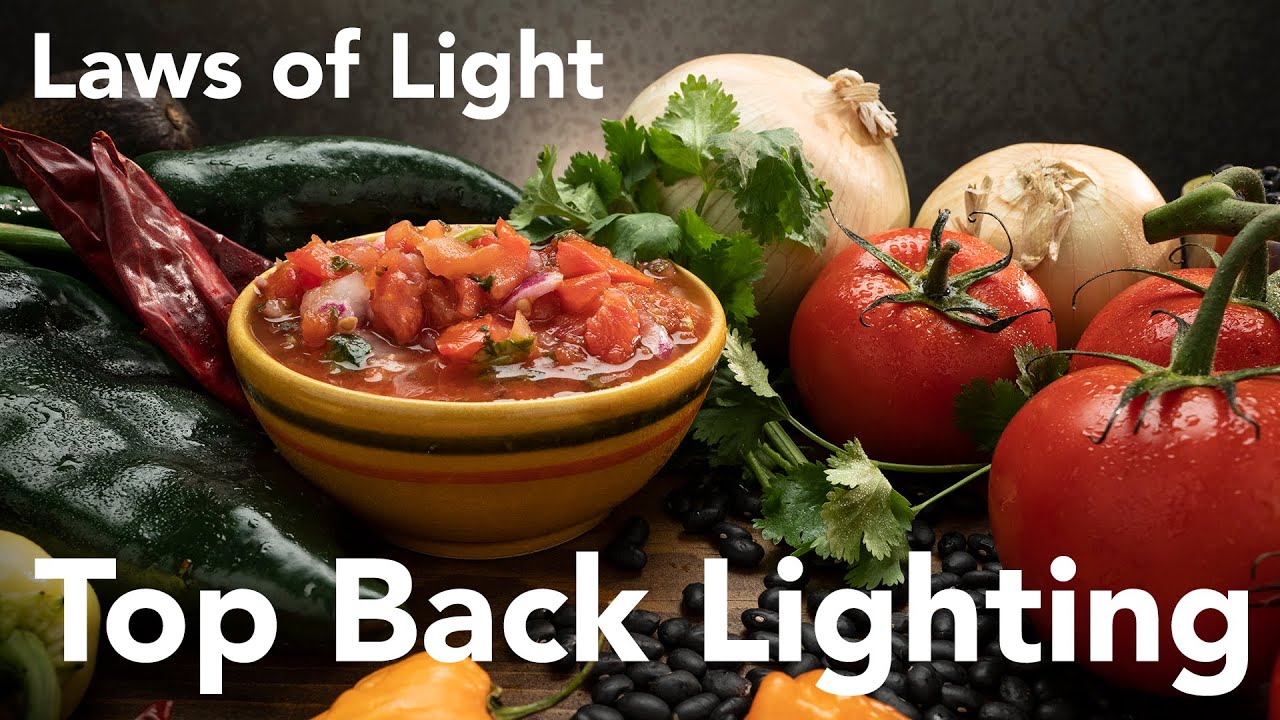
Every product shooter I know, at some point, makes the same mistake. The client wants something simple, the deadline is tight, and the light goes right next to the camera because that’s the safe, fast choice. I’ve done it. The result is always the same: flat surfaces, no separation, a product that looks like a catalog scan from 1997. I kept doing it even after I knew better, because moving the light behind the subject felt counterintuitive and, honestly, a little risky when you’re on the clock.
What changed my approach was watching Jay P Morgan work through this exact problem in his Laws of Light series. In this The Slanted Lens tutorial on top back lighting, he sets up a food/product scene with a layered three-light approach that creates depth, texture, and visual hierarchy. It’s one of those setups that looks complex in the final image but is actually logical once you understand why each light is there. I’m going to walk through it step by step the way I’d explain it to an assistant on set.
Step 1: Understand Why Front Lighting Is Working Against You
 Camera positioned directly in front of flat-lit product set
The fundamental problem with lighting close to the camera axis is that shadows fall directly behind the subject, away from the lens. You lose all the dimensionality that makes objects readable. Morgan’s point is blunt: even moving a front light slightly to the side doesn’t fix this. The shadows are still shallow, the surfaces still read as flat, and nothing tells the viewer where one object ends and another begins. The solution isn’t a different modifier. It’s a different position entirely.
Camera positioned directly in front of flat-lit product set
The fundamental problem with lighting close to the camera axis is that shadows fall directly behind the subject, away from the lens. You lose all the dimensionality that makes objects readable. Morgan’s point is blunt: even moving a front light slightly to the side doesn’t fix this. The shadows are still shallow, the surfaces still read as flat, and nothing tells the viewer where one object ends and another begins. The solution isn’t a different modifier. It’s a different position entirely.
Step 2: Place a Large Softbox Behind and Above the Set
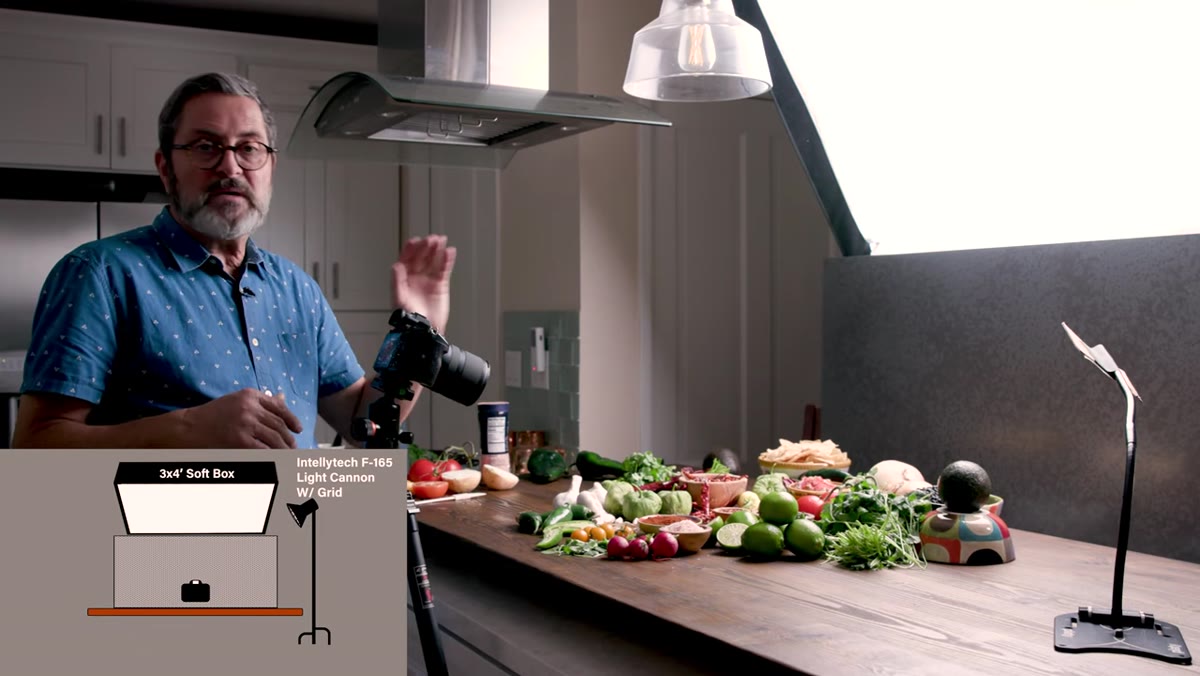
 Large 3x4 softbox positioned low behind the background surface
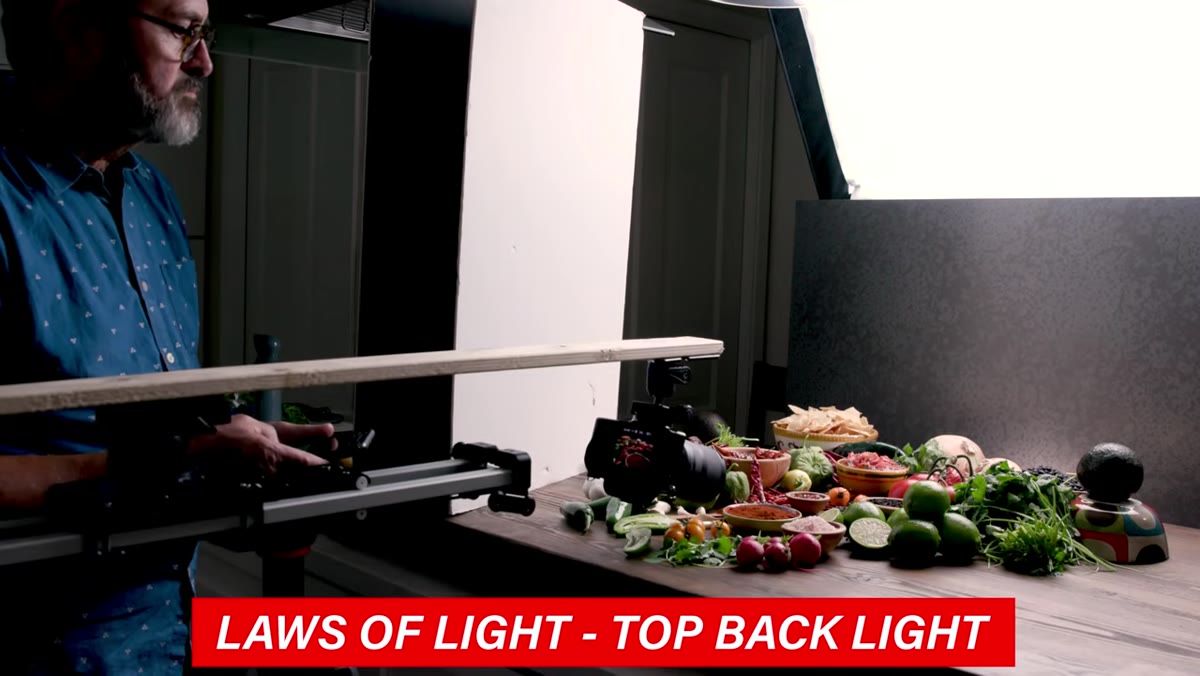
The anchor light here is a 3x4 softbox positioned behind the background, angled low so it throws light forward over the set rather than lighting the background itself. This is the counterintuitive part: the softbox is behind where your products sit, not in front. Because it’s positioned low and raking forward, it produces long shadows that travel toward camera. Those shadows do the heavy lifting. They define the edges of bowls, trace the curve of fruit, and separate elements from the surface they’re sitting on.
Large 3x4 softbox positioned low behind the background surface
The anchor light here is a 3x4 softbox positioned behind the background, angled low so it throws light forward over the set rather than lighting the background itself. This is the counterintuitive part: the softbox is behind where your products sit, not in front. Because it’s positioned low and raking forward, it produces long shadows that travel toward camera. Those shadows do the heavy lifting. They define the edges of bowls, trace the curve of fruit, and separate elements from the surface they’re sitting on.
Keep this light slightly behind your background plane so the background itself stays relatively dark. You want the light to travel over and through the scene, not pool behind it. The shadow length is directly tied to how low the light sits, so resist the instinct to raise it for more coverage. Lower means longer shadows, and longer shadows mean more visible structure in the image.
Step 3: Build a Background Using What You Have
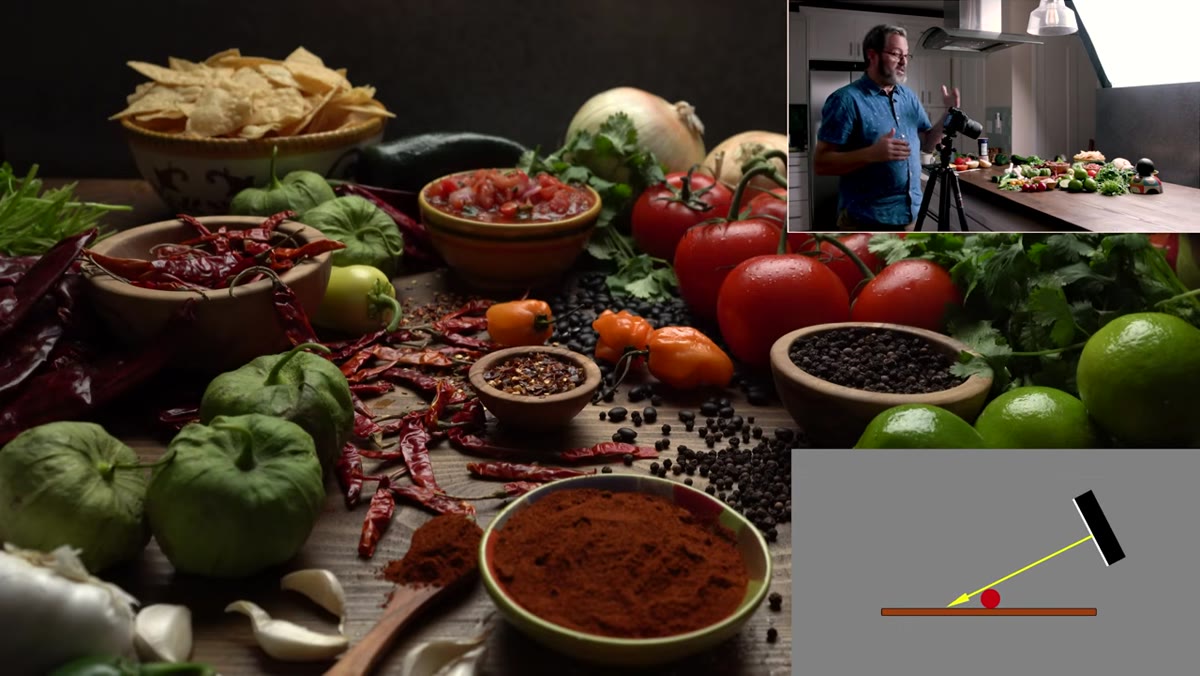 Table surface elevated on chairs and apple boxes as improvised background
Morgan’s background here is a table turned into a sweep using chairs, apple boxes, and stools. He’s not using a seamless or a dedicated background system. He’s creating a surface with dimension and texture that responds well to the raking backlight. This matters because a flat, featureless background gives you nothing to work with. A surface with some grain, color variation, or physical texture catches the light from behind and adds depth without any additional work.
Table surface elevated on chairs and apple boxes as improvised background
Morgan’s background here is a table turned into a sweep using chairs, apple boxes, and stools. He’s not using a seamless or a dedicated background system. He’s creating a surface with dimension and texture that responds well to the raking backlight. This matters because a flat, featureless background gives you nothing to work with. A surface with some grain, color variation, or physical texture catches the light from behind and adds depth without any additional work.
In my own studio I keep a few pieces of reclaimed wood and painted MDF panels for exactly this reason. Texture is free depth. If you’re shooting on a budget, a piece of plywood with a couple coats of chalk paint and some light sanding gives you a surface that responds beautifully to a backlight at almost no cost.
Step 4: Add a Hard Directional Light to Create Areas of Emphasis
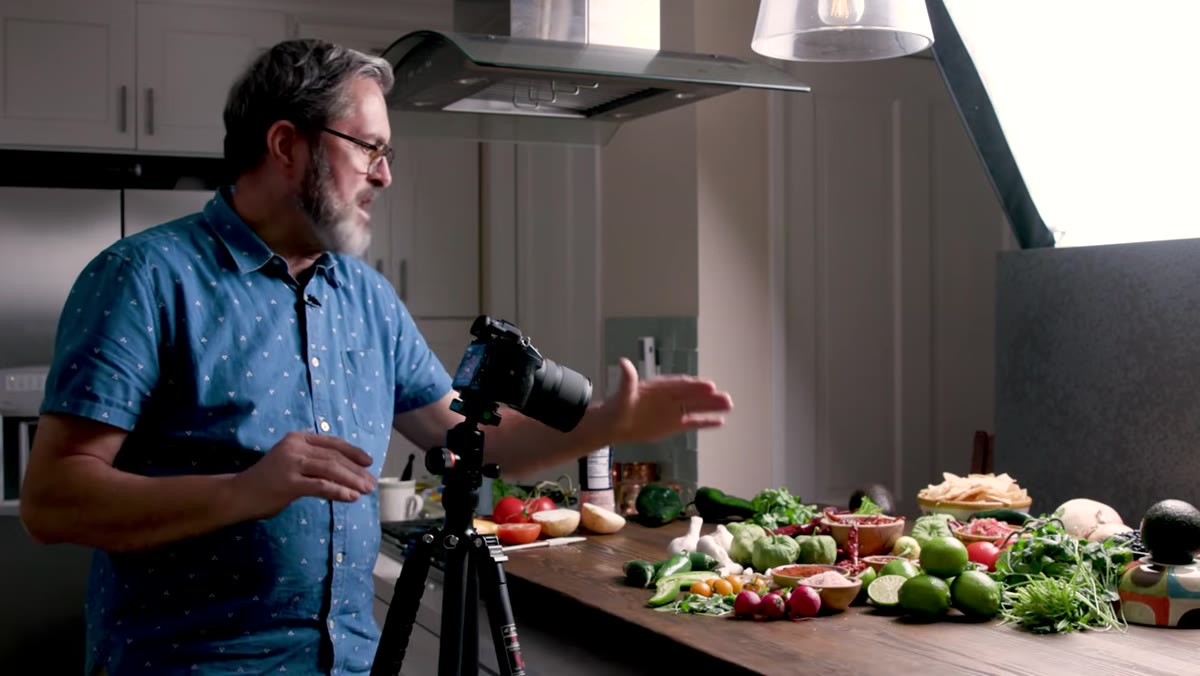 Fresnel lens light raking across salsa bowl creating specular highlights
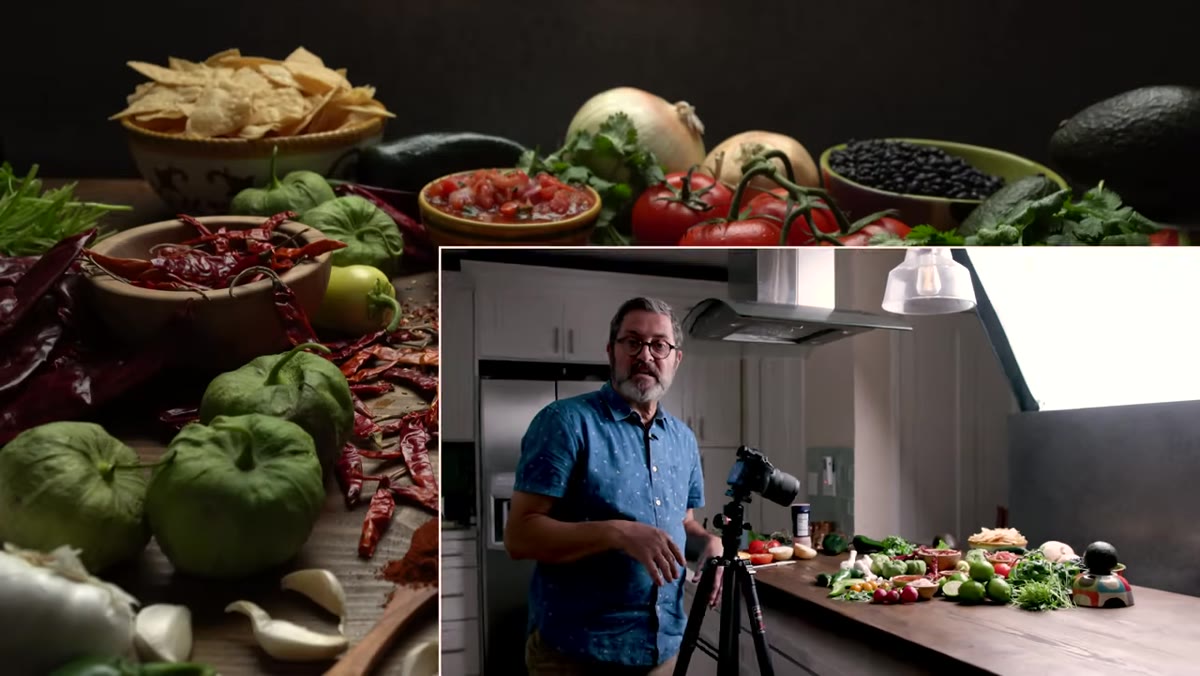
Once the soft backlight is establishing shape and shadow, Morgan adds a hard light, in this case an LED with a fresnel lens. This is the light that creates specular highlights, the bright reflections you see on a wet tomato or the gloss on a bowl of salsa. The key is placement and restraint. He’s not lighting the entire scene with this. He’s raking it across one specific hero element, the salsa in the back, because that’s where the camera move ends and where viewer attention should land.
Fresnel lens light raking across salsa bowl creating specular highlights
Once the soft backlight is establishing shape and shadow, Morgan adds a hard light, in this case an LED with a fresnel lens. This is the light that creates specular highlights, the bright reflections you see on a wet tomato or the gloss on a bowl of salsa. The key is placement and restraint. He’s not lighting the entire scene with this. He’s raking it across one specific hero element, the salsa in the back, because that’s where the camera move ends and where viewer attention should land.
Mixing soft and hard light in the same frame is a technique I use constantly in editorial food work. The soft light reads as natural and ambient. The hard light reads as intentional and cinematic. Used together, they create an image that feels both believable and elevated. Keep the hard light narrow and targeted. The moment it covers everything equally, it stops drawing the eye anywhere specific.
Step 5: Use Small Mirrors to Add Surgical Highlights
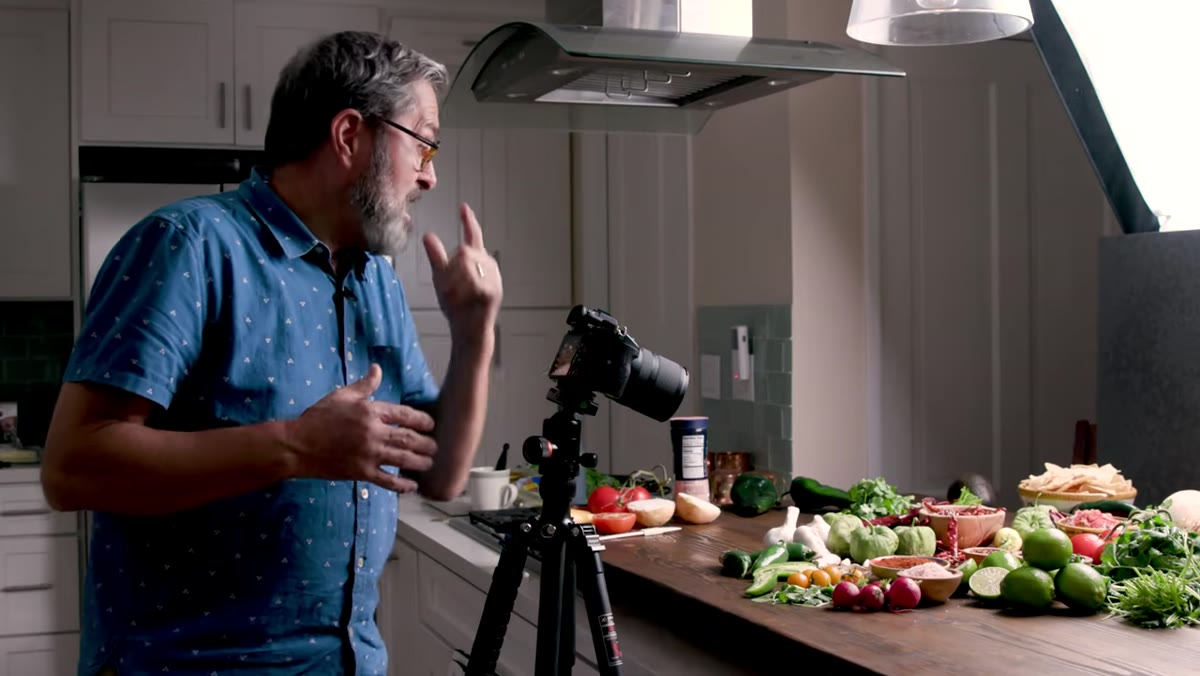 Small mirror on gooseneck arm bouncing light onto bowl surface
For precise, small highlights on specific surfaces, Morgan positions mirrors on flexible gooseneck arms to redirect light exactly where he wants it. This is cheaper and more controllable than adding another light source. A small dental mirror or craft mirror on a Platypod gooseneck gives you the ability to pop a catchlight onto the side of a bowl or the edge of a glass without introducing a whole new light direction into the scene.
Small mirror on gooseneck arm bouncing light onto bowl surface
For precise, small highlights on specific surfaces, Morgan positions mirrors on flexible gooseneck arms to redirect light exactly where he wants it. This is cheaper and more controllable than adding another light source. A small dental mirror or craft mirror on a Platypod gooseneck gives you the ability to pop a catchlight onto the side of a bowl or the edge of a glass without introducing a whole new light direction into the scene.
I label each of my mirrors with masking tape, same as every modifier in my studio, so I can log what I used in my lighting notes afterward. Sounds excessive. It’s saved me from recreating setups from scratch multiple times.
Step 6: Add a Background Light With Diffusion for Horizon Depth
 Small LED light behind diffusion material creating soft background glow
The third and final distinct light source is a small LED panel placed behind diffusion material to add a subtle glow in the background. This creates what Morgan calls “horizon,” a soft gradient that suggests depth behind the set without competing with the products in the foreground. On a reflective background surface this can get hot fast, so he pulls it back until it’s just barely visible. The threshold is: you should feel its presence more than you see it.
Small LED light behind diffusion material creating soft background glow
The third and final distinct light source is a small LED panel placed behind diffusion material to add a subtle glow in the background. This creates what Morgan calls “horizon,” a soft gradient that suggests depth behind the set without competing with the products in the foreground. On a reflective background surface this can get hot fast, so he pulls it back until it’s just barely visible. The threshold is: you should feel its presence more than you see it.
The diffusion material is doing two things. It softens the point source so there’s no hard hotspot, and it spreads the light into a wider, more even field. A piece of 1/4 grid diffusion or even a white shower curtain works fine for this purpose.
What I’d Do Differently Based on My Own Work
The setup Morgan shows is optimized for a scene with multiple hero elements and some camera movement. In my still product work for beauty and skincare clients, I usually add one more step: a small reflector card placed below and in front of the product to bounce some of the backlight back up and fill the underside of labels and lids. Packaging often has text or detail on the bottom face that goes completely black with pure back lighting. A white foam core card angled at about 45 degrees forward-facing catches just enough spill from the softbox to make that detail readable without adding a new light direction. It takes thirty seconds and solves a problem that would otherwise cost you in retouching.
Top back lighting is not a trick. It’s a foundational decision to stop putting light where it’s convenient and start putting it where it creates structure. One large soft source from behind and above, one hard accent for emphasis, and a background fill for depth. Three lights. Every product I shoot that I’m actually proud of has some version of this logic underneath it.
Watch the full tutorial on YouTube to see Jay P Morgan build this setup in real time with live camera feedback.
Comments (3)
I've watched a dozen tutorials on this and yours is the clearest by far.
Great breakdown. The step-by-step approach really helps.
Finally someone explains this in a way that actually makes sense.
Leave a Comment